Experience the difference that high-quality dried herbs and spices can make in your cooking. We’ll share our favorite ways to use our homegrown ingredients to create delicious and nourishing meals.
We take quality seriously. Every pouch is processed, packed, and handled with care — because you’re not just buying “flour”, you’re buying peace of mind for your kitchen.
But let’s be honest: mistakes can happen. A seal can get compromised in transit, a batch can have an unexpected issue, or a package can arrive in a condition we would never choose for you.
That’s exactly why we have a 7‑day return option for defective products — because you deserve the best, and we want to take responsibility if something goes wrong on our end.
The promise (in simple words)
If your sealed corn flour arrives defective (for example: factory error, damage, mould, contamination, or anything that clearly shouldn’t be there), you can request a return within 7 days.
Best practice: If it’s something you can see immediately (like a torn pouch, damp pack, wrong item, or missing item), please message us within 48 hours of delivery so we can resolve it quickly. For other quality concerns, you have up to 7 days from delivery to request a return.
What counts as a “defect” (the kind we will take responsibility for)
Here are common examples of issues we consider eligible for support, return, replacement, or refund — depending on the situation:
✅ 1) Package arrived damaged or compromised
Torn pouch
Weak/failed seal
Pouch punctured during delivery handling
Flour exposed to air/moisture before you even opened it
✅ 2) Spoilage signs in a sealed pack
Visible mould
Strong off smell that suggests spoilage
Dampness or clumping that looks like moisture exposure (especially when the pouch seal was compromised)
✅ 3) Contamination or “mixed with other things”
Foreign particles that clearly shouldn’t be present
Product appears mixed with another item
✅ 4) Wrong item / wrong quantity / missing item
If you received the wrong product, wrong quantity, or something is missing, please report within 48 hours of delivery with photos and your order number.
What is NOT returnable (to keep things fair and safe)
We love helping, but we also have to protect food safety and be fair to everyone. These are examples of cases that may not qualify:
❌ 1) Customer-caused issues
Damage caused by storage after delivery (e.g., leaving the pack open, exposing it to moisture, scooping with wet spoons)
Contamination caused after opening
❌ 2) Opened/broken seal for “change of mind”
For health & safety reasons, opened food items typically can’t be returned unless it’s clearly a defect/damage issue tied to the product condition.
❌ 3) Delayed complaints far beyond the reporting window
If the issue is reported too late (especially after significant storage time), it becomes difficult to confirm what happened and resolve responsibly.
A 2‑minute quality check when your corn flour arrives
This small habit can save you stress later — especially during busy weeks.
Step 1: Check the outer delivery package
Look for signs of soaking, crushing, or tearing.
Step 2: Check the pouch seal and label
Before opening:
Is the pouch seal intact?
Is the pack dry?
Does anything look punctured or tampered with?
Step 3: Open, then inspect quickly (if all looks fine)
You’re checking for:
Unusual smell
Visible mould
Anything foreign
Unexpected damp clumps
If anything feels off, stop there and message us — don’t “manage it” or keep cooking with it.
How to request a return (simple, clear, and human)
To start, send us:
1) Your order number 2) Product name (Corn Flour) 3) What’s wrong (short description) 4) Clear photos/video
If your return is approved, we’ll share the next steps. For defective returns, we may arrange collection/return logistics, and we’ll guide you on how to send it back in the original packaging with labels intact.
Refund timeline (what to expect)
After we receive the item, we inspect it (usually within a few business days). If approved:
Refunds are typically processed within 3–7 business days after inspection, returned to your original payment method.
Depending on payment method and processing timelines, please allow up to 14 business days in some cases.
We know waiting for money back is not fun — so we do our best to move fast and communicate clearly.
If you’re ordering corn flour today, here’s the direct link
Browse all flours: https://greenunison.com/shop/flours/
Prefer shopping by message?
WhatsApp Catalogue: https://wa.me/c/2348103043789
WhatsApp: 0810 304 3789
Helpful reads (so you get the best experience with your flour)
If you cook with corn flour often, these will help you enjoy smoother results and better storage:
How to Prepare Corn Flour for Swallow (Tuwo Masara): https://blog.greenunison.com/how-to-prepare-corn-flour-for-swallow-tuwo-masara/
Your Flour & Pap Powder Care Guide (weevils, moisture, odours): https://blog.greenunison.com/flour-pap-storage-guide-to-beat-weevils-moisture-odours/
Bake Bakery‑Style at Home with Wholegrain Corn Flour (White & Yellow): https://blog.greenunison.com/bake-bakery-style-with-wholegrain-corn-flour-white-yellow/
Micro‑Batches: The Science of Aging Flour (taste & storage over time): https://blog.greenunison.com/micro-batches-science-aging-flour/
Final note: quality is our standard — responsibility is our promise
We’re proud of what we make, and we work hard to keep quality consistent. Still, if something slips through, we won’t pretend it’s “normal”.
A 7‑day defective product return is our way of adding accountability to quality — because you deserve the best.
If anything looks wrong with your corn flour order, message us and we’ll help you sort it out properly.
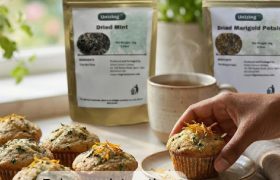
There’s a kind of comfort you can smell. The oven hums, the kitchen warms up, and the whole house starts whispering, “Something good is coming.” Now imagine that scent with a gentle minty lift and a soft, golden floral note, all wrapped up in a simple bake made with plantain flour and corn flour.
This post gives you three things in one:
A recipe guide (easy muffins you can make on a relaxed day)
A practical, educational breakdown (how these flours behave, and how to get the best texture)
A cosy inspiration story (because food is flavour + feeling)
A Sunday Kitchen Story: “The Bake That Smells Like a Garden”
Some days call for loud flavours. Other days ask for something quieter, softer, and a bit more “grown-up.” This is that bake.
You know the mood: you want something warm to nibble with tea, not too sugary, not too heavy, and definitely not stressful. You want a recipe that feels like a soft blanket, not a maths exam.
That’s where dried mint and dried marigold petals come in. Mint brings a clean, refreshing aroma. Marigold adds a gentle golden colour and a light floral vibe. Together, they make your kitchen smell like “calm, but make it tasty.”
Quick Ingredient Map (What Each One Does)
1) Plantain flour
Plantain flour gives body and a naturally earthy flavour that works beautifully in bakes. Because it’s gluten-free, it behaves differently from wheat flour, so we use simple structure helpers (like eggs or yoghurt) to keep things tender.
2) Corn flour
Corn flour adds a smooth, familiar comfort and helps lighten the texture when paired with plantain flour. It also plays nicely with warm spices and citrus, if you choose to add them.
3) Dried mint
Mint is powerful. A little goes a long way. The trick is to crush it gently (to wake up the aroma) and avoid “over-steeping” it in hot liquid for too long, which can make it taste sharp.
4) Dried marigold petals
Think of marigold as your “sunshine ingredient.” It’s mostly for colour and a soft floral hint. Use a small amount, like you would with zest: enough to be special, not enough to take over.
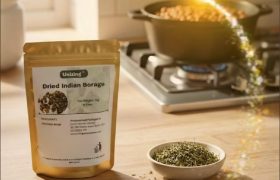
Maybe there is a pouch of dried Indian borage, a jar of dried sweet basil and some dried lavender sitting quietly in your cupboard. You add thyme and curry powder to almost every pot, but these herbs feel “new” and a little intimidating.
From messages and search data, we keep seeing the same questions:
“Are dried herbs as good as fresh?”
“How much should I use so it does not taste bitter?”
“Can I even use herbs like Indian borage or lavender in our everyday dishes?”
This guide brings those real questions together and answers them in one place, with a special focus on Indian borage, basil and lavender – all available as gently dried, kitchen-ready herbs in the Green Unison eShop.
Important: this article is for everyday cooking, comfort and flavour only. It is not medical advice and it does not replace speaking to a qualified health professional about any symptoms, diagnosis or treatment.
Q1. I see Indian borage, basil and lavender on your shop. Where do I even start?
Let’s meet each herb in simple kitchen language.
Indian Borage (Mexican Mint / Cuban Oregano)
Flavour: bold, mint-meets-thyme with a hint of oregano. Best for: rich, savoury dishes that need a lift – beans, stews, pepper soup, sauces and marinades. Think of it as: a flavour “reset button” when your pot tastes flat or too heavy.
Flavour: warm, slightly sweet and soft, with that classic tomato-friendly basil aroma. Best for: anything tomato-based – stew, jollof-style rice, oven-baked chicken in tomato sauce, egg sauce, noodles with home-made pepper mix. Think of it as: your go-to partner for tomato, onions and pepper.
Flavour: floral and slightly sweet; strong in tiny amounts. Best for: gentle “aroma accents” – simple bakes, honey, sugar, syrups for drinks, or as a tiny twist in zobo, pap toppings or dessert sauces. Think of it as: vanilla’s floral cousin – use sparingly.
All three sit inside the Dried Herbs eShop, so you can easily add them to a single order.
Q2. Do dried herbs really work in our kind of cooking, or are they just for “foreign” recipes?
Short answer: yes, they work beautifully in everyday home cooking.
Dried herbs are simply fresh herbs that have had their water gently removed. That drying step concentrates flavour, which is why cooks usually need less dried herb than fresh. For long-cooked dishes like stews, soups and slow sauces, dried herbs often perform better than fresh because they have time to rehydrate and release flavour into the pot.
In practice, that means:
Your long-simmered tomato stew loves dried basil.
Your pot of beans or pepper soup can handle a bold herb like Indian borage.
Your simple sugar syrup or honey can happily hold a pinch of dried lavender.
You do not need to change your whole menu. You are simply layering more depth, aroma and character into dishes you already cook.
Q3. How much dried herb should I use compared to fresh?
A common rule in cookbooks is:
Use about 1 part dried herb for 3 parts fresh.
In everyday kitchen language:
1 teaspoon dried ≈ 1 tablespoon chopped fresh.
Some herbs (like Indian borage and lavender) are naturally stronger, so you may need less. For a family pot (4–6 servings), here is a gentle starting guide:
Indian borage: about ½ teaspoon dried leaves stirred into beans, stew or pepper soup in the last 5–10 minutes of cooking.
Sweet basil: about 1 teaspoon dried leaves for a tomato stew or jollof-style rice; start with ½ teaspoon and adjust next time if you want more.
Lavender: a pinch (⅛ teaspoon or less) in a small batch of syrup, biscuit dough or dessert topping. Too much quickly becomes perfumey.
Always start small; you can add more in your next pot when you know your preference.
Q4. When should I add dried herbs to soup, stew or sauce?
Timing makes a big difference.
For long-cooked dishes (stews, beans, pepper soup)
Base layer: add part of your dried herb earlier in cooking so it can rehydrate and blend with the sauce.
Finishing layer: add a small extra pinch near the end for fresh aroma just before serving.
Example for a tomato stew:
After frying your pepper–tomato mix, add about ½ teaspoon dried basil and simmer.
In the last 3–5 minutes, crush another small pinch of basil between your fingers straight into the pot for a bright aroma.
For very strong herbs (Indian borage, lavender)
Indian borage: add towards the middle or end of cooking (last 5–10 minutes), especially if the pot will still simmer. It is powerful, so you do not need a long cook time for the flavour to appear.
Lavender: use mainly in short-cooked recipes – infusing honey or syrup, or flavouring batter for biscuits and simple cakes – and always measure tiny amounts.
Q5. Which everyday dishes can I use Indian borage, basil and lavender in?
Here are practical, tonight-friendly ideas.
Dried Indian Borage in savoury dishes
Indian borage’s mint-thyme profile makes it shine in hearty, savoury pots.
Beans and stews: add about ½ teaspoon dried Indian borage to a pot of beans or mixed stew in the last 10 minutes. Taste and adjust salt and acid (for example, a squeeze of lemon or lime).
Pepper soup: add a small pinch along with your usual pepper soup spice mix; it gives an aromatic, slightly cooling background note.
Marinades for fish or meat: combine crushed dried Indian borage with garlic, oil, salt and a little lemon for oven-baked fish or grilled chicken.
“Flat” pots that need rescue: if your sauce tastes dull, crush a small pinch between your fingers and stir in near the end of cooking. It can act like a mini flavour reset.
Basil and tomatoes are a classic pair across many cuisines, and the same rule works beautifully in West-African-style tomato dishes too.
Tomato stew for rice or yam: add about 1 teaspoon dried basil once your pepper–tomato mix has fried and the oil “comes up”. Simmer, taste, and finish with a small extra pinch if you want more aroma.
Jollof-style rice: stir ½–1 teaspoon dried basil into the base sauce before adding rice. It adds depth without changing the identity of the dish.
Egg sauce: sprinkle a pinch into your onion–pepper–tomato mix just before you pour in beaten eggs.
Noodles with homemade sauce: toss cooked noodles in a quick tomato-onion–pepper sauce with a pinch of dried basil and a squeeze of citrus instead of seasoning cubes alone.
Lavender is powerful. In cooking, it is usually treated like a gentle background note rather than the main flavour.
Lavender sugar or honey: stir a tiny pinch into a small jar of sugar or honey and leave for a few days to infuse. Use in tea, on toast or over yoghurt and fruit.
Simple biscuits or tea loaves: add a tiny pinch to vanilla biscuit dough or a basic tea loaf mixture. Lavender loves sugar, vanilla and citrus.
Drink syrups: infuse a pinch into a small pot of sugar syrup, then strain and use the syrup to sweeten zobo, drizzle over fresh fruit, or stir into chilled water with lemon for a floral cooler.
For extra kitchen inspiration with other herbs and teas, you can also explore herb-focused articles by searching for “peppermint”, “lemongrass” or “Indian borage” on our blog: peppermint, lemongrass, Indian borage.
Q6. How do I stop dried herbs from tasting medicinal or bitter?
If dried herbs have ever “slapped” you in a dish, it is usually because of one of three things:
Too much at once – herbs like Indian borage and lavender are naturally potent.
Added at the wrong time – some herbs taste better added early (to cook in), others near the end.
No balance with salt, acid or fat – herbs need company.
To keep flavours round and friendly:
Start with tiny amounts, especially for Indian borage and lavender. You can always add more next time.
Crush dried leaves between your fingers just before adding. This wakes up their aroma and helps them blend into the dish.
Balance with a pinch of salt and a dash of acid (tomato, lemon or lime) if the dish tastes “sharp herbal” rather than delicious.
Pair herbs with friendly bases: tomatoes, onions, garlic, citrus and mild chilli help herbs shine instead of shout.
Q7. How should I store dried herbs, and how long do they last?
Proper storage is one of the most common questions we see – and it makes a real difference to flavour.
For dried herbs like Indian borage, basil and lavender:
Keep them in airtight jars or resealable pouches.
Store in a cool, dry cupboard, away from direct sunlight, cooker heat and steam.
Always use a clean, dry spoon to scoop from the jar.
As a general guide, most dried herbs keep their best flavour for 6–12 months when stored well.
If you open a jar and the aroma is weak or dusty instead of fresh and herbal, it may be time to refresh your stock.
You will find storage and shelf-life guidance printed on each Green Unison dried herb pack, and the resealable packaging is designed to make these steps easy.
Q8. Can I use the same dried herbs for tea as well as cooking?
Yes – as long as you are using culinary dried herbs from the food-grade herb range (not essential oils or cosmetic-only products).
Examples:
Dried Indian borage can go into stews and also be brewed as a gentle herbal drink in small, food-like portions.
Dried sweet basil can flavour tomato stew and also be steeped briefly as a simple herbal infusion.
Dried lavender is commonly used in both tea and baking; the key is keeping the quantity low.
If you would like detailed tea brewing steps for mint family herbs and relaxing evening cups, you can search for “mint tea” or “calming tea” on our blog: mint tea articles.
In this particular guide, we are focusing mainly on cooking, so we recommend:
Treat tea from dried herbs like a light, food-like drink.
Keep daily amounts moderate, especially with stronger herbs.
Always talk to a health professional if you plan to drink any herb regularly for specific health reasons.
Q9. Is there anyone who should be more careful with herbs?
Even though we are talking about food-like use, it is still good to stay on the safe side:
If you are pregnant, breastfeeding, managing a health condition or taking regular medication, check with a qualified health professional before using herbs like Indian borage or lavender regularly as tea or strong infusions.
Avoid giving concentrated herbal teas to babies and very young children unless a paediatric professional has advised it.
If you ever notice unusual reactions after using any herb, stop and seek proper medical advice.
Used in normal culinary amounts in food, these herbs are typically enjoyed as part of everyday meals in many cultures. The key is moderation, variety and listening to your body.
Dried Herb Quick-Start Cheat Sheet (Family Pot)
Save or print this as a one-page guide for your kitchen. You can also turn it into a downloadable PDF or image in your media library.
Not sure which herb fits your favourite dishes? Tap to chat and tell us what you cook most often – we will help you pick a simple starting combo. Chat on WhatsApp or send a direct message to +234 810 304 3789.
Little herbs, big flavour – one pinch at a time. 🌿
There’s a special kind of peace that comes from wrapping your hands around a warm mug of herbal tea—especially after Lagos traffic, a busy work day, or during dry, dusty harmattan evenings.
The beautiful thing? You don’t need a fancy tea brand to enjoy that comfort. With a few spoonfuls of dried herbs you already have at home, you can create your own gentle, caffeine-free blends that support your body and calm your mind.
Dry air, dusty breeze, scratchy throat and that “I might be coming down with something” feeling—harmattan can be a lot. This blend leans on herbs traditionally used for respiratory comfort and warmth.
We’ll use:
Dried Indian Borage – a bold, mint-thyme herb often used in homes for steam inhalation, teas and soups to support easy breathing.
Dried Peppermint Leaves – strong, menthol-cool leaves that open up the chest and feel refreshing in the throat.
Strain, then inhale the steam gently before your first sip.
Best time to drink
In the evening after a dusty commute
On cool mornings when your chest feels tight or dry
⚠️ Gentle reminder: This is a comfort tea, not a cure. If you have difficulty breathing, chest pain, fever or persistent symptoms, please speak to a doctor or qualified health professional quickly.
Some days feel heavier than others—bloating, moodiness, cramps, low energy. While herbal tea can’t fix everything, a gentle blend can be a kind companion on “PMS days”.
Here we lean more on spearmint, which many women around the world enjoy as part of their hormone-friendly routines, along with lemongrass and marigold for warmth and comfort.
Cover and steep for 7–10 minutes to build flavour.
Strain and sip slowly. You can add a teaspoon of honey if you enjoy sweetness.
Best time to drink
Late afternoon or evening, especially on days you feel crampy or easily irritated.
⚠️ If you’re pregnant, trying to conceive, on medication or managing a diagnosed hormone condition, please check with a health professional before using herbs regularly as part of your routine.
For those days when your brain feels foggy but you don’t want to rely on coffee, a bright herbal blend can help you feel more awake and refreshed—without caffeine.
This blend features:
Dried Menthol Mint – stronger than regular mint, with a cool, sharp lift that wakes the senses.
Dried Sweet Basil – familiar kitchen herb with a cozy, savoury aroma that grounds the blend.
Dried Lemongrass Leaves – bright and citrusy, tying everything together and making the tea feel “clean”.
What this blend is good for
Mid-morning or mid-afternoon slumps
Long work or study sessions
Replacing a second cup of coffee with something gentler
Usually ¼–½ teaspoon is enough for your top note in a 250 ml mug.
General Safety Reminders
Herbs are powerful, even when they feel gentle. Keep these in mind:
Start with small amounts and notice how your body responds.
If you’re pregnant, breastfeeding, on regular medication or managing a health condition, talk to a qualified health professional before drinking herbal blends daily.
Stop using any herb that makes you feel uncomfortable or triggers unusual symptoms.
Herbal tea is a supportive habit, not a replacement for medical care, medication or professional advice.
Ready to Brew Your Next Mug?
You don’t have to wait for a special occasion to enjoy herbal tea. Whether it’s:
A quiet evening cup of lavender, spearmint and lemongrass,
A harmattan comfort blend with Indian borage and peppermint, or
A clear-headed focus blend while you work,
you can create something beautiful from simple, dried leaves on your shelf.
If you’ve been thinking, “I want to eat a bit cleaner, but I still want my swallow,” you’re not alone.
Clean eating doesn’t have to mean salad every day or complicated rules. Sometimes, it’s as simple as choosing a swallow that comes from one familiar ingredient you can pronounce, cooked the same way you already love.
That’s where plantain flour swallow comes in a simple, comforting plantain flour swallow upgrade that still feels like home.
What Does “Clean” Mean Here?
When we say “clean” in this context, we’re talking about:
Short ingredient lists
Familiar, minimally processed foods
Products you can explain in one sentence
For swallow, that looks like:
A flour that is made from one main ingredient
No artificial colourants
No flavour enhancers
No unnecessary additives
Plantain flour fits that picture beautifully when it’s made from carefully dried, milled unripe plantain.
What Exactly Is Plantain Flour Swallow?
Plantain flour swallow is made by cooking plantain flour with hot water until it becomes smooth, stretchy and moldable very similar to other swallows you already know, just with a different base.
Good plantain flour is usually:
Made from peeled, dried, finely milled unripe plantains
Naturally free from artificial colourants
Neutral to slightly earthy in taste
Easy to pair with vegetable, fish, meat or mixed soups
If you want a version that is already finely milled and ready for smooth swallow, you can look at:
It’s designed for instant plantain amala-style swallow, with no sieving needed.
Why People Call It a “Clean Eating Upgrade”
1. Simple, clear ingredients
When your swallow is made from just plantain flour and water, you know exactly what is on the plate. It fits nicely into a clean eating mindset where you can recognise and trust the ingredients.
2. Familiar comfort, adjusted in a gentle way
You still sit down with a warm plate of swallow and soup. You still tear, dip and enjoy. The routine is the same the main change is the flour you used.
3. Easy to fit into normal life
You don’t have to change your entire cooking style. Most of your soups stay the same. You’re just swapping the base you mould on the side.
For many people, that’s a realistic way to “upgrade” without turning their whole kitchen upside down.
How to Switch Your Swallow to Plantain Flour (Step by Step)
If you’ve only ever eaten other types of swallow, trying something new can feel risky. Here’s a gentle way to start.
Step 1: Start with a small quantity
For the first trial:
Cook plantain flour for just one person, or
Make a mix of half plantain flour, half your usual swallow flour
This way, the taste and texture are not a shock, and you can adjust gradually.
Step 2: Learn the water–flour balance
Plantain flour can behave slightly differently from other flours, so take note of:
How much water you boil
How much flour you sprinkle in
How long you stir on the heat
A simple starting mini-guide (you can adjust to your preference):
Bring water to a gentle boil.
Reduce the heat slightly.
Sprinkle in plantain flour gradually, stirring firmly with a wooden spoon.
Keep mixing until it thickens and pulls away from the sides of the pot.
If it’s too soft, sprinkle a little more flour. If it’s too thick, add a splash of hot water and mix in well.
With just a few of these on your shelf, you can pull off:
Weeknight swallow and soup
Light weekend brunches
Pancakes or bakes using plantain flour as part of your flour mix
Quick thickening for certain dishes
Gentle, Real-Life Clean Eating
Clean eating doesn’t have to be dramatic. Sometimes, it’s just:
Reading the label
Choosing the simpler option
Stocking your pantry with things you actually cook with
Switching from one type of swallow to plantain flour swallow is one of those quiet upgrades: your plate still looks familiar, but your ingredient list gets calmer and shorter.
If you’ve been curious about plantain swallow, this might be your sign to try a small pot, taste it with your favourite soup, and see how your own body and schedule respond.
Ready to Try the Plantain Flour Swallow Upgrade?
When you’re ready to give it a proper test in your own kitchen, you can order directly:
There are days when your body is quietly asking for small rituals a cooling scalp massage after taking your wig off, a soft body oil after shower, or a simple drizzle of flavour over food that is already in the pot.
Herbal infused oils are one of the easiest ways to add those rituals into real life. But once you see different bottles on the shelf peppermint, marigold, basil, Indian borage the big question appears:
Which one should I actually be using?
In this guide, we will gently compare peppermint-family infused oils with marigold infused oil, show where culinary infused oils come in for cooking, and help you choose the right bottle for your own skin, hair and kitchen routines.
First Things First: Not Every Oil Is for the Same Job
Before we compare peppermint and marigold, it helps to clear up three quick points:
Infused oils are different from essential oils. Essential oils are highly concentrated and must be diluted before use. Infused oils are herbs slowly steeped in a carrier oil, so they are already in a gentler form that feels more like a normal body oil.
So while your content calendar says “Peppermint Oil, Marigold Oil”, in real life we are talking about peppermint-family infused oils for external use and marigold infused oil for external use, plus a few separate culinary oils for the kitchen.
Peppermint-Family Infused Oils: Fresh, Cooling, Wake-Up Energy
If you like that “mini AC on your skin” feeling, peppermint and the wider mint family will feel familiar very quickly.
Green Unison offers a small mint line so you can choose the intensity that suits you:
All of these are cosmetic oils for skin, hair and massage. They are not edible.
What does peppermint infused oil feel like?
When you apply a mint-infused oil, one of the main plant compounds, menthol, interacts with “cold” receptors on your skin. Your brain reads that as a cooling sensation, even though the actual temperature has not really dropped. The result is a fresh, wake-up feel rather than heat.
Because the mint leaves have been gently steeped into a base oil, you get:
A light to medium texture that spreads easily.
A refreshing herbal aroma instead of a flat oil smell.
A cooling sensation that can feel especially nice on the scalp, neck, shoulders, feet and tired legs.
Simple ways to use peppermint-family infused oils
You can build tiny, realistic rituals into your day with just a few drops:
Scalp massage oil: Apply a small amount of Peppermint Infused Oil or Menthol Mint Infused Oil to your fingertips and massage gently into the scalp, avoiding the eye area. Patch test first.
Post-workout or “I’m tired” legs and feet: Massage a little Mint Infused Oil into clean legs and feet for that cool, refreshed feel.
Everyday “fresh” body oil: If you want a softer mint, Spearmint Infused Oil gives a gentler cooling effect and sweet mint aroma.
Safety note: These are cosmetic oils for external use only. Always patch test on a small area first and avoid the eye area or broken skin. If irritation occurs, stop using immediately.
Where peppermint feels like “wake up”, marigold feels like “exhale”.
Marigold Infused Oil – Soft & Comforting is made by slowly infusing dried marigold petals into a gentle carrier oil. The result is a cosmetic oil with a light floral scent and a smooth, nourishing glide.
What does marigold infused oil feel like?
Instead of a strong cooling sensation, marigold oil is about softness and comfort:
Texture is usually smooth and easy to spread across damp or dry skin.
The floral aroma is light, not overpowering.
The overall feel is “quiet” and cosy – perfect for slow evenings.
Simple ways to use marigold infused oil
After-shower body oil: Apply a small amount of Marigold Infused Oil on damp skin after your bath or shower for a smooth, comfortable glide.
Hand and foot oil: Massage into hands and feet before bed as a soft, soothing step between your day and your sleep.
Layering under or over lotion: Use a few drops under a simple lotion, or add a little oil on top to increase slip and comfort.
Safety note: Again, this is a cosmetic oil for external use only and not for eating. Patch test first and discontinue use if irritation occurs.
Peppermint vs Marigold: Which Infused Oil Matches Your Mood?
Here is a quick side-by-side view to help you decide between peppermint-family infused oils and marigold infused oil:
Feature
Peppermint / Mint Infused Oils
Marigold Infused Oil
Overall mood
Fresh, cooling, “wake me up”
Soft, comforting, “help me unwind”
Typical feel on skin
Cooling sensation on skin and scalp
Smooth glide with gentle floral feel
Best everyday uses
Scalp massage, tired legs/feet, “fresh” body oil
After-shower body oil, hand and foot massage, slow evening care
Aroma
Herbal mint; can be strong or mild depending on the bottle
Light, soft floral
Use on food?
No. For external cosmetic use only.
No. For external cosmetic use only.
Good starting point if you love…
That cool, minty feel on your scalp and body
Gentle, quiet body oils without strong scents
Where Does Cooking Come In? The Role of Culinary Infused Oils
The “kitchen” part of your oil routine belongs mainly to culinary infused oils like basil and Indian borage, not cosmetic peppermint or marigold oils.
These oils are clearly labelled for food use. You can:
Drizzle them over finished dishes as a last-minute flavour boost.
Stir them into marinades, dressings and dips.
Add a little over roasted yam, potatoes or vegetables just before serving.
Important: Cosmetic infused oils (peppermint, marigold, lavender, spearmint, menthol mint and similar bottles) are not edible. Always follow the label and use culinary oils for food, cosmetic oils for skin and hair.
Which Infused Oil Should You Start With?
If you are just building your infused oil collection, here are some simple starting points:
If you want a bigger overview of what herbal infused oils can do in general, you can also read our earlier guide on the blog about how herbal infused oils “hit different” and support everyday routines.
How to Use Infused Oils Safely in Your Routine
To keep things safe and comfortable, build these habits into your routine:
Check the label: Confirm if the oil is for cosmetic use or food use before you do anything else.
Patch test first: Apply a small amount of cosmetic oil to a small area and wait 24 hours to see how your skin responds.
Avoid sensitive areas: Do not apply peppermint-family oils near the eyes or on broken skin. Wash hands after use.
Use a little at a time: Infused oils are designed to spread well. Start with a few drops and add more only if needed.
Store properly: Keep bottles tightly closed in a cool, dry place away from direct sunlight.
Where to Buy Peppermint, Marigold and Culinary Infused Oils
You can order infused oils directly from the Green Unison shop:
Dried marigold petals are one of those pantry jars that look too pretty to ignore but easy to underuse. At first glance they seem like “just” decoration, yet they can quietly upgrade your drinks, self-care rituals and even your gift ideas.
In this guide, we’ll walk through five practical ways to use dried marigold petals at home – from tea and bath blends to simple DIY oil and crafts – without complicated recipes or medical promises.
Meet Dried Marigold Petals
Marigold petals (often from Calendula officinalis, sometimes called pot marigold) have long been used in herbal traditions as an edible flower, natural colour and gentle ingredient in teas, oils and bath blends. Many sources note that dried petals can be used in tea, as a seasoning or saffron-style colouring, and sprinkled over food for colour.
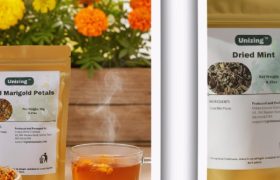
At Green Unison, our Dried Marigold Petals are harvested and low-heat dried to preserve their bright colour and delicate aroma, ready for tea, simple DIYs and home rituals.
Below are five easy ways to enjoy them without needing a full herbalist set-up.
1. Comforting Caffeine-Free Herbal Tea
One of the simplest ways to use dried marigold petals is as a gentle herbal tea. Many herbal guides mention calendula petals as a classic tea ingredient and natural colouring for warm drinks.
You do not need a fancy spa set-up to enjoy a soft, floral soak at home. Many DIY bath recipes use calendula petals in bath salts or “bath tea” for their colour and gentle, skin-friendly reputation.
To make a simple marigold soak:
Fill a small muslin bag or tea bag with a spoon or two of dried petals.
Hang it under the tap while your bath runs, or drop into a bucket for a foot soak.
Optionally add plain Epsom salts for extra comfort.
The petals lightly tint the water and bring a soft floral mood to your evening routine, whether you are soaking your feet after a long commute or taking a slow Sunday bath.
3. DIY Marigold Infused Oil (or Use a Ready-Made One)
Another classic use for dried marigold petals is in simple infused oil. Herbal references often show calendula steeped in a carrier oil to create a golden oil that can be used in body products and massage blends.
Cover fully with a neutral oil (such as sunflower, grapeseed or another carrier oil you already like on your skin).
Stir to release trapped air, then seal the jar.
Leave in a cool, shaded spot for 3–4 weeks, shaking the jar gently every few days.
Strain through a fine cloth into a clean bottle and label clearly for external use only.
You can use a small amount of this oil as a body oil, lightweight massage oil or as an ingredient in DIY balms and butters if you enjoy making your own products.
No-DIY option: ready-made marigold infused oil
If you prefer something ready to go, Green Unison also offers Marigold Infused Oil – Soft & Comforting, a nature-powered cosmetic oil gently infused with dried marigold petals for everyday body and self-care routines.
Use it on its own or layer it after your usual moisturiser for extra slip during massage.
4. Edible Colour and Garnish in the Kitchen
Many sources list calendula petals as an edible flower that can be added to salads, soups, bakes and teas as a natural seasoning and saffron-style colour.
Here are some simple ways to use them in food:
Salad sprinkle: Add a pinch of petals over grain bowls or salads for a soft, peppery floral note.
Rice or grain colour: Stir a small amount into warm rice, couscous or millet for a gentle golden hue.
Bake and dessert garnish: Sprinkle over frosted cakes, loaf slices, pancakes or yoghurt bowls just before serving.
Drink rim decoration: Mix petals with a little sugar or salt and press onto the rim of mocktail glasses.
Always make sure you are using culinary-grade dried marigold petals, like Green Unison’s Dried Marigold Petals, and keep portions light so the colour and flavour remain gentle.
5. Craft, Decor and Gift Ideas
Dried marigold petals also shine in home décor and DIY gift projects. Because they hold their colour well, they are popular in craft uses like soaps, candles and potpourri mixes.
Try these easy ideas:
Jar gifts: Layer dried marigold petals with Epsom salts in a glass jar, add a label with simple bath instructions and gift as a “soft evening soak” mix.
Table sprinkle: Use a small amount of petals around candles or table settings for cosy dinners at home.
Drawer sachets: Mix petals with other dried herbs and a few drops of your favourite essential oil (on the herbs, not on clothes) in little fabric sachets.
Soap and candle decoration: If you make your own soap or candles, sprinkle a few petals on top as decoration, following your usual craft safety steps.
For many homes, dried plantain and plantain flour live in the cupboard for one main job: swallow.
However, dried plantains can do far more than that.
In this guide, you will see seven smart, everyday ways to use dried plantains and plantain flour – from light snacks to breakfasts and quick comfort meals. You do not need to be a chef; you just need simple steps and a little curiosity.
Along the way, you will see ideas that pair beautifully with:
Dried plantain vs plantain flour: quick kitchen reminder
Before we jump into recipes, it helps to remember the difference in everyday cooking:
Dried plantain slices Usually come as thin or chunky pieces. Great for chips, stews, and porridge-style dishes. You see the pieces as you cook and eat.
Plantain flour Made by milling dried unripe plantain into a fine powder. Perfect for swallow (amala ogede), thickening stews, porridges and simple home baking. Easy to blend with other flours.
Because plantains are naturally starchy and contain some fibre and resistant starch, they tend to feel more filling than very sugary snacks, especially when you prepare them with simple ingredients and minimal frying.
Now, let’s turn that packet of dried plantain into everyday meals.
1. Crispy baked or air-fried dried plantain chips
Many people only think of fresh plantain when they picture chips. Even so, dried plantain slices make excellent chips with very little oil.
How to make lighter dried plantain chips
Preheat your oven or air fryer.
Lightly coat dried plantain slices with:
1–2 teaspoons of neutral oil, or brush oil lightly.
A pinch of salt.
Optional: mild chilli, smoked paprika, garlic powder or a spice mix you already enjoy.
Spread in a single layer on a tray or in the air-fryer basket.
Bake or air fry until crisp and golden, turning once.
Because the plantain is already dried, it crisps up faster than fresh slices. As a result, you can often use less oil than a deep-fried batch.
Tip: Store cooled chips in an airtight jar. This turns dried plantains into a grab-and-go snack for work bags, school bags or travel.
2. Breakfast porridge with plantain flour and pap powder
On cool mornings, a warm bowl of porridge is comforting. Instead of only using pap or oats, you can build a simple plantain-based breakfast bowl.
You may already love amala ogede on its own. Even so, some days you might want to change the texture or flavour slightly without leaving plantain behind.
Add cool water and whisk into a smooth, thin paste (no lumps).
Reduce your stew or sauce to a gentle simmer.
Gradually pour in the paste while stirring.
Cook for a few more minutes to let it thicken and lose any raw taste.
Because plantain flour has a mild flavour, it usually does not overpower your main spices. Instead, it quietly supports gravies, pepper sauces, and even some vegetable soups.
5. Plantain flour pancakes and waffles
If you have ever wanted to upgrade weekend breakfast, this is a fun place to start. Plantain flour can join your usual batter to create pancakes or waffles with a gentle plantain note.
Optional: pinch of cinnamon, pinch of salt, or a few seed toppings
Method
In a bowl, mix plantain flour and groundnut flour.
Add honey or date syrup slowly and stir until the mixture starts to hold together.
If it feels too dry, add a teaspoon of water or milk at a time.
Roll into small balls and place on a lined plate.
Chill in the fridge until firm, then store in an airtight container.
These bites are great for snack boxes, work desks, or after-school hunger, especially on days when you do not want to rely on packaged sweets.
7. Soft porridge for gentle evenings
In many homes, there are evenings when everyone wants something warm, simple and not heavy before bed.
Instead of always reaching for only pap, you can gently blend plantain flour into your evening routine.
Note: Always follow your healthcare provider’s advice when feeding babies or people with special dietary needs. This section is for general, everyday family cooking and is not medical guidance.
Prepare it in exactly the same way as the breakfast bowl above, but keep the portion light. Because this porridge is warm and smooth, many people find it comforting for late evenings when heavy food is not appealing.
How to store dried plantains and plantain flour properly
To really enjoy all these ideas, it helps to protect the quality of your ingredients.
Here are simple storage tips:
Keep away from heat and steam Store dried plantains and plantain flour in a cool, dry cupboard – not directly above the cooker.
Use airtight containers After opening the pouch, pour what you will use regularly into a clean, dry, airtight jar or container. Reseal the original pouch tightly.
Avoid wet spoons Always scoop with a dry spoon to reduce clumping and to help prevent spoilage.
Rotate older stock first If you buy in bulk, place older packs in front so they are used first.
If your kitchen gets very hot and humid, you can keep a portion of flour in the freezer in a well-sealed container. Let it come back to room temperature before using so it does not clump.
Putting it all together: a simple “dried plantain week”
To make this practical, here is how a regular week might look if you want to use dried plantains and plantain flour more consistently:
Monday: Half-and-half swallow (plantain + corn flour) with a favourite soup.
Wednesday: Baked dried plantain chips as a light snack.
Friday: Plantain flour pancakes for breakfast or dinner.
Saturday: Plantain–groundnut snack bites prepared for the coming week.
Sunday evening: Gentle plantain–pap porridge as a light end to the weekend.
Small, repeated uses like this help you treat dried plantain as a real pantry staple, not just an “amala ingredient”.
Ready to stock your kitchen with plantain–friendly options?
If you would like to try these ideas, you can start with:
Choosing Healthy Flours for Nutrient-Dense Meals: Plantain & Corn Made Simple
These days, the flour shelf can feel like a small market on its own. Different colours, different claims, different prices. It is very easy to grab whatever is closest and run.
However, flour is not just powder. It becomes swallow for your soups, porridge for breakfast, and even snacks for the lunchbox. Because of that, it helps to know which flours are actually simple and nutrient-dense, and which ones are better left on the shelf.
This guide focuses on two everyday heroes:
plantain flour
corn flour (maize)
You will see:
how to read their labels without stress
what “nutrient-dense” really means in everyday cooking
easy ways to turn them into gentle, filling meals
Along the way, you will meet some kitchen staples from our range:
“Nutrient-dense” sounds like a big nutrition word, but in normal kitchen language it simply means:
you are getting more useful nutrients per spoonful
you are not carrying extra baggage from unnecessary sugar, fat or additives
For flours, nutrient-dense options usually:
are made from a single, recognisable ingredient (for example, unripe plantain or whole maize)
contain some fibre and complex carbohydrates, not only highly refined starch
avoid long lists of additives, colourings and flavourings
This does not mean you can never touch other flours again. It simply means that your everyday staples work better for your body when they are simple, minimally processed and predictable.
How to read a plantain flour label without stress
Plantain flour has become popular with people who want meals that feel satisfying but not too heavy. Even so, not every plantain flour in the nylon is the same.
Here is a gentle, three-step way to read the label.
1. Start with the ingredients list
A clean plantain flour should have a very short list, usually something like:
“100% unripe plantain”
That tiny sentence tells you a lot:
there is no mixing or bulking with cheaper flours
there is no added sugar trying to make the flour sweet on its own
the product is based on a single, familiar ingredient your grandmother would recognise
Good plantain flour producers often mention things like:
low-heat or gentle drying
fine milling in food-safe equipment
Why does this matter?
Gentle drying helps the flour keep its natural colour and flavour.
Fine milling means you get a smooth swallow with no sieving, which saves time and reduces waste.
3. Check the packaging and storage advice
A good pack of plantain flour will usually:
come in a resealable, food-grade pouch
include simple instructions on how to store it
Once you bring it home, it helps to:
pour a working quantity into a clean, dry airtight container
keep the rest sealed, away from heat, light and steam
How to read a corn flour label
Corn (maize) flour is a long-time friend of pap, swallow and simple home baking. Yet the labels can still be confusing. Some packs are basically pure starch, while others give you more of the whole grain.
1. Again, start with ingredients
Look for a clear line such as:
“100% maize / 100% corn”
This tells you that:
the flour is based on a single grain, not a mystery blend
there are no extra flavourings hiding inside the pack
Some products are almost pure corn starch. They can be useful in baking, but they are not as satisfying as flours that keep more of the grain.
For everyday meals, you generally want a flour that:
keeps its natural white or yellow corn colour
cooks into a swallow or batter that feels smooth but present, not like thin paste
This kind of texture usually pairs better with vegetable-rich soups and sauces, which makes it easier to build balanced plates.
3. Watch out for extra sugar and heavy flavourings
Some instant mixes add a lot of sugar, creamers or artificial flavours. They may taste nice as once-in-a-while treats, but they are not ideal as a daily base for family meals.
Try to keep your everyday flours as close to the original plant as possible. Save the sugary mixes for days when you are consciously choosing a treat.
Plantain vs corn flour: gentle nutrition snapshot
Every body is different, and this is not medical advice. However, it helps to have a simple picture in mind when you are choosing flours for your home.
Plantain flour (from unripe plantain)
Unripe plantain flour typically offers:
complex carbohydrates that support steadier energy compared to very sugary foods
some dietary fibre
resistant starch, a special type of starch that behaves a little like fibre in the gut
naturally occurring minerals such as potassium
Because of this combination, many people find plantain-based meals filling but not overly heavy, especially when the plate also contains vegetables and protein.
Corn flour (from maize)
Corn flour made from whole maize can provide:
complex carbohydrates for everyday energy
fibre, especially when more of the grain is kept
a neutral, familiar taste that fits many soups and sauces
When you combine corn swallow with generous vegetables and a reasonable portion of protein, you get a plate that feels traditional yet still respects what your body needs.
Building a nutrient-dense plate with plantain and corn flour
Flour is only one part of the story. To turn it into a truly nutrient-dense meal, it helps to think about the whole plate.
A simple picture you can use is:
about ½ of the plate: vegetables (leafy greens, mixed vegetables, okro, etc.)
about ¼ of the plate: swallow or porridge made from plantain or corn flour
about ¼ of the plate: protein such as beans, fish, eggs or lean meat
Portions will change depending on age, activity level and health advice from your doctor, but this visual helps you plan meals that feel balanced rather than extreme.
Now let us turn this into real food.
Recipe 1: Breakfast bowl with plantain, pap and groundnut
This bowl is warm, gentle and surprisingly filling.
In a bowl, mix the plantain flour and pap powder with a little cool water to form a smooth paste.
Bring water to a gentle boil in a pot.
Gradually pour the paste into the hot water while stirring continuously.
Cook for a few minutes until the mixture thickens and becomes smooth.
Adjust the thickness with more water or milk.
Serve in a bowl, sprinkle groundnut flour on top and finish with fruit.
This kind of bowl combines complex carbohydrates, some fibre, and a hint of healthy fat from the groundnut, so many people find it more grounding than a sweet drink taken on an empty stomach.
In a separate bowl, mix plantain and corn flour together. You can start with a 50:50 ratio and adjust to your taste next time.
Reduce the heat to medium.
Gradually sprinkle the flour blend into the boiling water while stirring firmly.
Continue to stir until the swallow becomes smooth, stretchy and lump-free.
Shape and serve with a vegetable-rich soup and moderate protein.
This simple mix spreads your flour choices, keeps the familiar swallow experience, and still supports a nutrient-dense plate when paired with plenty of vegetables.
Recipe 3: Light home pancakes with plantain & corn flour
For relaxed mornings or gentle evening meals, plantain and corn flour also work beautifully in pancakes.
A pinch of salt and a little sweetener, if you like
A small amount of oil for the pan
Method
In a bowl, whisk plantain flour, corn flour, groundnut flour, salt and any dry spices you enjoy.
Add eggs and milk gradually, stirring until you get a smooth batter.
Let the batter rest for a few minutes so the flours hydrate properly.
Heat a lightly oiled pan on medium heat.
Pour in small rounds of batter and cook each side until golden.
Serve with vegetables and eggs for a savoury plate, or with fruit and a drizzle of honey for a gentle treat.
Storage tips to protect your flours
Even the best flour loses value if it is stored badly. To keep yours fresh:
Keep packs away from heat and steam. Store them in a cool, dry cupboard, not directly above the cooker.
Use airtight containers. After opening, pour a working quantity into a clean, dry jar and close it tightly.
Always use dry spoons. Wet spoons encourage clumping and spoilage.
Rotate older stock first. Place earlier purchases in front so they are used before new ones.
If your kitchen is very humid, you can store part of the flour in the freezer in a well-sealed container. Allow it to return fully to room temperature before opening the container, so condensation does not form inside.
Quick checklist for choosing healthy flours
Next time you stand in front of the flour shelf, you can use this short checklist:
Is the ingredient list short and clear? Phrases like “100% unripe plantain” or “100% maize” are good signs.
Are there unnecessary extras? Everyday flours do not need heavy sugar, flavourings or colourings.
Does the brand explain its process? Low-heat drying and fine milling are worth paying attention to.
Is the packaging protective? Resealable, food-grade pouches with storage advice help keep your flour safe.
If a product ticks most of these boxes, it is more likely to support the kind of nutrient-dense meals you are trying to build at home.
Ready to restock your flour shelf with confidence?
If you are ready to move from “just manage anything” to intentional choices, you can start with these kitchen basics:
Choosing Healthy Flours for Everyday Meals: Plantain & Corn Guide
Walk into any shop and the flour shelf can feel like a small market on its own. There are so many packs, colours and promises that it is easy to pick something simply because the nylon looks fine or the price is low.
However, flour is not just about texture. It becomes the base of family meals, school lunches and evening swallows. Because of this, it helps to know which flours are actually simple and nutrient-conscious, and which ones are better left on the shelf.
This guide focuses on two familiar staples:
plantain flour
corn flour
You will learn:
what to look for on the label
what “nutrient-dense” really means in everyday cooking
how to use plantain and corn flour in easy, balanced meals
Along the way, you will see recipes that work beautifully with:
“Nutrient-dense” sounds like a big nutrition word, but in daily cooking it simply means:
more useful nutrients per spoonful
less empty calories from added sugar, excess fat or unnecessary additives
In the context of flours, nutrient-dense options usually:
are made from a whole, recognisable ingredient (for example, unripe plantain or whole maize)
contain some fibre and complex carbohydrates, not just highly refined starch
do not rely on long lists of additives and colourings
This does not mean you must never touch other flours. Rather, it means that your everyday staples are better when they are simple, minimally processed and predictable.
How to read a plantain flour label
Plantain flour has become very popular for people who want meals that feel satisfying without being too heavy. Even so, not all plantain flours are equal.
When you pick up a bag, look for these clues.
1. Ingredient list
A clean plantain flour should have a very short ingredient list, usually:
100% unripe plantain
This tells you:
there is no mixing or bulking with other cheaper flours
there is no added sugar trying to make the flour taste sweet
the product is based on a single, familiar ingredient
Gentle drying helps the flour keep its colour and natural flavour.
Fine milling means you get smooth swallow with no sieving, which saves time and reduces waste.
3. Packaging and storage
A good plantain flour pack will usually:
be resealable or clearly state how to store the flour
protect the flour from light and moisture
Once you get home, it is best to:
pour what you use often into an airtight container
keep the rest in the original pouch, well-sealed and away from heat and steam
How to read a corn flour label
Corn (maize) flour is a long-time favourite for pap, swallow and home baking. To choose a more nutrient-conscious corn flour, pay attention to similar details.
1. Ingredient list
Look for a clear statement such as:
100% maize / 100% corn
Here is what that tells you:
the flour is based on a single grain
there are no unnecessary blends or artificial flavourings
Some products use very refined corn starch, which can be light but low in fibre. Others use more of the whole grain.
When you want something closer to a wholegrain option, you are looking for:
a natural corn colour (white or yellow)
a texture that cooks into smooth but present swallow or batter
This kind of flour usually pairs better with vegetable-rich soups and stews, making it easier to build balanced plates.
3. Extra sugars and flavourings
Some instant mixes add a lot of sugar, flavourings or creamers. These might taste nice as treats, but they are not ideal as everyday staples.
Because of this, it helps to:
check if “sugar”, “glucose syrup” or long lists of additives appear high up on the label
keep those products for rare treats, not daily use
For regular, nutrient-conscious meals, simple flours with short ingredients are usually a better base.
Plantain flour vs corn flour: simple nutrition snapshot
Every body is different and this is not medical advice. Even so, it helps to understand the basic strengths of each flour.
Plantain flour (unripe plantain)
Plantain flour made from unripe plantain typically offers:
complex carbohydrates for steady energy
some dietary fibre
resistant starch, a special kind of starch that behaves a bit like fibre in the gut
minerals such as potassium, naturally present in plantain
Because of this mix, many people find plantain-based meals filling but not overly heavy, especially when portion sizes are sensible and plates include vegetables and protein.
Corn flour (maize)
Corn flour made from whole maize can provide:
complex carbohydrates
fibre, especially when more of the grain is used
a familiar, neutral taste that pairs well with a wide range of soups and sauces
Combined with vegetables, lean protein and healthy fats in moderation, corn-based meals can form part of a balanced, nutrient-conscious diet.
Building a nutrient-dense plate with plantain and corn flour
Flour is only one part of a plate. To turn it into a nutrient-dense meal, it helps to think about everything else that joins it.
A simple way to plan your plate is:
around ½ plate vegetables (leafy greens, mixed vegetables, okro, etc.)
¼ plate swallow or porridge made from plantain or corn flour
¼ plate protein such as beans, fish, eggs or lean meat
This is not a strict rule, but it is a helpful picture when you want comfort food that still respects your body.
Below are three easy meal ideas based on this principle.
Mix plantain flour and pap powder with a little cool water in a bowl to make a smooth paste.
Bring water to a gentle boil in a pot.
Gradually pour the paste into the hot water while stirring continuously.
Cook until smooth and thickened, adjusting with more water or milk if needed.
Serve in a bowl and top with groundnut flour and fruit.
This kind of bowl combines complex carbohydrates, some fibre and a bit of healthy fat from the groundnut, so many people find it more grounding than a sugary drink alone.
2. Half-and-half swallow: plantain + corn flour
If you love swallow but want something that feels gentle and balanced, a simple half-and-half mix can help.
A pinch of salt and a little sweetener, if you like
Oil for light greasing of the pan
Method
In a bowl, whisk plantain flour, corn flour, groundnut flour, salt and any dry spices you enjoy.
Add eggs and milk gradually until you get a smooth batter that is not too thick.
Let the batter rest for a few minutes.
Heat a lightly oiled pan on medium heat.
Pour in small rounds of batter and cook on each side until golden.
Serve with fruit, a light drizzle of honey or a vegetable-rich stew, depending on whether you want a sweet or savoury plate.
Storage tips to protect the nutrition you are paying for
Even the best quality flour loses value if it is stored poorly. To protect your investment:
Keep packs away from heat and steam. Store them in a cool, dry cupboard, not directly above the cooker.
Use airtight containers. After opening, pour a working quantity into a clean, dry jar and close it tightly.
Avoid wet spoons. Always scoop with a dry spoon to reduce clumping and help prevent spoilage.
Rotate older stock first. Place earlier purchases in front so they are used before new ones.
If your kitchen gets very humid, you can store part of the flour in the freezer in a tightly sealed container. Allow it to return to room temperature before using so it does not clump.
Simple checklist for choosing healthy flours
When you next stand in front of the flour shelf, ask these quick questions:
Is the ingredient list short and clear? “100% unripe plantain” or “100% maize” are good signs.
Are there unnecessary sugars and additives? Everyday staples do not need long lists of extras.
Does the brand explain drying and milling? Gentle drying and fine milling usually support better texture and flavour.
Does the packaging protect the flour? Resealable packs and clear storage instructions are helpful.
If a product ticks these boxes, it is more likely to support your goal of building nutrient-dense meals.
Ready to restock your flour shelf with confidence?
If you want to move from guesswork to intention, you can start with these kitchen basics: