There’s a kind of comfort you can smell. The oven hums, the kitchen warms up, and the whole house starts whispering, “Something good is coming.” Now imagine that scent with a gentle minty lift and a soft, golden floral note, all wrapped up in a simple bake made with plantain flour and corn flour.
This post gives you three things in one:
A recipe guide (easy muffins you can make on a relaxed day)
A practical, educational breakdown (how these flours behave, and how to get the best texture)
A cosy inspiration story (because food is flavour + feeling)
A Sunday Kitchen Story: “The Bake That Smells Like a Garden”
Some days call for loud flavours. Other days ask for something quieter, softer, and a bit more “grown-up.” This is that bake.
You know the mood: you want something warm to nibble with tea, not too sugary, not too heavy, and definitely not stressful. You want a recipe that feels like a soft blanket, not a maths exam.
That’s where dried mint and dried marigold petals come in. Mint brings a clean, refreshing aroma. Marigold adds a gentle golden colour and a light floral vibe. Together, they make your kitchen smell like “calm, but make it tasty.”
Quick Ingredient Map (What Each One Does)
1) Plantain flour
Plantain flour gives body and a naturally earthy flavour that works beautifully in bakes. Because it’s gluten-free, it behaves differently from wheat flour, so we use simple structure helpers (like eggs or yoghurt) to keep things tender.
2) Corn flour
Corn flour adds a smooth, familiar comfort and helps lighten the texture when paired with plantain flour. It also plays nicely with warm spices and citrus, if you choose to add them.
3) Dried mint
Mint is powerful. A little goes a long way. The trick is to crush it gently (to wake up the aroma) and avoid “over-steeping” it in hot liquid for too long, which can make it taste sharp.
4) Dried marigold petals
Think of marigold as your “sunshine ingredient.” It’s mostly for colour and a soft floral hint. Use a small amount, like you would with zest: enough to be special, not enough to take over.
Sunrise at our farm and partner fields — the first step in a long, loving journey to your plate.
There is a certain quiet that belongs to early mornings on the farm — a hush broken only by careful footsteps and the soft rustle of broad leaves. For the people who grow our plantains, every season is a chorus of hands, heat and hope. At Green Unison we grow plantains on our own farms, and when harvests can’t meet demand we carefully source the rest from trusted organic farms that practise gentle, chemical-free care. This is their story and the slow, loving labour that turns green unripe plantain into flour that warms festive tables, comforts harmattan mornings and helps households begin the new year with light, nourishing meals.
At dawn: where the flour’s story begins
Our plantain journey is rooted in Ogun State — from our small family fields around Iperu Remo, to the river-kissed plots of Akaka Remo, and a nearby farm settlement where a river runs through the land. Growers on our estate, the river-fed plots and partner organic farms rise early to harvest green unripe plantains at the perfect firmness. The fruit must be green and starchy — not sweet — to make flour that cooks into a smooth elubo ogede or a comforting breakfast porridge. These lands are tended in different ways: some by our own teams, and others by partner farmers working land that has been passed down through families, held communally, or rented from families who remain the landowners. Our head office in Iperu Remo also runs irrigation systems so we can support an all-year supply of fresh unripe plantains for milling and steady kitchen tables.
Hands and stories: the people behind the flour
Each bunch of plantains is a work of hands — peeled with patience, sliced thin, and dehydrated using controlled low-heat methods that preserve starch structure and minimise nutrient loss. This careful dehydration reduces moisture safely, helps prevent contamination and produces slices that mill into a smooth, sand-free flour. These hands do more than harvest: they keep communities fed and households afloat. At the nearby farm settlement many cultivators bring deep knowledge of planting and harvest cycles, helping the site thrive. On our own farms and at Akaka Remo our teams work alongside partner growers; some partner plots are family-inherited, some are communal lands rented for cultivation, and others are farmsteads rented from families who remain the landowners. This mix of arrangements is part of the region’s farming fabric — and it means every bag of flour carries the care and expertise of many hands and histories.
“Behind every spoon of our plantain flour is a full day like this — careful peeling, controlled dehydration and smooth, sand-free flour, all ready for your table.”
The gentle art: drying and milling for flavour and texture
Quality plantain flour is made, not rushed. After peeling and slicing, our green unripe plantain is dehydrated using controlled, low-heat methods designed for best quality retention. These methods protect the starches and colour of the fruit while reducing moisture to safe levels, so the flour mills fine and cooks quickly into a lump-free swallow.
Slow, low-temperature dehydration reduces the need for heavy processing, preserving the texture and helping the flour cook quickly into a lump-free swallow. Once dry, the slices are milled to a fine consistency and sieved so you get a smooth, even flour every time.
We apply the same standards whether the plantains are grown on our estate, in Akaka Remo’s river-fed plots, at the nearby settlement, or on a partner organic farm: careful harvest timing, minimal handling and a focus on preserving natural goodness. These steps — harvest timing, gentle dehydration, fine milling — are simple, but they make the difference between a flour that needs lots of sieving and one that gives you perfect amala or pancakes with minimal fuss.
Why plantain flour is perfect for festive, harmattan and New Year tables
The end of the year brings feasts, travel and colder, drier mornings. Plantain flour answers the moment in three ways:
Comforting and light: A bowl of plantain porridge or a plate of smooth amala feels warming without being heavy — helpful during busy festivities.
Quick and forgiving: Finely milled plantain flour cooks fast and is generally easier to work with when you’re juggling holiday plans.
Budget-wise and local: Choosing locally produced flour supports small farmers and often offers a friendly price point for families planning seasonal menus.
Search interest for plantain flour shows that people are looking for reliable, local alternatives — our own pages for plantain flour are being discovered in search, which tells us many households are curious and ready to try something wholesome and familiar.
How to cook it — simple, honest tips
Cooking plantain flour is a small act of care. Here are practical, no-nonsense tips so your first pot is the best pot.
For smooth amala (swallow): Pour boiling water into a pot and reduce the heat slightly. Sprinkle the plantain flour in slowly, whisking or stirring firmly with a wooden spoon until it forms a smooth, elastic paste. If the pack gives a recommended ratio, start with that and adjust. If uncertain, add less flour, test the texture, then add more — you can always thicken, but you cannot thin a lumped paste easily.
For porridge: Mix a small amount of flour into cool water to make a paste, then pour into gently boiling milk or water while stirring. Cook for a few minutes, stirring until the porridge thickens. Top with banana, roasted groundnut or a drizzle of honey for a quick festive breakfast.
For baking and snacks: Plantain flour blends beautifully in pancakes, flatbreads and quick muffins. Swap up to half of the wheat in many simple recipes for plantain flour for a lighter, earthy result.
Storage: Keep the flour in an airtight container in a cool, dry place. For longer shelf life during wet or humid months, store in the fridge. Use within the best-before period on the pack and always smell and check for dampness before use.
If you’d like a quick recipe, try our 10-minute creamy plantain porridge — a crowd favourite over the last few weeks.
Small choices, big meaning: health, economy and care
Choosing locally produced plantain flour is about more than a single meal. It is a gentle vote for ingredients made nearby; a way of eating that prefers simpler processing and supports families who farm the land. Whether you want something light over the festive season, a soothing breakfast for harmattan mornings, or a healthier start to the new year, this flour offers a practical, kind choice.
We’ve also shared many ideas for plantain flour across our blog — from creative everyday recipes to tips for bakes and snacks. If you’re planning festive menus or New Year meal prep, those guides make it easy to begin.
Ready to taste the journey?
If you’d like to bring this flour to your kitchen, choose the Smooth Plantain Flour that’s milled for consistent, lump-free cooking:
All of our plantains are sourced in Ogun State — from Iperu Remo, Akaka Remo and a nearby farm settlement. A river passes through the settlement’s plots, and our head office in Iperu Remo uses irrigation systems to support an all-year supply of fresh unripe plantains, so every bag carries the same promise of quality and care.
Maybe there is a pouch of dried Indian borage, a jar of dried sweet basil and some dried lavender sitting quietly in your cupboard. You add thyme and curry powder to almost every pot, but these herbs feel “new” and a little intimidating.
From messages and search data, we keep seeing the same questions:
“Are dried herbs as good as fresh?”
“How much should I use so it does not taste bitter?”
“Can I even use herbs like Indian borage or lavender in our everyday dishes?”
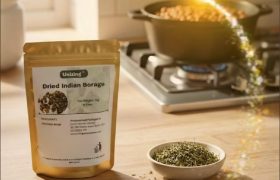
This guide brings those real questions together and answers them in one place, with a special focus on Indian borage, basil and lavender – all available as gently dried, kitchen-ready herbs in the Green Unison eShop.
Important: this article is for everyday cooking, comfort and flavour only. It is not medical advice and it does not replace speaking to a qualified health professional about any symptoms, diagnosis or treatment.
Q1. I see Indian borage, basil and lavender on your shop. Where do I even start?
Let’s meet each herb in simple kitchen language.
Indian Borage (Mexican Mint / Cuban Oregano)
Flavour: bold, mint-meets-thyme with a hint of oregano. Best for: rich, savoury dishes that need a lift – beans, stews, pepper soup, sauces and marinades. Think of it as: a flavour “reset button” when your pot tastes flat or too heavy.
Flavour: warm, slightly sweet and soft, with that classic tomato-friendly basil aroma. Best for: anything tomato-based – stew, jollof-style rice, oven-baked chicken in tomato sauce, egg sauce, noodles with home-made pepper mix. Think of it as: your go-to partner for tomato, onions and pepper.
Flavour: floral and slightly sweet; strong in tiny amounts. Best for: gentle “aroma accents” – simple bakes, honey, sugar, syrups for drinks, or as a tiny twist in zobo, pap toppings or dessert sauces. Think of it as: vanilla’s floral cousin – use sparingly.
All three sit inside the Dried Herbs eShop, so you can easily add them to a single order.
Q2. Do dried herbs really work in our kind of cooking, or are they just for “foreign” recipes?
Short answer: yes, they work beautifully in everyday home cooking.
Dried herbs are simply fresh herbs that have had their water gently removed. That drying step concentrates flavour, which is why cooks usually need less dried herb than fresh. For long-cooked dishes like stews, soups and slow sauces, dried herbs often perform better than fresh because they have time to rehydrate and release flavour into the pot.
In practice, that means:
Your long-simmered tomato stew loves dried basil.
Your pot of beans or pepper soup can handle a bold herb like Indian borage.
Your simple sugar syrup or honey can happily hold a pinch of dried lavender.
You do not need to change your whole menu. You are simply layering more depth, aroma and character into dishes you already cook.
Q3. How much dried herb should I use compared to fresh?
A common rule in cookbooks is:
Use about 1 part dried herb for 3 parts fresh.
In everyday kitchen language:
1 teaspoon dried ≈ 1 tablespoon chopped fresh.
Some herbs (like Indian borage and lavender) are naturally stronger, so you may need less. For a family pot (4–6 servings), here is a gentle starting guide:
Indian borage: about ½ teaspoon dried leaves stirred into beans, stew or pepper soup in the last 5–10 minutes of cooking.
Sweet basil: about 1 teaspoon dried leaves for a tomato stew or jollof-style rice; start with ½ teaspoon and adjust next time if you want more.
Lavender: a pinch (⅛ teaspoon or less) in a small batch of syrup, biscuit dough or dessert topping. Too much quickly becomes perfumey.
Always start small; you can add more in your next pot when you know your preference.
Q4. When should I add dried herbs to soup, stew or sauce?
Timing makes a big difference.
For long-cooked dishes (stews, beans, pepper soup)
Base layer: add part of your dried herb earlier in cooking so it can rehydrate and blend with the sauce.
Finishing layer: add a small extra pinch near the end for fresh aroma just before serving.
Example for a tomato stew:
After frying your pepper–tomato mix, add about ½ teaspoon dried basil and simmer.
In the last 3–5 minutes, crush another small pinch of basil between your fingers straight into the pot for a bright aroma.
For very strong herbs (Indian borage, lavender)
Indian borage: add towards the middle or end of cooking (last 5–10 minutes), especially if the pot will still simmer. It is powerful, so you do not need a long cook time for the flavour to appear.
Lavender: use mainly in short-cooked recipes – infusing honey or syrup, or flavouring batter for biscuits and simple cakes – and always measure tiny amounts.
Q5. Which everyday dishes can I use Indian borage, basil and lavender in?
Here are practical, tonight-friendly ideas.
Dried Indian Borage in savoury dishes
Indian borage’s mint-thyme profile makes it shine in hearty, savoury pots.
Beans and stews: add about ½ teaspoon dried Indian borage to a pot of beans or mixed stew in the last 10 minutes. Taste and adjust salt and acid (for example, a squeeze of lemon or lime).
Pepper soup: add a small pinch along with your usual pepper soup spice mix; it gives an aromatic, slightly cooling background note.
Marinades for fish or meat: combine crushed dried Indian borage with garlic, oil, salt and a little lemon for oven-baked fish or grilled chicken.
“Flat” pots that need rescue: if your sauce tastes dull, crush a small pinch between your fingers and stir in near the end of cooking. It can act like a mini flavour reset.
Basil and tomatoes are a classic pair across many cuisines, and the same rule works beautifully in West-African-style tomato dishes too.
Tomato stew for rice or yam: add about 1 teaspoon dried basil once your pepper–tomato mix has fried and the oil “comes up”. Simmer, taste, and finish with a small extra pinch if you want more aroma.
Jollof-style rice: stir ½–1 teaspoon dried basil into the base sauce before adding rice. It adds depth without changing the identity of the dish.
Egg sauce: sprinkle a pinch into your onion–pepper–tomato mix just before you pour in beaten eggs.
Noodles with homemade sauce: toss cooked noodles in a quick tomato-onion–pepper sauce with a pinch of dried basil and a squeeze of citrus instead of seasoning cubes alone.
Lavender is powerful. In cooking, it is usually treated like a gentle background note rather than the main flavour.
Lavender sugar or honey: stir a tiny pinch into a small jar of sugar or honey and leave for a few days to infuse. Use in tea, on toast or over yoghurt and fruit.
Simple biscuits or tea loaves: add a tiny pinch to vanilla biscuit dough or a basic tea loaf mixture. Lavender loves sugar, vanilla and citrus.
Drink syrups: infuse a pinch into a small pot of sugar syrup, then strain and use the syrup to sweeten zobo, drizzle over fresh fruit, or stir into chilled water with lemon for a floral cooler.
For extra kitchen inspiration with other herbs and teas, you can also explore herb-focused articles by searching for “peppermint”, “lemongrass” or “Indian borage” on our blog: peppermint, lemongrass, Indian borage.
Q6. How do I stop dried herbs from tasting medicinal or bitter?
If dried herbs have ever “slapped” you in a dish, it is usually because of one of three things:
Too much at once – herbs like Indian borage and lavender are naturally potent.
Added at the wrong time – some herbs taste better added early (to cook in), others near the end.
No balance with salt, acid or fat – herbs need company.
To keep flavours round and friendly:
Start with tiny amounts, especially for Indian borage and lavender. You can always add more next time.
Crush dried leaves between your fingers just before adding. This wakes up their aroma and helps them blend into the dish.
Balance with a pinch of salt and a dash of acid (tomato, lemon or lime) if the dish tastes “sharp herbal” rather than delicious.
Pair herbs with friendly bases: tomatoes, onions, garlic, citrus and mild chilli help herbs shine instead of shout.
Q7. How should I store dried herbs, and how long do they last?
Proper storage is one of the most common questions we see – and it makes a real difference to flavour.
For dried herbs like Indian borage, basil and lavender:
Keep them in airtight jars or resealable pouches.
Store in a cool, dry cupboard, away from direct sunlight, cooker heat and steam.
Always use a clean, dry spoon to scoop from the jar.
As a general guide, most dried herbs keep their best flavour for 6–12 months when stored well.
If you open a jar and the aroma is weak or dusty instead of fresh and herbal, it may be time to refresh your stock.
You will find storage and shelf-life guidance printed on each Green Unison dried herb pack, and the resealable packaging is designed to make these steps easy.
Q8. Can I use the same dried herbs for tea as well as cooking?
Yes – as long as you are using culinary dried herbs from the food-grade herb range (not essential oils or cosmetic-only products).
Examples:
Dried Indian borage can go into stews and also be brewed as a gentle herbal drink in small, food-like portions.
Dried sweet basil can flavour tomato stew and also be steeped briefly as a simple herbal infusion.
Dried lavender is commonly used in both tea and baking; the key is keeping the quantity low.
If you would like detailed tea brewing steps for mint family herbs and relaxing evening cups, you can search for “mint tea” or “calming tea” on our blog: mint tea articles.
In this particular guide, we are focusing mainly on cooking, so we recommend:
Treat tea from dried herbs like a light, food-like drink.
Keep daily amounts moderate, especially with stronger herbs.
Always talk to a health professional if you plan to drink any herb regularly for specific health reasons.
Q9. Is there anyone who should be more careful with herbs?
Even though we are talking about food-like use, it is still good to stay on the safe side:
If you are pregnant, breastfeeding, managing a health condition or taking regular medication, check with a qualified health professional before using herbs like Indian borage or lavender regularly as tea or strong infusions.
Avoid giving concentrated herbal teas to babies and very young children unless a paediatric professional has advised it.
If you ever notice unusual reactions after using any herb, stop and seek proper medical advice.
Used in normal culinary amounts in food, these herbs are typically enjoyed as part of everyday meals in many cultures. The key is moderation, variety and listening to your body.
Dried Herb Quick-Start Cheat Sheet (Family Pot)
Save or print this as a one-page guide for your kitchen. You can also turn it into a downloadable PDF or image in your media library.
Not sure which herb fits your favourite dishes? Tap to chat and tell us what you cook most often – we will help you pick a simple starting combo. Chat on WhatsApp or send a direct message to +234 810 304 3789.
Little herbs, big flavour – one pinch at a time. 🌿
Infused oils are a simple, long-standing way to capture the flavour, aroma and plant goodness from dried herbs into a neutral carrier oil. For everyday life, a few small bottles of calming and cooling infused oils are incredibly useful: a calming shoulder rub before bed, a cooling touch for warm days, or a fragrant herbal oil to massage into temples while you read.
You don’t need fancy kit — just quality dried herbs, a neutral carrier oil and basic sterilised jars. You can create small, effective bottles at home using our herbs.
Herbs to use for calm and cool
Below are the herbs we recommend for calming and cooling oils, with simple ideas for how to use them. These notes are inspirational and practical — not medical advice. Always patch test.
Marigold (Tagetes erecta) — gentle and soothing
Why choose it: A soft, floral herb commonly used in skincare for its comforting scent and gentle profile.
Use it for: A calming evening chest or shoulder oil, or an all-over fragrant oil for dry skin.
Why choose them: Peppermint and menthol mint bring an uplifting, cooling note. Peppermint is crisp and fresh; menthol mint has a stronger cooling character.
Use them for: A cooling temple blend on hot days, or a light, invigorating shoulder rub after a long commute. Keep concentrations low for topical use.
Evening calm: A few drops of marigold or lavender infused oil massaged into shoulders and throat while you breathe slowly.
Cooling touch: Peppermint/menthol mint in a diluted oil for a refreshing wipe on wrists or temples on hot days (avoid eyes).
Scalp refresh: Lightly massage diluted lemongrass oil into the scalp for a bright, uplifting scent — rinse if needed.
Linen & pillow mist (DIY): Add a teaspoon of infused oil to a spray bottle with water + a touch of alcohol or solubiliser, shake well and spritz fabrics (test first).
Gentle reminder: These are topical, not medical treatments. Avoid using essential oils neat on skin; keep concentrations low and patch test first. Avoid the eye area and broken skin. If pregnant, breastfeeding or if taking medications, seek personalised guidance.
Note: Our finished infused oils (for example Menthol Mint Infused Oil and Marigold Infused Oil) are currently out of stock and being restocked. If you’d like to pre-order or be notified when they return, please tap the WhatsApp links below — we’ll help you place an order or guide you to DIY options.
Short how-to (teaser — full DIY guide coming soon)
For home infusions, the two most popular approaches are cold infusion (low heat, longer time) and warm infusion (gently heated). Either approach will transfer the herb’s aroma and soluble components into a carrier oil (e.g. sweet almond, sunflower or fractionated coconut oil). Because this post focuses on uses and inspiration, we’ll keep this brief — watch our socials for a step-by-step warm infusion demo.
Safety first
For external use only. Do a patch test (apply a small amount on the inner forearm and wait 24 hours).
Avoid eyes and mucous membranes.
Keep out of reach of children.
If in doubt (pregnancy, medication, allergies), ask a healthcare professional.
We’re happy to suggest exact herb quantities for a 100–250 ml bottle and to advise on carrier oils. 😊
Related reads & resources
“Start a Mini Herb Garden on Your Balcony — Everything You Need” — a great read if you want fresh herbs to dry yourself (link to internal post).
“Marigolds: The Golden Blossom with a Heart of Gold” — for marigold uses and harvest tips (link to internal post). (If you’d like, I can insert the exact internal links from your blog sitemap.)
Credits & sources
Content informed by Green Unison product information and best practice guidance for topical herbal preparations. All suggestions are non-medical and for general wellness and home use.
Ever felt that post-meal heaviness after a delicious plate of jollof, swallow, or spicy stew? 🍛 Your stomach might be craving a gentle herbal helper — and lemongrass tea could be just the thing.
This light, citrus-scented herbal tea made from Dried Lemongrass Leaves is known for its refreshing aroma and digestive support. Studies suggest that lemongrass (Cymbopogon citratus) contains citral — a compound that helps relax the gut and reduce bloating. While it’s not a medicine, it’s been trusted in many traditional diets for its soothing, stomach-friendly nature.
So if you’re ready to sip your way to a lighter, comfier feeling after meals, here are 14 simple ways to enjoy lemongrass tea daily.
🌼 1. Sip After Your Heaviest Meal
Drinking a warm cup of lemongrass tea about 15–30 minutes after lunch or dinner can help your body feel less sluggish. It’s caffeine-free, so it won’t interfere with rest later in the day.
🍋 2. Add Ginger for Extra Relief
Combine lemongrass with a few slices of fresh ginger for a powerful digestive combo. Ginger helps speed up digestion while lemongrass relaxes the gut — perfect harmony in a cup.
💧 3. Stay Hydrated Between Meals
Instead of sugary drinks, sip diluted lemongrass tea through the day. It hydrates, refreshes, and helps your digestive system stay active without added sugar or caffeine.
🌿 4. Sweeten Naturally
If you prefer a bit of sweetness, add honey or stevia while the tea is warm (not boiling hot) to preserve nutrients. Avoid sugar, which can increase bloating.
🫖 5. Use as a Digestive Starter
A small cup before eating can gently wake up your digestive enzymes and prepare your stomach for food.
🌞 6. Brew a Morning Detox
Start your morning with lemongrass tea and a squeeze of lemon. It supports hydration and leaves you feeling lighter before breakfast.
🧊 7. Try Iced Lemongrass Tea on Hot Days
Cold-brewing your tea overnight in the fridge preserves its citrus aroma. Add mint or cucumber for a refreshing twist — ideal for warm weather.
🧘♀️ 8. Create a Calm Tea Ritual
Your mind affects your digestion, too. Pair your cup with deep breathing or quiet time. For extra relaxation, spritz a little Lemongrass Hydrosol around your space — its natural scent uplifts the mood.
🍲 9. Use as a Broth Base
Add brewed lemongrass tea to soups or light meals instead of plain water. It adds subtle flavour and helps your body digest heavier ingredients.
🕓 10. Keep It Handy for Afternoon Slumps
Instead of coffee or soda, sip lemongrass tea to refresh your senses and avoid the bloated feeling caffeine can sometimes bring.
🌙 11. Drink Before Bed
Lemongrass tea’s calming aroma makes it a perfect evening drink. Warm but not too hot — it helps your body wind down while supporting gentle digestion overnight.
🍵 12. Mix with Other Herbal Allies
Pair with mint, ginger, or moringa for flavour variety and balanced benefits. Each herb adds its own soothing touch for your gut and taste buds.
🍋 13. Lemongrass + Apple Cider Vinegar Shot
For adventurous tea lovers — mix a tablespoon of brewed lemongrass tea with half a teaspoon of apple cider vinegar. It’s tangy, aromatic, and helps awaken sluggish digestion (best once or twice a week).
💚 14. Keep It Simple
Sometimes, all you need is plain lemongrass tea and a moment of peace. No additives, no fuss — just warmth, aroma, and calm after every meal.
💬 Final Thoughts
Lemongrass tea is a simple pleasure with gentle digestive benefits. Whether you sip it warm, iced, or infused with ginger, it’s an easy daily habit for lightness and comfort.
Note: Lemongrass tea is not a medical treatment. It is traditionally enjoyed for digestive comfort and general wellness. For chronic issues, always consult your healthcare provider.
Ever heard of “seeded pap”? It’s a simple twist on the traditional pap (ogi/akamu) that could make a big difference in women’s hormonal health. 🥣 If you experience mood swings, cramps, or irregular cycles, this nutrient-packed pap bowl might become your new favorite breakfast. In this post, we’ll explore how adding seeds to your pap can support hormonal balance naturally – helping with PMS comfort and PCOS management – and which herbal teas to pair with it for maximum relief and relaxation.
Why Your Hormones Will Love a Seeded Pap Bowl 🌼
Pap (fermented corn porridge) is a beloved breakfast because it’s warm, soothing, and easy to digest. On its own, though, pap is mostly carbohydrates – great for quick energy, but not enough to keep you full or balance your blood sugar for long. Blood sugar spikes and crashes can worsen hormonal imbalances. The solution? Add protein, healthy fats, and fiber – which is exactly what seeds provide.
Seeds are little hormone helpers: Many seeds (like flax, pumpkin, sunflower, sesame) are packed with omega-3 fatty acids, zinc, selenium, and fiber that support healthy hormone production and metabolism. For example, flaxseed is rich in lignans that may help balance estrogen levels, and pumpkin seeds supply zinc which supports progesterone and can ease PMS symptoms. By mixing these into your pap, you’re essentially enriching your meal with hormone-friendly nutrients.
Steadier energy, less cravings: A seeded pap bowl contains more protein and fat than plain pap. Seeds like groundnuts (peanuts) are especially high in protein and good fats. This combo slows down the digestion of pap’s carbs, preventing the mid-morning crash. Steadier blood sugar = fewer mood swings and cravings, which is a win for anyone with PMS or Polycystic Ovary Syndrome (PCOS) who struggles with sugar cravings. (Bonus: protein and magnesium from seeds can also calm anxiety and improve mood.)
Reduced inflammation: Hormonal issues like PMS cramps or PCOS often come with inflammation. Seeds carry antioxidants and anti-inflammatory compounds. For instance, sesame and sunflower seeds are rich in vitamin E and selenium – nutrients known to help reduce inflammation and even support ovarian health. A more nutrient-diverse diet can mean calmer, happier hormones.
Bottom line: Upgrading your pap into a “power bowl” by adding seeds turns it into a more balanced meal. Over time, this can help smooth out some hormonal ups and downs naturally (of course, results vary, and consistency is key). It’s food-as-medicine, built right into your breakfast! 🥄
How to Make a Seeded Pap for Hormonal Balance 🔄
Making a seeded pap is quick and flexible. You can use Instant Pap Powder to save time – it cooks in minutes and gives a smooth, creamy base. Here’s a simple method:
Prepare your pap base: Mix 3–4 tablespoons of Pap powder with a little cold water to form a slurry, then pour into ~2 cups of boiling water on the stove. Stir continuously on low heat until it thickens into a creamy pap. (If using raw wet pap/ogi, prepare as usual.)
Choose your seed boost: Add 1–2 tablespoons of ground seeds or nuts into the pap and stir well. Great options include ground flaxseed, chia, sunflower, or a spoonful of groundnut powder (blended roasted groundnuts). Even a dollop of peanut butter works! These will dissolve/thicken the pap slightly and infuse it with nutrients.
Top it off: Sprinkle some whole seeds or crushed nuts on top for texture. For example, a teaspoon of pumpkin seeds or sesame seeds adds a pleasant crunch. You can also add sliced fruit (banana, berries) and a drizzle of honey or date syrup if you like it sweet – just keep added sugars moderate to stay hormone-friendly.
Enjoy warm: Savor it slowly as a comforting morning bowl. The added seeds make it more filling, creamy and flavorful. Knowing it’s helping your body is the best part – each spoonful is rich in fiber and healthy oils that support your cycle.
Tip: If you’re following the popular “seed cycling” method for hormone balance, you can tailor the seeds you add to pap based on your cycle phase (for example, flax & pumpkin seeds in the first half of your cycle, sesame & sunflower in the second half). While research on seed cycling is still emerging, it’s an easy and harmless practice that many women find beneficial. Your breakfast pap is an ideal place to do it! 😉
Herbal Teas to Pair with Your Pap 🍵
No wellness breakfast is complete without a soothing herbal tea, especially when we’re talking hormones. Here are a few gentle, caffeine-free teas that can complement your seeded pap and further support women’s health:
Spearmint Tea: Spearmint isn’t just refreshing – studies suggest it may help reduce excess androgen levels. This is helpful for women with PCOS dealing with symptoms like unwanted hair growth. A daily cup of spearmint tea has been linked to improved hormone balance and even more regular cycles for some ladies. Plus, it aids digestion (good for that full pap tummy). Brew 1–2 teaspoons of dried spearmint leaves in hot water, steep 5–10 minutes, and enjoy.
Ginger & Lemongrass Tea: If PMS cramps or bloating are your issue, ginger is a known natural remedy – it’s scientifically proven to ease menstrual pain (comparable to ibuprofen in some studies!). You can make a simple ginger tea at home. For added aroma, steep it with lemongrass leaves which have a bright citrusy flavor and help calm the nerves. This combo tea can act as a soothing tonic on those “ugh” days: it warms you up and reduces inflammation.
Marigold Tea: Surprise – those orange marigold petals aren’t just for the garden. Marigold tea made from dried marigold petals is traditionally used for menstrual comfort. It’s thought to help gently detox the body and relieve cramping thanks to its anti-inflammatory properties. The flavor is mild and floral. You can mix marigold with other herbs (like mint or lemon balm) for a tastier blend. Sip this especially during your PMS week for a bit of calming relief.
Peppermint or Lavender Tea: For stress relief and better sleep (important for hormone regulation!), peppermint and lavender are go-tos. A cup of peppermint tea after your pap can reduce any bloating and help you feel more clear-headed. Lavender isn’t typically consumed as a solo tea in Nigeria, but a lavender-mint infusion can be lovely for soothing anxiety. When we’re less stressed, our hormones stay happier – so don’t underestimate the power of unwinding with a warm herbal brew. 😊
Feel free to rotate these teas depending on what your body needs each day. They are all caffeine-free, so they won’t jolt your cortisol (stress hormone) in the morning. In fact, taking 5 minutes to quietly enjoy your tea is a wonderful ritual to signal your body it’s safe and supported.
Putting It All Together (Consistency is Key) 🎯
Making one “super breakfast” won’t magically fix a hormone imbalance – but small habits, compounded over time, truly help. By regularly eating a balanced meal like seeded pap, you’re giving your body steady fuel and key micronutrients that many women are deficient in. Combine that with stress-busting steps (hello, herbal tea and a moment of calm) and you have a recipe for feeling better all month long.
Many women with hormonal issues have reported feeling more energetic and fewer cravings by upgrading their breakfast this way. If you stick with it, you might notice: fewer mood swings by afternoon, less intense PMS symptoms, or more balanced skin (since blood sugar spikes can trigger acne too). And if you have PCOS, nourishing yourself with high-fiber, nutrient-dense foods is one of the best lifestyle approaches alongside any treatment your doctor recommends. It’s not a cure, but it’s an empowering way to care for yourself.
Give it a try: Tomorrow morning, add a couple of spoonfuls of seeds to your pap and brew one of the herbal teas above. Savor it and see how you feel for the rest of the day. Over the next few weeks, this could become your secret weapon for that time of the month – or honestly, for any day you want to feel balanced and nourished. 🌸
Ready to build your hormone-friendly pantry? Browse our WhatsApp catalog for all the natural goodies mentioned in this post – from pap powder to dried herbs. We’re happy to help you get started on your wellness journey. Questions or need a personalized recommendation? Just chat with us on WhatsApp – we’re one message away and ready to assist 😊.
Cheers to happy hormones and delicious mornings! 💚
If puff-puff was part of your childhood and weekend memories — the tray at parties, the stall by the roadside and the small-chops table — you’ll know how quickly those golden balls disappear.
You’ve probably also heard more than once that it’s “junk food” you should avoid or keep strictly for special occasions. This post offers a guilt-free approach that keeps the soul of puff-puff but uses plantain and corn flour to create a lighter, softer and more wholesome-feeling result.
We’ll open with the cultural story, then explain why this flour mix is a smart, sustainable pantry choice, and finish with a practical, kitchen-tested recipe and trouble-shooting tips so you can make these at home today.
Puff-puff: a snack that carries memory
Puff-puff is more than fried dough. It is smell, celebration, and sharing — the little treat that turns up at gatherings and makes people smile. Our aim here is not to replace tradition but to add an option: enjoy a version of puff-puff that is still indulgent, still delicious, but that feels lighter on the palate and sits well with a variety of diets and cooks.
Why the plantain flour revolution?
People are increasingly curious about flours beyond wheat. If you’ve ever picked up plantain or corn flour and wondered what else you can do with it, this puff-puff recipe is for you.
Softer crumb: Plantain flour holds on to moisture, so the inside stays soft and tender even after the puff-puff cools down.
Gentle natural sweetness: You get a mild, earthy sweetness, which means you can keep the sugar level comfortable without losing flavour.
Richer colour and aroma: The natural sugars in plantain help the puff-puff take on a warm golden colour and a slightly deeper aroma.
Less “heavy” feeling: Compared with using only white flour, many people find this blend tastes indulgent but doesn’t sit quite as heavy after a few pieces.
Tasty even the next day: The plantain flour helps the texture stay pleasant when reheated, instead of going tough or dry quickly.
In short, plantain flour doesn’t just tick a “healthier” box on paper — it changes how your puff-puff looks, smells and feels in the mouth.
Together, plantain and corn flours are a small revolution in the bowl — they let you keep the familiar flavour while creating a softer, less heavy bite.
Why choose Green Unison plantain flour for this recipe?
For this puff-puff, you want plantain flour that is:
Finely milled, so it blends smoothly into batter without gritty bits
Carefully dried, so the flavour stays clean and the flour doesn’t taste smoky or bitter
Consistent from bag to bag, so your results are predictable
That’s exactly what our Smooth Plantain Flour (Elubo Ogede) is made for. It works beautifully in swallow, but it also shines in recipes like puff-puff, pancakes and waffles — so a single bag goes a long way in the kitchen.
How much plantain flour do you need?
This recipe uses about ½ cup of plantain flour per bowl of batter. A standard bag of Smooth Plantain Flour will comfortably cover several family batches, so you can test this puff-puff, then still have enough left for pancakes or swallow during the week.
The sustainability and “guilt-free” angle
Puff-puff often gets pushed into the same group as doughnuts and chips – delicious, but treated as “junk” or fast food because it is deep-fried and usually made with only white flour and sugar. Many nutrition professionals will tell you to keep those foods as occasional treats.
That doesn’t mean puff-puff has to disappear from your plate. It just means we can be more intentional about what goes into the bowl.
By swapping part of the white flour for plantain flour (and a little corn flour), you are still making a treat, but you are also:
Upgrading the ingredients. You are bringing in real plantain and maize, not just refined flour.
Adding natural fibre and variety. Plantain and corn flours contribute fibre and micronutrients as part of a varied diet.
Making the indulgence feel more thoughtful. You still get that warm, party-snack feeling, but with a recipe that feels less like an “all or nothing” compromise.
There is also a sustainability side:
Support local crops. Using plantain and corn flour encourages local farming and reduces reliance on imported refined flour.
Variety in the pantry. Rotating flours gives your cooking new flavours and textures and moves you away from a one-flour-for-everything mindset.
The result is a puff-puff you can enjoy with a little less guilt: same street-snack nostalgia, but ingredients that line up better with everyday wellness goals.
Activate the yeast. Stir the lukewarm water, sugar and yeast; leave 5–10 minutes until foamy.
Mix dry ingredients. Whisk together all flours, salt and nutmeg.
Combine. Pour the yeast mix into the dry blend, add the egg if using, and stir to a thick, scoopable batter (should fall slowly from a spoon). Add water if too stiff.
Proof. Cover and leave in a warm place for 40–60 minutes, until doubled and bubbly — this gives the airy interior.
Fry carefully. Heat oil on medium. Test by dropping a small spoonful of batter: it should sink then slowly rise. Fry spoonfuls in small batches, turning for even browning (a few minutes per batch).
Drain & serve. Use a slotted spoon and drain on a rack or paper towel. Serve warm.
Notes
Plantain flour can brown a little faster due to natural sugars — moderate the oil heat to avoid over-browning.
For a wheat-free version, try equal parts plantain and corn flour with 1–2 eggs; expect a softer fritter rather than the classic stretchy puff-puff texture.
Troubleshooting & tips
Batter too thick? Add 2–3 tbsp lukewarm water and fold gently. You want a batter that flows slowly.
Puff-puff dense after frying? Either the batter was too stiff or the proofing was insufficient. Give it time to double in a warm spot.
Too oily? Don’t overcrowd the pot and keep oil at medium; drain well on a rack.
Extra lift: A small splash (1 tsp) of white vinegar or lemon juice added to the batter just before frying can give a quick reaction with baking soda if you use any — a tiny trick for extra lift.
Serving ideas & variations
Spiced sweet: Add a pinch of cinnamon or orange zest for a grown-up version.
Savoury twist: Reduce sugar, fold in chopped herbs and a little grated cheese for a tray of savoury bites.
Mini party puff-puff: Make smaller balls for canapé-style serving.
Where to buy and how to order
Ready to try the plantain flour version? Order your flour combo on greenunison.com or send “PUFF-PUFF” to 08103043789 and we’ll help you choose pack sizes.
Can I make this without egg? Yes. You can leave the egg out; just keep the batter slightly looser and give it enough time to rise so it stays airy.
Can I bake instead of frying? You can spoon the batter into a greased muffin tin and bake until golden. The texture will be more like soft buns than classic puff-puff, but the flavour will still be lovely.
Can I use only plantain flour? You can, but the texture will be closer to a soft fritter. The plantain-plus-corn-plus-wheat blend in this recipe gives a balance of softness, stretch and shape.
Final note
This small plantain-flour revolution keeps the pleasure of puff-puff while offering a guilt-free option that fits modern kitchens and tastes. Play with the ratios, keep an eye on the oil, and enjoy the process — a little experimentation is how the best recipes are born.
Disclaimer: This article provides cooking guidance and sourcing notes only. It is not medical or nutritional advice.
You finally brought home a tray of new seedlings, eager to watch them grow into lush herbs and vibrant flowers. But a week later, they’re looking sad… what went wrong? Don’t worry – we’ve all been there. Caring for baby plants in their first week can be tricky, and even well-meaning new plant parents make a few common missteps. This guide will help you spot (and avoid) those first-week mistakes so your little green ones can settle in and thrive. 🌱💚
Whether you’ve adopted aromatic herbs like sweet basil or peppermint, a fragrant flower like lavender or marigold, or even a medicinal plant like Indian Borage, the first week at home is crucial. Let’s nurture those new seedlings together by avoiding these five common mistakes:
1. Drowning Them with Too Much Love (Overwatering)
The Mistake: In our enthusiasm to help our plants, we often give too much water. New seedlings usually come in small pots or cups, and it’s easy to think they need constant watering. However, overwatering is the number-one rookie error – it can waterlog the soil and suffocate the young roots. You might notice yellowing leaves or even a fungal film on the soil surface (a sign of “damping off”, a fungus that attacks overwatered seedlings).
Why It’s a Problem: Baby roots need oxygen as much as they need water. Soggy soil deprives roots of air, invites root rot, and can lead to weak or dying seedlings. In Nigeria’s warm climate, soil can dry out quickly, but standing water is never good – it breeds disease and mold.
How to Avoid It: Water lightly but frequently. Check the soil moisture with your finger each day – the top inch should feel slightly moist, not soaked. A great rule is to water only when the topsoil starts to dry out. Ensure your seedling’s container has drainage holes so excess water can escape. If you have a tray beneath the pot, empty any standing water. In very dry, hot periods (hello, harmattan season!), you might need to mist or water more often, but always feel the soil first. Remember: it’s easier to rescue a thirsty seedling than a drowned one. 💦
2. Poor Lighting and Sunburn Scenarios
The Mistake: Placing new seedlings in insufficient light – or at the other extreme, under harsh direct sun immediately. Both scenarios stress your baby plants. For instance, leaving a mint or basil seedling in a dim corner will make it grow thin and “leggy” (stretching towards light). On the flip side, taking a nursery-grown seedling and plopping it in scorching midday sun on day one can sunburn the tender leaves.
Why It’s a Problem: Light is food for plants. Too little light makes seedlings weak, pale, and lanky as they reach out desperately (you’ll see them bending toward a window – a sure sign they need more sun). But too much intense sun too soon can dry out or scorch the leaves, since the seedlings aren’t acclimatised yet. Think of it like our skin – you don’t go from indoors to a full day of sun without a bit of exposure training!
How to Avoid It: Aim for gentle, filtered sunlight for the first few days at home. Most herbs and flowers (like lavender or marigold) love sun, but start them off with morning sun or bright indirect light. Gradually increase their sun time over the week. If a plant is known to prefer full sun (6–8 hours a day), give it that in stages: maybe 3 hours on day one, 4–5 on day three, and avoid the 12–3pm intense period initially. If you’re keeping seedlings indoors, place them by the brightest window you have (south or east-facing is ideal) or use a grow-light. You’ll notice your seedlings staying short, sturdy and rich green with enough light. And if you see them wilting in afternoon sun, give them a bit of shade or bring them in during that peak heat. It’s all about balance – plenty of light, but not a sudden sun shock. 🌞
3. Not Repotting or Transplanting Soon Enough
The Mistake: Letting your new seedlings linger too long in their tiny nursery pots or transplanting them carelessly. We get it – life gets busy and that little mint seedling in a plastic cup looked fine at first. But in those first few days, the roots can quickly outgrow the cramped space or use up the soil’s nutrients. Conversely, some folks do the opposite: they rush to transplant but handle the seedling roughly or plant it at the wrong depth, causing transplant shock.
Why It’s a Problem:Pot-bound seedlings (in undersized cups) dry out very fast and can become stunted. You might see roots poking out the drainage holes or circling inside the cup – a sign they need more space. Leaving a seedling too long in a small pot can lead to nutrient deficiencies and stressed roots. On the other hand, poor transplant technique – like breaking the root ball apart, planting the stem too deep/shallow, or not watering after transplant – can set the plant back dramatically. The seedling may wilt or stop growing as it struggles to recover.
How to Avoid It: Plan to repot or transplant your seedlings within the first 2–3 days of bringing them home. Gently move them to a slightly larger pot with fresh potting mix, or into your garden bed, following best practices:
Transplant in late afternoon or evening (or early morning) when the weather is cooler. This way, the plant has overnight to start settling before facing harsh sun.
Handle with care: Keep the root ball intact. Tap the seedling out of its cup without tugging the stem. If it’s root-bound, loosen gently but don’t tear all the roots.
Plant at the same depth it was in its nursery pot. Burying the stem too deep can invite rot; planting too shallow can expose roots. Firm the soil around it lightly.
Water immediately after transplanting to settle the soil around the roots. Then keep the soil lightly moist (not waterlogged, as per Mistake #1!). Consider providing a bit of shade for a day or two if the sun is intense – even a piece of cloth or newspaper tent can help.
Your goal is to make the move as stress-free as possible. When done right, your seedling will hardly know it’s been moved – until it suddenly has room to stretch its roots and grow! 🌱🪴
4. Using the Wrong Soil or Container (No Drainage, Heavy Soil)
The Mistake: Potting your seedlings in whatever dirt you have around – for example, scooping heavy garden soil into a container with no drainage holes, or reusing old soil that might harbor pests. New plant parents sometimes assume “soil is soil,” but young seedlings need the right environment to get started.
Why It’s a Problem: Regular garden soil can be too dense for potted seedlings, leading to poor drainage and little air reaching the roots. Water gets trapped (especially if the pot lacks holes), and you end up with – you guessed it – soggy roots and unhealthy plants. Also, soil from outside could carry bacteria or insect eggs that a delicate indoor seedling isn’t ready to battle. In short, the wrong soil or a non-draining pot can turn your nurturing efforts into a nightmare of moldy, drowning, or diseased seedlings.
How to Avoid It: Set your seedlings up for success with light, well-draining soil and proper containers:
Use quality potting mix: It’s formulated to be fluffy and airy, often with ingredients like coco peat or perlite to improve drainage. This ensures roots can breathe and expand easily. If planting directly in a garden bed, mix in compost or sandy loam to improve soil texture – your marigold and other seedlings will appreciate the nutrient boost and air pockets.
Choose pots with drainage: Always, always ensure any pot or container has holes at the bottom. If you fell in love with a cute pot with no hole, consider drilling one or use it as a decorative cover for a functional pot inside. Good drainage prevents water from pooling at the bottom and keeps roots healthy.
Clean or new soil: If reusing pots, throw out any old soil and sterilise the pot (a mild bleach solution rinse works) to kill lingering germs. Start your seedlings in fresh mix so they aren’t exposed to pests/diseases from the get-go.
Right size pot: Don’t jump to an enormous pot either – a pot just one size up from the nursery cup is ideal. Too large a pot holds excess water in the soil that the small roots can’t use yet, which again can cause rot.
By giving your seedlings the equivalent of a comfortable, clean new home – good soil, good drainage – you’ll notice they establish faster. Healthy roots mean a healthy plant up top! 🌿
5. Overfeeding Early (Fertiliser Frenzy)
The Mistake: “If a little plant food is good, a lot must be better, right?” Not so fast! A common mistake is fertilising seedlings too soon or too heavily. In the excitement to see your baby plant shoot up, you might be tempted to douse it with liquid fertiliser or sprinkle granules right after planting. Unfortunately, this can do more harm than good in week one.
Why It’s a Problem: Freshly potted or transplanted seedlings are in a delicate, adjusting phase. Their roots are tender – blasting them with strong fertiliser can burn the roots or force growth that the young root system can’t support. It’s like giving a newborn baby a full adult meal – they’re not ready for it! Plus, quality potting mixes often come with a small starter charge of nutrients, and we usually transplant seedlings into compost-enhanced soil, so they aren’t starving initially. Overfeeding can upset the soil’s nutrient balance and even invite pests (lush, overfed growth can attract aphids and others).
How to Avoid It: Hold off on the plant food bar for a little while. 😇 For most seedlings, wait 1–2 weeks before the first feeding. Let the plant settle and put out new roots in its new soil. When you do start feeding:
Begin with a diluted, gentle fertiliser. If you have an all-purpose liquid fertiliser, mix it at half the recommended strength for the first feed. Organic options like fish emulsion or seaweed extract are typically mild – those are great starters (just be mindful of using them indoors due to smell).
Alternatively, use a slow-release organic fertiliser sparingly when potting – something like worm castings or a tiny pinch of compost mixed into soil. This provides a low, gradual nutrient supply that won’t overwhelm the plant.
Observe your plant. If it’s putting out new, green growth in the first week or two, it likely has what it needs from the soil. The best “food” initially is sunlight and water (in the right amounts). Think of fertiliser as a boost for an established plant, not a rescue for a struggling seedling. If your seedling looks peaky for reasons other than hunger (often it’s water or light issues), address those basics first rather than reaching for the fertiliser bottle.
By avoiding an early fertiliser frenzy, you’re preventing chemical burn and encouraging your seedlings to first grow a strong root network. In a couple of weeks, you’ll have a robust plant that can gobble up nutrients happily when it’s time to feed. 🍽️🌱
In Summary: Give Them a Great Start
Your first week with new seedlings should be a time of enjoyment, not mystery or heartbreak. 😅 By sidestepping these common mistakes – overwatering, poor lighting, delayed or clumsy transplanting, bad soil/drainage, and premature feeding – you set the stage for your seedlings to flourish. Think of yourself as a gentle guide in that first week: providing sips of water, just the right amount of sun, a comfy new home, and patience before heavy meals.
Soon you’ll see your little plants perk up, unfurl new leaves, and even shoot up a bit taller. Each success, whether it’s a basil for your kitchen or a blooming marigold on your balcony, is a win for you as a plant parent. And if something does go wrong, don’t be too hard on yourself – plants are forgiving with a bit of TLC.
Ready to grow more? 🌻 Explore our range of healthy, naturally raised plant seedlings to find your next green baby. From mints (spearmint, menthol mint, and more) to medicinal herbs and ornamentals, we’ve got you covered. You can also reach out anytime for guidance – we love to help fellow gardeners.
For quick questions or personalised tips, send us a message on WhatsApp (it’s fast!): Chat with Green Unison🌱. We’re happy to assist with any seedling care inquiries or order requests. You can even browse our WhatsApp catalog for products here: wa.me/c/2348103043789.
Good luck with your new plant babies, and happy gardening! 🌱🎉 You’ve got this – may your home be ever greener and your thumbs ever greener too. 😊👍
Along the way, we’ll keep everything science‑aware, gentle and realistic—no miracle claims, just smart ways to use a very aromatic herb.
Meet Indian Borage (Mexican Mint / Cuban Oregano)
Indian borage (Plectranthus amboinicus) is a member of the mint family with thick, succulent leaves and a strong aroma that sits somewhere between mint, oregano and thyme. It’s also known in many places as Mexican mint, Cuban oregano, country borage or broad‑leaf thyme.
Researchers have found that the leaves are rich in essential oils (like thymol and carvacrol), flavonoids and other polyphenols with antimicrobial and anti‑inflammatory activity in laboratory and animal studies.
That doesn’t turn it into a medicine on its own—but it does help explain why so many cultures traditionally reach for this herb in teas, steams, rubs and home cooking.
Important: All ideas in this article are for everyday comfort, flavour and home care. They do not replace professional medical advice, diagnosis, treatment or emergency care.
1. A Quick “Comfort Cup” When the Air Feels Heavy
You know that feeling when the weather swings, dust is everywhere, and your chest or throat feels a bit “tight” and uncomfortable?
That’s one of the classic moments people reach for Indian borage tea.
Brew as above, steeping for about 5 minutes before straining.
Why this cup makes sense
Warm herbal drinks are a traditional way to bring comfort and moisture to the throat and chest.
Lab studies on Plectranthus amboinicus show essential oil and extract components with antioxidant, antimicrobial and anti‑inflammatory activity, which may help explain why this herb is used historically for respiratory discomfort.
That doesn’t mean this tea “treats” any illness—but as a caffeine‑free comfort drink, it earns its place in the evening routine.
Safety first
Keep portions moderate (1–2 cups a day as a food‑like drink for most healthy adults).
If you’re pregnant, breastfeeding, have a health condition or take medication, talk to your health professional before drinking any herb regularly.
For high fever, chest pain, difficulty breathing or symptoms that don’t improve, seek proper medical care quickly.
Sometimes the house feels heavy—maybe after harmattan dust, smoke from nearby cooking, or a long day with windows closed. A simple herbal steam bowl can feel like a mini spa for your nose and face.
Let it cool for 1–2 minutes so the steam is warm, not scalding.
Sit comfortably, lean over the bowl at a safe distance and drape a towel loosely over your head.
Breathe in the aromatic steam for 5–10 minutes, taking breaks if it feels too warm.
You’re simply using the strong, mint‑thyme aroma as a comfort ritual—similar to how people use menthol rubs or minty steams—without claiming to “treat” anything.
Very important safety notes
Keep hot water far away from children and pets.
This is not for babies or toddlers.
Do not press your face too close to the water; steam burns are real.
If you feel dizzy, too hot or uncomfortable, stop immediately.
3. A “Heavy Meal Helper” After Starchy or Oily Food
Big plates of swallow, rice, beans or rich sauces are comforting—but sometimes leave you feeling heavy or bloated.
Indian borage has a long history in traditional systems as a culinary herb used after heavy meals, especially in teas and spiced dishes.
Two simple ways to use Indian borage around meals
a) Light after‑meal sip
After a heavy or late dinner:
Brew a small cup of Indian borage tea (as in Section 1).
Sip slowly, instead of reaching straight for fizzy drinks.
The warm, aromatic drink encourages you to slow down, sit upright and give your stomach time to settle—simple lifestyle habits that make a practical difference on their own.
b) Add it directly into your cooking
Indian borage’s bold flavour stands up well in:
Beans and stews
Pepper soups
Marinades for fish and meat
Oily sauces that need more “lift”
Try:
Crushing ½–1 teaspoon of Dried Indian Borage Leaves into the pot in the last 5–10 minutes of cooking, or
Finishing dishes with a drizzle of Indian Borage Infused Oil as a flavour booster, just like you might use herb‑infused olive oil.
Start small—this herb is strong—and adjust to taste.
Again, this is about flavour and comfort, not treatment. If you often feel pain, burning, or severe discomfort after meals, get proper medical checks rather than self‑treating with herbs.
4. Emergency Flavour Rescue for “Flat” Pots
You’ve added onions, garlic, stock, pepper… yet the pot still tastes somehow flat. Before you give up, Indian borage can act like a tiny emergency reset for savoury dishes.
The leaf flavour is minty with a thyme‑like depth, thanks to aromatic compounds that give it a strong, herbal punch.
5. Living Air Freshener and Mood‑Lifting Balcony Buddy
Indian borage doesn’t only belong in the kitchen. With its thick leaves and strong scent, it makes a lovely living air freshener for small spaces.
Simple ways to use the plant around the home
Balcony or window box: Keep a pot of Indian Borage Seedlings near a window or balcony rail. When the breeze blows through the leaves, the scent gently circulates.
Hand “scent swipe”: Before guests arrive, lightly rub a clean leaf between your fingers and brush your hands over curtain edges or around the balcony railing. The herb ensures a subtle, herbal scent without synthetic sprays.
Herbal corners: Combine Indian borage with other aromatic plants like mint and marigold so your home garden does double duty: beautiful, fragrant and more attractive to helpful insects like pollinators.
For more ideas on using aromatic plants as natural helpers, you can read:
Together, the live plant plus pantry products give you a simple Indian Borage toolkit that covers flavour, comfort and home fragrance.
Frequently Asked Questions About Indian Borage
1. Is Indian borage the same as ordinary borage?
No.
Indian borage is Plectranthus amboinicus, part of the mint family, with thick, fuzzy leaves and a strong, oregano‑like aroma.
Common borage (Borago officinalis) is a different plant with blue star‑shaped flowers and a cucumber‑like taste, often used for its seed oil.
This article is about Plectranthus amboinicus, the one sold as Indian borage / Mexican mint / Cuban oregano in our shop.
2. Can I drink Indian borage tea every day?
Used like a culinary herb in small, food‑like amounts, Indian borage tea is generally considered safe for most healthy adults in traditional use.
However:
There aren’t many long‑term human studies.
If you’re pregnant, breastfeeding, managing a health condition, or taking regular medication, speak to a qualified health professional before using it daily.
Stop immediately and seek help if you notice any unusual reactions.
3. Can children take Indian borage?
Many families traditionally give mild herbal teas to older children, but safety depends on age, health history and dose.
We recommend:
Avoiding herbal teas in babies and toddlers unless specifically guided by a paediatric professional.
For older children, use very weak tea, and only occasionally, after checking with a health practitioner who knows the child’s history.
4. I’m pregnant or breastfeeding. Is Indian borage safe for me?
Scientific data in pregnancy and lactation is limited. Some sources recommend caution with concentrated herbal use in these stages.
It’s best to:
Treat Indian borage as a normal culinary herb only, in small quantities,
Avoid heavy or long‑term self‑medication with any herb, and
Ask your doctor or midwife before using Indian borage regularly as tea or steam.
5. How many leaves should I use in cooking?
For a family‑sized pot (4–6 servings):
Start with ½–1 teaspoon dried leaves or 2–3 fresh leaves, chopped.
Taste, then add a little more if you want a stronger flavour.
It’s easier to add more later than to fix an over‑herbed pot.
Ready to Give Indian Borage a Home?
If you’ve been curious about this bold little herb, now is a good time to add it to your home routine—gently, safely and deliciously.
Let Indian borage earn its spot as the “emergency herb” in your home—quietly waiting in its pot or jar, ready for those little moments when you need comfort, flavour or freshness in a hurry.
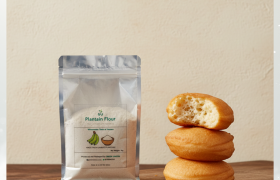
If you already love amala ogede made with our Smooth Plantain Flour, you’re not alone. Many people know plantain flour as “that swallow flour” or something to use only for pancakes.
But plantain flour can do much more.
In this post, we’ll share five simple, everyday ways to use plantain flour so your kitchen feels more flexible, your meals stay interesting, and that pouch in your pantry works harder for you.
We’ll also touch on:
Why unripe plantain flour is loved for its fibre and resistant starch
How to pair it with our corn flour for better texture in bakes
How every scoop quietly supports local farmers and processors
This post is for general food and cooking information only. It is not medical advice and does not replace speaking with a qualified health professional about your diet.
1. Creamy Plantain Flour Breakfast Porridge
When you want a warm breakfast but don’t feel like oats, plantain flour porridge is a quick swap you can cook in about 10 minutes.
Why people love it
Uses just a few pantry ingredients
Naturally gluten-free – made from 100% unripe plantain with no wheat added
Unripe plantain flour contains resistant starch and dietary fibre, which behave more like fibre than simple sugar and help you feel satisfied
These are your “small chops from the same bag of flour” – perfect for school snacks, road trips, or something crunchy to serve with tea.
Short recipe videos and snack ideas built around one main ingredient are trending in many food communities. People love anything crunchy, simple and budget-friendly.
Instead of deep-frying all the time, you can bake a crunchy version.
Rub in the butter or coconut oil until it looks like fine crumbs.
Add water a little at a time until you get a soft but not sticky dough.
Roll out and cut into small bite-sized squares or strips.
Arrange on the tray and bake for 12–15 minutes, turning once, until golden at the edges.
Cool completely so they crisp up, then store in an airtight jar.
Budget tip: Using local flours like plantain and corn helps reduce dependence on imported snacks and keeps more value within the local food economy.
3. Plantain Flour Flatbreads for Everyday Wraps
Think of this as a soft, flexible flatbread you can use for:
Egg roll-style breakfasts
Wraps filled with chicken, beans or veggies
Simple stew scooping when you don’t feel like swallow
Using a mix of plantain, corn, and a little wheat flour (or a binder if you avoid wheat) gives you a soft, foldable bread – similar to the way corn and plantain flour blends give softer, lighter bakes.
½ teaspoon seasoning of choice (onion powder, dry pepper, herbs)
Enough water to form a soft dough
Method
Mix the flours, salt and seasoning.
Add water little by little until you get a soft, scoopable dough.
Roll into small balls or scoop with a teaspoon.
Drop gently into a simmering pot of light soup or thin stew.
Cover and cook for 10–15 minutes until the dumplings are cooked through.
You’ll get a more filling soup without cooking a separate swallow – very helpful on busy evenings.
5. Smoothie, Pap and Baby Porridge Booster
Plantain flour also works beautifully as a smoothie and baby-food booster. Around the world, people are adding different flours to smoothies, porridges and pap for more body and variety.
You can lean into that trend by showing how one spoon changes the texture of everyday meals.
Research shows that unripe plantain flour contains indigestible carbohydrates (resistant starch) and dietary fibre, which behave differently from simple sugars and support more gradual energy release.
At Green Unison, our plantain flour is made from 100% unripe plantains that are washed, peeled, gently low-heat dried and finely milled, so you get a smooth, naturally gluten-free flour that works in both savoury and sweet dishes.
We’re sharing this information as a general guide to food, not as a cure, treatment, or nutritional prescription.
That means fewer random flours sitting half-used in the cupboard.
3. Cultural relevance, without losing tradition
These ideas don’t replace classic dishes; they stretch them:
Dumplings in soups sit comfortably beside swallow.
Flatbreads still welcome vegetable stews, beans and eggs.
Chin-chin-style bites are still recognisable to anyone who grew up with small chops.
You’re not abandoning familiar tastes – just getting more from the same ingredient.
4. Economic value and supporting local producers
Plantain flour doesn’t appear by magic. There is a whole chain of people behind each pouch:
Farmers
Transporters
Small and medium-scale processors who turn fresh plantain into flour
Retailers and food businesses
Processing plantain into flour and snacks creates jobs, reduces post-harvest losses and improves profitability for small-scale producers. Choosing local flours like Smooth Plantain Flour and Silky Corn Flour keeps more of that value within the local economy.
Ready to try plantain flour beyond swallow and pancakes? Tap “Add to cart” on our shop or send us a quick WhatsApp message – we’ll help you pick the right pack size for your kitchen 😊
Quick Disclaimer
Is this medical or nutrition advice? No. This article is for general food and cooking information only. It does not replace professional medical or dietary advice. If you have any health condition or specific nutrition needs, please speak with a qualified health professional before changing your diet.