Author: Ayodotun Ayodele

  • DIY Herbal Tea Blends for Health & Comfort (Using Green Unison Dried Herbs)

    DIY Herbal Tea Blends for Health & Comfort (Using Green Unison Dried Herbs)

    There’s a special kind of peace that comes from wrapping your hands around a warm mug of herbal tea—especially after Lagos traffic, a busy work day, or during dry, dusty harmattan evenings.

    The beautiful thing? You don’t need a fancy tea brand to enjoy that comfort. With a few spoonfuls of dried herbs you already have at home, you can create your own gentle, caffeine-free blends that support your body and calm your mind.

    In this guide, you’ll learn how to use Green Unison’s nature-powered herbs—like Dried Lemongrass Leaves, Dried Lavender, Dried Indian Borage and our different mints—to make soothing herbal tea blends for:

    • Bedtime calm and better rest
    • Harmattan comfort and breath support
    • Hormone-friendly comfort on “PMS days”
    • Clear-headed focus during busy hours

    All with simple recipes you can repeat again and again.

    Note: This article is for gentle, everyday wellness and comfort. It’s not medical advice and not a replacement for seeing a health professional.


    Why Make Your Own Herbal Tea Blends?

    Buying ready-made tea bags is convenient, but creating your own blends has big advantages:

    • You control what’s inside. No hidden flavours, caffeine or preservatives—just clean, dried herbs.
    • You can tailor it to how you feel today. Heavy after eating? Tired? Anxious? You can adjust your blend.
    • It’s cost-effective. A small pouch of herbs from the Dried Herbs shop can last weeks or months.
    • You support local farmers. Green Unison herbs are grown and gently dried in Ogun State with care from farm to pouch.

    A Quick Herbal Tea Brewing Guide

    Before we dive into recipes, here’s a simple base method you can use for almost any blend.

    For 1 mug (about 250 ml):

    1. Measure the herbs
    • Total of about 1–2 teaspoons of dried herbs per 250 ml water.
    • If a blend has many herbs, use smaller amounts of each so the total still fits in that 1–2 tsp range.
    1. Boil and pour
    • Bring fresh water to a boil.
    • Pour over herbs in a mug, tea pot, French press or infuser.
    1. Cover and steep
    • Cover your mug/teapot so the beneficial oils don’t escape with the steam.
    • Steep 5–10 minutes, depending on how strong you like your tea.
    1. Strain and sip
    • Strain out the herbs.
    • Enjoy plain, or sweeten gently with honey if you like.

    You can safely adjust steeping time and herb quantity to match your taste. Start mild; you can always make it stronger next time.


    Blend 1: Bedtime Calm – Lavender, Spearmint & Lemongrass

    When your mind is busy and sleep feels far away, a soft herbal blend can help you slow down and signal to your body that it’s time to rest.

    This blend combines:

    • Dried Lavender – a calming floral herb often used for relaxation rituals and night routines.
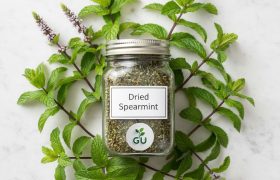
    • Dried Spearmint Leaves – gentle, sweet mint that soothes without feeling too intense.
    • Dried Lemongrass Leaves – bright, citrusy and often used after meals to ease heaviness and support digestion, which is perfect before bed.

    What this blend is good for

    • Unwinding after a long day
    • Creating a simple night-time ritual
    • Light post-dinner comfort so you don’t go to bed feeling too heavy

    Ingredients (1 mug)

    How to brew

    1. Add all herbs to your mug, teapot or infuser.
    2. Pour 250 ml freshly boiled water over the blend.
    3. Cover and steep for 7–10 minutes.
    4. Strain and sip slowly. Add a little honey if you like something sweet.

    Best time to drink

    • 30–60 minutes before bed
    • As part of your evening “wind-down” routine—phone away, lights dim, maybe a journal or gentle music.

    Blend 2: Harmattan Comfort – Indian Borage, Peppermint, Lemongrass & Marigold

    Dry air, dusty breeze, scratchy throat and that “I might be coming down with something” feeling—harmattan can be a lot. This blend leans on herbs traditionally used for respiratory comfort and warmth.

    We’ll use:

    • Dried Indian Borage – a bold, mint-thyme herb often used in homes for steam inhalation, teas and soups to support easy breathing.
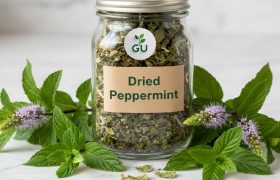
    • Dried Peppermint Leaves – strong, menthol-cool leaves that open up the chest and feel refreshing in the throat.
    • Dried Lemongrass Leaves – adds warmth and gentle digestive support.
    • Dried Marigold Petals – a beautiful, caffeine-free flower often used in herbal blends for general comfort and a touch of sunshine in your cup.

    What this blend is good for

    • Harmattan evenings
    • Scratchy throat or dry, uncomfortable feeling in the chest
    • Cozy, warming moments after being out in dusty air

    Ingredients (1 mug)

    How to brew

    1. Add all herbs to your mug or teapot.
    2. Pour 250 ml freshly boiled water over them.
    3. Cover and steep for 6–8 minutes.
    4. Strain, then inhale the steam gently before your first sip.

    Best time to drink

    • In the evening after a dusty commute
    • On cool mornings when your chest feels tight or dry

    ⚠️ Gentle reminder: This is a comfort tea, not a cure. If you have difficulty breathing, chest pain, fever or persistent symptoms, please speak to a doctor or qualified health professional quickly.


    Blend 3: Hormone-Friendly Comfort – Spearmint, Lemongrass & Marigold

    Some days feel heavier than others—bloating, moodiness, cramps, low energy. While herbal tea can’t fix everything, a gentle blend can be a kind companion on “PMS days”.

    Here we lean more on spearmint, which many women around the world enjoy as part of their hormone-friendly routines, along with lemongrass and marigold for warmth and comfort.

    We’ll use:

    What this blend is good for

    • Days when you feel bloated or low-energy around your cycle
    • Evening self-care with a hot water bottle and a calm playlist
    • Pairing with a grounding meal like pap, oats or plantain-flour porridge

    Ingredients (1 mug)

    How to brew

    1. Place all herbs in your mug/teapot.
    2. Add 250 ml freshly boiled water.
    3. Cover and steep for 7–10 minutes to build flavour.
    4. Strain and sip slowly. You can add a teaspoon of honey if you enjoy sweetness.

    Best time to drink

    • Late afternoon or evening, especially on days you feel crampy or easily irritated.

    ⚠️ If you’re pregnant, trying to conceive, on medication or managing a diagnosed hormone condition, please check with a health professional before using herbs regularly as part of your routine.


    Blend 4: Clear-Headed Focus – Menthol Mint, Sweet Basil & Lemongrass

    For those days when your brain feels foggy but you don’t want to rely on coffee, a bright herbal blend can help you feel more awake and refreshed—without caffeine.

    This blend features:

    • Dried Menthol Mint – stronger than regular mint, with a cool, sharp lift that wakes the senses.
    • Dried Sweet Basil – familiar kitchen herb with a cozy, savoury aroma that grounds the blend.
    • Dried Lemongrass Leaves – bright and citrusy, tying everything together and making the tea feel “clean”.

    What this blend is good for

    • Mid-morning or mid-afternoon slumps
    • Long work or study sessions
    • Replacing a second cup of coffee with something gentler

    Ingredients (1 mug)

    How to brew

    1. Add all herbs to your mug/teapot.
    2. Pour 250 ml freshly boiled water over them.
    3. Cover and steep for 5–7 minutes (shorter steep keeps it bright and lively).
    4. Strain and enjoy warm. You can also let it cool and sip as a room-temperature focus drink while you work.

    Best time to drink

    • Morning or afternoon, not too close to bedtime, because the cooling menthol can feel quite awakening.

    How to Build Your Own Signature Herbal Tea Blend

    Once you’ve tried the recipes above, you can start creating your own blends using the herbs you have at home. Here’s a simple framework:

    1. Choose your base

    Pick 1–2 herbs that will make up most of the blend:

    Use about 1–1½ teaspoons total of your base per mug.

    2. Add a “support” herb

    This is where you bring in extra character or focus:

    Use about ½–1 teaspoon of your support herb per mug.

    3. Finish with a “top note”

    Finally, add a small amount of something special:

    Usually ¼–½ teaspoon is enough for your top note in a 250 ml mug.


    General Safety Reminders

    Herbs are powerful, even when they feel gentle. Keep these in mind:

    • Start with small amounts and notice how your body responds.
    • If you’re pregnant, breastfeeding, on regular medication or managing a health condition, talk to a qualified health professional before drinking herbal blends daily.
    • Stop using any herb that makes you feel uncomfortable or triggers unusual symptoms.
    • Herbal tea is a supportive habit, not a replacement for medical care, medication or professional advice.

    Ready to Brew Your Next Mug?

    You don’t have to wait for a special occasion to enjoy herbal tea. Whether it’s:

    • A quiet evening cup of lavender, spearmint and lemongrass,
    • A harmattan comfort blend with Indian borage and peppermint, or
    • A clear-headed focus blend while you work,

    you can create something beautiful from simple, dried leaves on your shelf.

    Explore the full range of herbs in the
    👉 Green Unison Dried Herbs shop

    and start building your own cozy, health-supporting tea rituals—one mug at a time.

  • Local Superfoods in Your Pantry: Corn, Plantain & Groundnut Flour Nutrition Unpacked

    Local Superfoods in Your Pantry: Corn, Plantain & Groundnut Flour Nutrition Unpacked

    If your kitchen already has corn flour, plantain flour and groundnut flour, you’re sitting on a mini “superfood corner” without even realising it.

    These three pantry staples are more than swallow and pap ingredients. Used well, they can help you:

    • build more satisfying meals from simple ingredients
    • enjoy familiar local foods with a little more balance
    • reduce how often you rely on heavily processed snacks

    In this post, we’ll unpack – in plain language – what each flour brings to your plate, plus simple, realistic ways to use them every day.

    Kind note: This article is for general food inspiration only and is not medical or nutrition advice. Always speak with a qualified health professional for personalised guidance.


    What makes these flours “local superfoods”?

    “Superfood” is a marketing word, but there is something special about everyday flours made from whole local crops:

    • Corn flour – a source of complex carbohydrates, some fibre and naturally occurring vitamins and minerals that provide gentle, steady energy.
    • Plantain flour – made from unripe plantain, offering complex carbs, fibre and resistant starch, with a mild flavour that fits breakfast, swallow and snacks.
    • Groundnut flour – a concentrated way to add plant protein, healthy fats and flavour to simple meals like pap, soups and smoothies.

    When the flours are carefully dried and finely milled – like the nature-powered flours from Green Unison – you get the benefits of the original crop in an easy, scoopable form.

    You can explore the full range here:

    Now let’s break down each one.


    Corn flour: familiar comfort and steady energy

    Corn flour has always been a comfort staple – from tuwo and pap to simple home baking.

    When it’s milled from whole maize and left unsieved, you keep more of the natural bran and germ, which means:

    • a steadier release of energy compared with many refined flours
    • a bit more fibre to support comfortable digestion
    • naturally occurring B-vitamins and minerals from the grain itself

    Green Unison’s Silky White/Yellow Corn Flour – Effortless Use is finely milled so it mixes quickly and cooks evenly, whether you’re making swallow, pap or a batter.

    Everyday ways to use corn flour

    You don’t need a big recipe book. Small, repeatable moves are enough:

    1. Soft swallow for busy days
      Make a smooth, lump-free bowl of tuwo masara for those evenings when you want something lighter but still satisfying.
    1. Pap for gentle mornings
      Swap part of your usual pap base with corn flour or use Green Unison Instant White/Yellow Pap Powder (Ogi/Akamu) – Easy on the Kitchen for days when you need breakfast quickly.
    2. Light baking and snacks
      Blending a little corn flour into wheat flour can soften the texture of homemade bakes.
      For ideas, see:
      👉 Bake Bakery-Style at Home with Wholegrain Corn Flour (White & Yellow)
      👉 Fluffy Corn-Flavoured Pancakes: A Naturally Sweet Breakfast with Green Unison

    Plantain flour: green plantain in a scoop

    Plantain flour (especially from unripe plantains) is one of those quiet heroes in the cupboard.

    Because it’s made from green plantain, gently dried and milled, it naturally contains:

    • complex carbohydrates that help you feel properly fed
    • fibre and resistant starch, which support a steady, gentle release of energy
    • potassium and other naturally occurring minerals found in plantain

    Green Unison Smooth Plantain Flour (Elubo Ogede) – No Sieving Needed is milled finely enough for swallow and porridge, so it fits into both weekday and weekend routines.

    Everyday ways to use plantain flour

    1. Swallow that feels light but satisfying
      When you want something different from the usual swallows, plantain flour is a great option – soft on the tongue yet filling enough to carry your favourite soups.
    2. 10-minute breakfast porridge
      Turn plantain flour into a creamy bowl instead of always reaching for oats or custard.
      Try this guide:
      👉 10-Minute Smooth Plantain Flour Power Porridge (No Oats Needed)
    3. Snack and dessert twist
      A small amount of plantain flour can be blended into pancake batters, waffle mixes or simple home snacks for a gentle sweetness and extra body.
    4. Soft, guilt-friendly treats
      If you enjoy experimenting, this article shows how plantain flour can transform a favourite street snack:
      👉 Guilt-Free Puff-Puff: The Plantain Flour Revolution

  • Fluffy Corn-Flavoured Pancakes: A Naturally Sweet Breakfast with Green Unison

    Fluffy Corn-Flavoured Pancakes: A Naturally Sweet Breakfast with Green Unison

    Quick, soft and pleasantly sweet — pancakes reimagined with Green Unison corn flour.
    This post shares a simple recipe that produces light, fluffy pancakes with a clean corn flavour, honest tasting notes from our reviewer, and clear links so you can order the exact products shown.

    Simple Corn-Flour Pancake Recipe

    Makes: 8–10 medium pancakes | Prep & cook: ~10 minutes

    Ingredients

    Optional: For an even softer crumb, mix in a small amount of plantain flour. See plantain flour and other items on the Green Unison Shop (plantain flour and all products).

    Method

    1. In a bowl, sieve the wheat flour and add the corn flour. Add sugar, baking powder and a pinch of salt. Whisk to combine and remove any lumps.
    2. In a separate bowl, whisk the egg with the milk and oil.
    3. Pour the wet mix into the dry mix and whisk gently until you have a thick, smooth batter. Rest 5–10 minutes to let the flours hydrate.
    4. Heat a frying pan on medium and grease lightly. Pour the batter (about ¼ cup per pancake). Wait for bubbles to form on the surface and the edges to look set, then flip and cook until golden.
    5. Stack, drizzle with honey and enjoy.

    Tip: If the batter feels too thin, add a dash more corn flour. If too thick, loosen with a splash of milk. Aim for a thick, smooth, consistent batter before cooking.

    Why Green Unison corn flour works so well

    • Natural sweetness: corn adds a pleasant, subtle sweetness so you can reduce added sugar.
    • Fine milling → smooth batter: Green Unison corn flour blends easily, producing a silky, lump-free batter that cooks into a tender pancake.
    • Fluffy texture: with the right leavening (baking powder) and a gentle whisk, pancakes rise light and airy.
    • Versatile: use on its own for gluten-free pancakes or blend with plantain flour for extra softness.

    Honest tasting notes from the reviewer

    “Very fluffy inside.”
    “Just clean and natural flavour.”
    “No lumps no aftertaste.”
    “corn flour blends so with batter.”

    These short comments reflect what we experienced: a golden stack that tastes naturally sweet and finishes cleanly on the palate.

    Ready to order? Clear product links and ordering

    Buy the exact corn flour used in this recipe:

    Other products and complementary flours:

    Order by WhatsApp (quick and personal):

    We’re happy to advise on quantities, mixing ratios (corn vs plantain or wheat) and delivery options — just message us on WhatsApp.

    Final notes and serving ideas

    • Try a 1:1 mix of corn flour and plantain flour for extra softness (shop link above).
    • Add a splash of vanilla or a pinch of cinnamon to the batter for a warm flavour note.
    • Serve with fresh fruit and honey for a naturally sweet breakfast.

  • 10-Minute Smooth Plantain Flour Power Porridge (No Oats Needed)

    Mornings can be wild. Between traffic, school runs, work, and everything in between, a proper breakfast often loses the battle.

    If you’re tired of skipping breakfast – or you’re bored of the same bowl of oats – this creamy Smooth Plantain Flour breakfast porridge is for you. It’s ready in about 10 minutes, uses things you already have at home, and turns one of your favourite pantry staples into a warm, satisfying bowl.

    In this guide you’ll learn:

    • why plantain flour works brilliantly as breakfast, not just swallow
    • the exact step-by-step recipe for a 10-minute power porridge
    • topping ideas to keep things interesting all week
    • how to shop the ingredients quickly if you don’t already have them

    This article is for general food inspiration only and is not nutrition or medical advice.


    Why plantain flour works for breakfast

    Smooth Plantain Flour from Green Unison is made from 100% unripe plantains, gently dried and finely milled, with no additives. It’s naturally gluten-free and grain-free, and provides complex carbohydrates, potassium and resistant starch.

    In everyday language, that means a plantain-based porridge can help you:

    • feel more satisfied than a sugary snack
    • enjoy the familiar comfort of pap or custard
    • still keep things relatively light and simple

    Because the flour is milled very finely to make smooth amala ogede without sieving, it also blends quickly into hot liquid – perfect when you only have a few minutes.


    10-minute Smooth Plantain Flour breakfast porridge

    This recipe makes one generous adult bowl. Double or triple for the family.

    Ingredients

    Base

    • 3–4 tablespoons Smooth Plantain Flour (Elubo Ogede)
      – Order here: https://greenunison.com/product/nature-powered-plantain-flour/
    • 1 cup (240 ml) water
    • ½ cup (120 ml) milk of choice – dairy or plant-based
    • or use all water if you prefer
    • Small pinch of salt (optional)

    To sweeten (pick one)

    • 1–2 teaspoons honey or date syrup
    • or 1 ripe banana, mashed into the bowl

    Toppings (mix and match)

    • Sliced banana or other fresh fruit
    • A small handful of roasted groundnuts or any nuts you like
    • A sprinkle of seeds (e.g. sesame, sunflower, pumpkin)
    • A pinch of cinnamon or grated nutmeg

    Method (ready in about 10 minutes)

    1. Make a smooth plantain paste (2 minutes)
    • Add the plantain flour to a small bowl.
    • Whisk in 3–4 tablespoons of cool water to form a smooth, lump-free slurry.
    1. Heat your liquid (3 minutes)
    • Pour the remaining water and milk into a saucepan.
    • Add the pinch of salt if using.
    • Bring to a gentle simmer over medium heat.
    1. Cook the porridge (3–4 minutes)
    • Once the liquid is steaming, reduce the heat to low.
    • Slowly pour in the plantain slurry while whisking continuously.
    • Keep stirring as it thickens. Within a few minutes you should have a creamy, spoon-coating porridge.
    • If it becomes too thick, add a splash of hot water or milk and whisk until smooth again.
    1. Sweeten and serve (1–2 minutes)
    • Take the pot off the heat. Stir in honey, date syrup or mashed banana to taste.
    • Pour into a bowl and add your favourite toppings: groundnuts for crunch, slices of banana, a sprinkle of seeds, or a dusting of cinnamon.

    That’s it – a warm bowl of plantain power porridge in the time it takes some people to make a cup of tea.


    Easy variations to keep breakfast exciting

    Once you’ve nailed the basic method, you can tweak the bowl to suit your mood and what you have at home.

    1. Nutty energy bowl

    • Stir 1 tablespoon of peanut butter or groundnut paste into the porridge right at the end.
    • Top with chopped roasted groundnuts and banana slices.

    This adds extra creaminess and a satisfying nutty taste, pairing nicely with the mild flavour of unripe plantain flour.


    2. Coconut & cinnamon “weekend treat”

    • Replace half the milk with coconut milk.
    • Add a pinch of cinnamon or nutmeg while the porridge cooks.
    • Finish with toasted coconut flakes and a drizzle of honey.

    You get a fragrant, dessert-like porridge that still leans on familiar pantry staples.


    3. Plantain–corn swirl bowl

    If you love pap and tuwo, this is a fun twist that pulls both worlds together.

    • Cook your plantain porridge as above, but a little looser.
    • In a separate mug, whisk 1 tablespoon of Green Unison Silky Corn Flour into 2–3 tablespoons of water to form a smooth slurry.
    • Stir the corn flour slurry into the hot plantain porridge and simmer for another minute until thick and silky.

    The result is a plantain–corn hybrid porridge with the nostalgia of pap and the extra body of plantain flour. Use Green Unison’s finely milled corn flour for a smooth, lump-free result:
    https://greenunison.com/product/nature-powered-corn-flour/


    How much Smooth Plantain Flour do I need?

    For a creamy single-serve breakfast bowl:

    • 3–4 tablespoons Smooth Plantain Flour is usually enough for one adult, depending on how thick you like it.
    • A 1 kg pouch can give roughly 40 bowls at 25 g (about 3 tablespoons) per serving, so it stretches nicely for regular weekday breakfasts.

    If you’re feeding children or someone with a smaller appetite, simply halve the quantities and loosen the porridge with more water or milk.


    Frequently asked questions

    Is this porridge gluten-free?

    Smooth Plantain Flour from Green Unison is made from 100% unripe plantain with no wheat added, so it is naturally gluten-free.

    If you need to avoid gluten for health reasons, always check the full product label and speak with a qualified health professional for individual advice.


    Can I make it with only water?

    Yes. Using only water gives a lighter, more pap-like porridge. Using some milk makes it richer and creamier. You can also add a splash of evaporated milk or coconut milk on top when serving.


    Can I meal-prep this?

    Plantain porridge is best eaten fresh, but you can:

    • pre-mix dry ingredients (plantain flour plus spices) in jars,
    • or cook a batch and reheat gently with a splash of water or milk, whisking to smoothen again.

    Where to buy Smooth Plantain Flour and Corn Flour

    Ready to try this 10-minute power breakfast?

    • Smooth Plantain Flour (Elubo Ogede) – finely milled, no sieving needed, great for swallow, porridges, smoothies and baby foods:
      https://greenunison.com/product/nature-powered-plantain-flour/
    • Silky White/Yellow Corn Flour – quick-cooking, naturally gluten-free corn flour for tuwo, pap-style bowls and rustic baking:
      https://greenunison.com/product/nature-powered-corn-flour/

    Browse the full flour range in the eShop:
    https://greenunison.com/shop/


    Order in a few taps

    Prefer to order through chat rather than the website?

    • WhatsApp catalogue:
      https://wa.me/c/2348103043789
    • Chat directly to order Smooth Plantain Flour (pre-filled message):
      https://wa.me/2348103043789?text=Hi%20Green%20Unison%2C%20I%27d%20like%20to%20order%20Smooth%20Plantain%20Flour%20for%20breakfast%20porridge.

    Just tap send, confirm your pack size, and the team will guide you through delivery options.

  • 60-Second Calm Skin Routine with Herbal Infused Oils

    60-Second Calm Skin Routine with Herbal Infused Oils

    Some days your face has seen it all — heat, dust, AC, traffic, screen time — and you only have a minute to breathe.

    This calm skin routine is designed for those days: one infused oil + one minute of gentle massage to help your skin feel softer and your mind feel a little more relaxed.

    No complicated steps. No harsh actives. Just simple, nature-powered care you can actually keep up with.


    Why a Short, Gentle Face Massage Helps You Feel Calm

    A few things we know from research and real-life experience:

    • Gentle facial massage can support local blood flow for a short time, which may help your skin look a bit more awake and refreshed after you’re done.
    • Massage is naturally relaxing for many people — the slow pressure and repeated strokes can feel like a mini “reset” after a long day.
    • Simple routines are easier to stick with. Current skincare trends are moving towards “skin minimalism”: fewer, more thoughtful steps, done consistently, instead of a long routine you abandon after a week.

    This routine is not a medical treatment and it doesn’t promise to fix any skin condition. It’s a cosmetic, feel-good ritual to help you enjoy your infused oils in a safe, gentle way.


    Infused Oil vs Essential Oil (and Why It Matters for Your Face)

    If you’ve ever searched for “oils for glowing skin” or “herbal oil for face”, you’ve probably seen two main types: essential oils and infused oils.

    Here’s the simple breakdown:

    • Essential oils
    • Highly concentrated plant aroma.
    • Usually need to be diluted in another oil before touching skin.
    • Can easily be too strong or irritating if used directly.
    • Infused oils
    • Herbs (like mint, marigold or lavender) are gently soaked in a carrier oil.
    • Result is a milder, ready-to-use cosmetic oil designed for direct topical use (with a patch test).
    • Great for everyday massage and moisturising.

    In this routine we’re focusing on herbal infused oils — the kind Green Unison makes — because they’re designed as cosmetic oils for skin and hair, external use only, with a softer feel that suits quick, daily rituals.

    Always read the label, keep them away from eyes and broken skin, and stop using if irritation shows up.


    Step-by-Step: Calm Skin Routine in 60 Seconds

    You can do this in front of a mirror, at your desk (with clean hands), or before bed after cleansing.

    If your face is very sweaty or dusty, wash it gently and pat dry first.

    Step 1: Choose Your Infused Oil (10 seconds)

    Pick one infused oil that matches how you feel right now:

    Or browse the full Infused Oils collection and pick the one that calls your name today.

    New to a particular herb? Do a patch test on the inner arm and wait 24 hours before using it on your face.


    Step 2: Prep Your Hands & Skin (10 seconds)

    1. Wash your hands or clean them with a wipe.
    2. Put 2–4 drops of your chosen infused oil into your palm.
    3. Rub your palms together to spread and warm the oil slightly.

    You’re aiming for a light glide, not a heavy oil layer.


    Step 3: 60-Second Gentle Massage Map

    You can use fingers only — no tools needed. Keep pressure soft to medium, never rough.

    0–15 seconds – Calm the jaw & cheeks

    • Place your fingers along your jawline.
    • Gently glide upwards towards your ears, then up to the cheekbones.
    • Repeat these slow strokes 3–4 times while breathing out deeply.

    15–30 seconds – Smooth the cheeks outward

    • Place both hands on the centre of your face (beside the nose).
    • Glide your fingers outward towards the temples.
    • Think slow, sweeping strokes — like you’re wiping away the day’s stress.

    30–45 seconds – Relax the forehead

    • Start at the centre of your forehead.
    • Glide your fingers outwards towards the temples in horizontal strokes.
    • Keep your shoulders relaxed; don’t clench your jaw.

    45–60 seconds – Finish with a “hug” for your skin

    • Use both hands to gently “press and release” your cheeks:
    • Lightly press palms to cheeks.
    • Hold for 2–3 seconds.
    • Release.
    • Repeat over your forehead and chin.

    If you have time, you can repeat the whole cycle once more. If not, you’ve still done a complete 60-second calm ritual.


    Everyday Skin, Everyday Life: When to Use This Routine

    You can fit this mini-ritual into different moments of your day:

    • Morning: After cleansing, before sunscreen — especially when the air feels dry or dusty.
    • Midday reset: After washing your face or using a gentle mist at work/home.
    • Night: After cleansing, as the last step before lights out.

    Most people will be fine doing this once a day. If your skin is already using other active products (acids, retinoids, etc.), keep this routine very simple and listen to your skin. If anything stings or feels wrong, stop and rinse off with a gentle cleanser.


    Which Green Unison Infused Oil Fits You Best?

    Here’s a quick guide to help you choose, based on mood and feel, not skin “type” labels:

    All infused oils are cosmetic products for external use only. Do not eat them, keep them away from eyes and broken skin, and discontinue use if irritation occurs.


    Safety First: Gentle, Science-Aware Self Care

    A few important reminders:

    • Patch test: Always patch test a new oil on a small area (like inner arm) and wait 24 hours.
    • Avoid sensitive areas: Keep oils away from eyes, lips, and broken or irritated skin.
    • Less is more: A few drops are enough. You don’t need to drench your face.
    • Health conditions: If you have ongoing skin issues or are under medical care, talk to a qualified health professional before adding new products or rituals.

    This routine is about comfort and care, not diagnosing, treating, or curing any condition.


    Shop the Routine & Chat with Us 💬

    Ready to try your own 60-second calm skin ritual?


    Keep Reading: More Herbal Skin Rituals You’ll Love

    If you enjoyed this calm skin routine, you might also like:

    ✨ Save this routine, share it with a friend, and let your one-minute calm ritual become a small, steady gift you give your skin every day.

  • 10-Minute Banana Groundnut Pancakes: Healthy Breakfast You Can Actually Make

    Some mornings, you blink and it’s already almost time to step out.

    You want something warm, filling and a little bit special – not just dry bread and margarine again – but you don’t have 45 minutes to start making a full spread.

    That’s where these 10-minute banana groundnut pancakes come in. 🥞✨

    They use everyday pantry staples, are naturally sweetened with ripe banana, and get a gentle protein boost from groundnut flour – so breakfast actually feels satisfying, not “snack level”.


    Why quick, healthy pancakes are everywhere right now

    Look around online and you’ll notice the same pattern:

    • Short, step-by-step breakfast videos.
    • Recipes with 5–7 ingredients you can recognize.
    • A big shift toward high-protein, high-fibre breakfasts that keep you full longer.

    People are busy, but they still want:

    • Comfort food (hello, pancakes 🥞)
    • Without a heavy sugar crash
    • And without complicated, imported ingredients

    This recipe is built around exactly that: simple, familiar ingredients you probably already have at home, plus a few natural upgrades from the Green Unison eShop.


    What makes these pancakes feel “healthier” than the usual ones?

    This is still breakfast, not medicine – so we’re focusing on balance and better choices, not perfection.

    Here’s what’s different:

    1. Natural sweetness from ripe banana

    Instead of loading the batter with sugar, we let a ripe banana do most of the sweetening.

    You still get a soft, sweet pancake – but the sweetness comes packaged with fibre, potassium, and flavour, not just empty calories.

    You can always drizzle a little honey or date syrup on top if you like things sweeter, but the base recipe is already quite pleasant on its own.


    2. Extra protein and nuttiness from groundnut flour

    We add a few tablespoons of Finely-ground Groundnut Flour to the batter.

    Groundnut (peanut) flour is:

    • Naturally rich in plant protein and healthy fats
    • Finely milled so it mixes smoothly into batters and drinks
    • Traditionally used in soups, smoothies and “energy” snacks

    In this recipe, it does two important jobs:

    1. Adds that toasty, nutty flavour that banana loves.
    2. Gently increases the protein so breakfast feels more substantial.

    Many people find that breakfasts with some protein and fibre help them stay satisfied for longer and reduce mid-morning “what can I snack on now?” moments.


    3. Option to swap in local whole-grain flours

    You can use regular wheat flour if that’s what you have – but to keep things closer to whole foods, you can also swap in some of Green Unison’s flours:

    • Smooth Plantain Flour (Elubo Ogede)
      Naturally gluten-free, made from 100% unripe plantain, and finely milled. It’s usually used for amala ogede, but also works nicely in pancakes as a partial flour replacement.
    • Silky White/Yellow Corn Flour
      Finely milled Nigerian corn flour that mixes lump-free and adds a gentle corn flavour.

    For this recipe, the base is simple:

    • Wheat flour for structure (or a mix of wheat and plantain flour)
    • Groundnut flour for flavour + protein
    • Banana for sweetness
    • Egg for binding

    You can adjust the mix depending on what’s in your kitchen.


    10-Minute Banana Groundnut Pancake Recipe

    Serves: 1–2 (about 6 small pancakes)
    Total time: About 10 minutes (including mixing and cooking)

    Ingredients

    Wet ingredients

    • 1 ripe banana, medium (the more spotted, the sweeter)
    • 1 egg (or flax “egg” – see notes below)
    • 1/4 cup milk (dairy or plant-based)
    • 1 teaspoon vegetable oil or melted butter for the batter (optional, for tenderness)

    Dry ingredients

    For cooking

    • 1–2 teaspoons oil or butter for the pan (choose the one you prefer)

    Optional toppings

    • Fresh fruit (banana slices, pawpaw, berries, etc.)
    • A small drizzle of honey or date syrup
    • A spoon of yogurt
    • A sprinkle of chopped roasted groundnuts

    Step 1 – Mash, whisk, and mix (3 minutes)

    1. In a medium bowl, peel and mash the banana with a fork until smooth with only tiny lumps.
    2. Add the egg and whisk together until the mixture looks uniform.
    3. Pour in the milk and optional oil or melted butter; mix well.

    In a separate small bowl, combine:

    • Wheat flour (or wheat + plantain flour)
    • Groundnut flour
    • Baking powder
    • Salt
    • Cinnamon (if using)

    Gently add the dry mix into the wet mix and fold until just combined.

    The batter should be slightly thick but still pourable.
    If it looks too thick, add a splash more milk. If it looks watery, sprinkle in a little more wheat or plantain flour.


    Step 2 – Heat the pan (1 minute)

    1. Place a non-stick pan or flat frying pan on medium heat.
    2. Allow it to warm up, then add a small teaspoon of oil or butter and swirl to coat the surface lightly.

    You want the pan hot enough that a drop of batter sizzles gently but doesn’t burn immediately.


    Step 3 – Cook the pancakes (5–6 minutes)

    1. Scoop about 2 tablespoons of batter per pancake onto the pan.
    2. Let it cook for 2–3 minutes, until:
    • You see small bubbles on the surface, and
    • The edges look slightly set.
    1. Gently flip with a spatula and cook the other side for another 1–2 minutes until golden brown.

    Because of the banana and groundnut flour, these pancakes brown a bit faster than plain ones, so keep the heat at medium rather than high.

    Repeat until all the batter is used, adding a few drops of oil between batches if needed.


    Step 4 – Serve and enjoy

    Stack the warm pancakes on a plate and add your favourite toppings:

    • Sliced banana or other fruit
    • A light drizzle of honey or date syrup
    • A spoon of yogurt and a sprinkle of chopped roasted groundnuts for crunch

    Serve immediately for the best texture – soft inside, gently crisp at the edges. 🥞💛


    Ingredient swaps and variations (using what’s in your kitchen)

    The aim is to work with what you already have, while giving gentle upgrades.

    1. Make it more filling with plantain flour

    Want a little more fibre and a different flavour?

    Swap half of the wheat flour for
    Smooth Plantain Flour (Elubo Ogede).

    • Start with this ratio:
    • 2 tbsp wheat flour + 2 tbsp plantain flour
    • You may need a tiny splash more milk, because plantain flour can thicken the batter slightly.

    The result: pancakes with a soft, slightly denser bite and a subtle plantain note.


    2. Corn pancake twist

    If you enjoy the taste of cornmeal pancakes or “almost akara vibes” in your breakfasts, you can swap part of the wheat flour for

    Silky White/Yellow Corn Flour.

    Try:

    • 2 tbsp wheat flour
    • 1 tbsp corn flour
    • 1 tbsp plantain flour (optional)
    • 2 tbsp groundnut flour

    This gives a pancake with a comforting corn flavour, still held together by the wheat and egg.


    3. Egg-free / vegan variation

    If you avoid eggs, you can make a quick flax “egg”:

    • Mix 1 tablespoon ground flaxseed with 3 tablespoons water, stir and let it sit for 5 minutes until gel-like.
    • Use this instead of the egg and pair it with plant-based milk.

    The pancakes may be slightly less fluffy, but still soft and tasty. Make them smaller (bite-size) so they flip easily.


    4. For baby / toddler breakfasts

    For toddlers who already eat eggs and peanuts safely:

    • Make the pancakes small – mini circles that are easy to pick up.
    • Go light on salt and skip the honey (especially for children under 1).
    • Serve with soft fruit and yogurt instead of sugary syrups.

    Always consider any allergies and your paediatrician’s advice when introducing new foods.


    Simple breakfast FAQ (based on real kitchen questions)

    “Can I make the batter ahead and fry later?”

    You can mix the dry ingredients ahead and keep them in an airtight jar.

    When you’re ready to cook, just:

    • Mash banana
    • Add egg + milk
    • Stir in a few spoons of your premixed dry blend

    Because baking powder works best freshly mixed, it’s better not to keep the wet batter sitting for long hours.


    “Do I have to use groundnut flour?”

    No – but it really helps with flavour and texture.

    If you leave out Finely-ground Groundnut Flour, you can:

    • Add a tablespoon of oil or a spoon of peanut butter to keep some richness, or
    • Use a bit more wheat flour and accept a milder flavour.

    If you have peanut allergies in the house, skip groundnut flour completely and use only wheat/plantain/corn flour and banana.


    “Is this ‘diet’ food?”

    Not really. These pancakes are:

    • Made from familiar, minimally processed ingredients
    • Naturally sweetened mostly with fruit
    • Gently boosted with plant protein and fibre

    They’re not a “miracle weight loss” recipe – just a smarter everyday breakfast that feels comforting and keeps you going.


    “What can I drink with it?”

    A warm, soothing herbal tea goes beautifully with pancakes.

    If you’d like a refreshing, caffeine-free option, you can try our guide on brewing spearmint tea using dried spearmint leaves here:

    It’s a nice way to bring more herbs into your morning routine.


    How to get the ingredients from Green Unison

    You don’t need to stress about hunting for good flours around town. You can get everything delivered:

    Explore more in the full eShop here:


    Ready to try it? Here’s your next step 💚

    If this recipe sounds like something you’d actually make on a busy morning, here’s how we can help you get started quickly:

    • 📦 View products and prices at a glance:
      Open our WhatsApp catalog to see all flour and pantry options in one place.
    • 💬 Chat with us on WhatsApp for help choosing products:
      Tap below to send us a message and we’ll guide you on what to order for these pancakes and other quick breakfasts: Chat with Green Unison on WhatsApp

    When you try the recipe, feel free to share a photo and tag us – we love seeing real breakfasts made with our farm-powered ingredients.

    Here’s to warm, nourishing pancakes that actually fit into real-life mornings. 🥞💚

  • No Sand, No Stress: Roasting Groundnuts with Garri (Step‑By‑Step DIY Guide)

    No Sand, No Stress: Roasting Groundnuts with Garri (Step‑By‑Step DIY Guide)

    If you grew up snacking on hot roasted groundnuts, you already know how addictive that crunch can be.

    What many people don’t know is that you can get that same street‑style flavour at home without sand, without an oven, and without stress — just a pan and a little garri.

    In this guide, we’ll walk through a simple, local way to roast groundnut with garri, using everyday tools. We’ll also share practical tips on how to keep it crunchy, how to reuse the garri, and how to store the nuts so they stay fresh for longer.

    For a clean and convenient starting point, we’ll assume you’re using Carefully Dried Groundnuts – Rich in Protein and Healthy Fats, which are already pre‑dried and roast‑ready.


    Why roast groundnuts at home?

    Roasting your own groundnuts comes with a few big advantages:

    • You control the salt. Lightly salted? Extra savoury? You choose.
    • You control the freshness. Roast in small batches and enjoy them at their best.
    • You know what went into it. No mystery oil, no extra additives.
    • You can use them many ways. As a snack, for garri, peanut butter, soup base and more.

    And of course, there’s the joy of doing it yourself — especially if you’re a DIY lover.


    Why use garri instead of sand?

    Traditionally, many sellers use fine sand to roast groundnuts because it distributes heat evenly. At home, that’s not always practical.

    Garri is a handy alternative because:

    • It’s easy to get and already in most pantries.
    • It helps distribute heat so the nuts roast more evenly.
    • It acts like a buffer between the nuts and the hot pan, reducing the chance of burning.
    • It’s much easier to clean off the nuts than sand.
    • It can be reused for another roasting session when handled properly.

    The key is low heat and constant stirring — once you master that, this method is very forgiving.


    What you’ll need

    • 2 cups raw groundnuts (peanuts), shelled
    • For quick prep, use Carefully Dried Groundnuts – Rich in Protein and Healthy Fats.
    • ½–1 cup plain garri (white or yellow is fine)
    • 1–2 tablespoons salt (adjust to taste)
    • Hot water (just boiled)
    • Mixing bowl
    • Sieve or colander
    • Flat tray or wide plate
    • Wide, dry frying pan
    • Wooden or heat‑safe spatula
    • Airtight container or clean jar with a tight lid

    Step‑by‑step: how to roast groundnut with garri

    1. Sort (quickly) and measure

    If you’re using market groundnuts, pick out stones, shrivelled nuts or any debris.

    If you’re using Carefully Dried Groundnuts – Rich in Protein and Healthy Fats, they’re already carefully selected, but it’s still good practice to glance through them and remove anything you don’t like.

    Measure out about 2 cups of groundnuts into a bowl.


    2. Salt soak with hot water

    1. Add 1–2 tablespoons of salt over the groundnuts in the bowl.
    2. Pour enough hot water to fully cover the nuts.
    3. Stir so the salt distributes evenly.
    4. Let the groundnuts soak for about 5 minutes.

    This quick soak lets a little salt enter the skin and helps the nuts roast more evenly.

    If you prefer very lightly salted groundnuts, use less salt or rinse an extra time later.


    3. Rinse and drain

    1. Pour the groundnuts into a sieve or colander.
    2. Rinse briefly under clean water to remove excess surface salt.
    3. Shake the sieve gently to remove as much water as possible.

    At this stage, the nuts should be damp but not dripping.


    4. Pre‑dry on a tray (sun or fan)

    Spread the damp groundnuts out in a single layer on a flat tray or wide plate.

    • If there is good sunlight, sun‑dry for about 2 hours.
    • If the weather is dull, place the tray in a well‑ventilated spot and let a fan blow over it.

    You’re not trying to fully dry them like raw nuts again — just enough so they are no longer wet on the surface. Slightly moist inside, dry on the outside, is perfect for even roasting.

    You’ll know they’re ready when:

    • The skins no longer look shiny‑wet.
    • The nuts separate easily when you run your fingers through them.

    5. Preheat the garri

    1. Place a dry frying pan on low heat.
    2. Pour in ½–1 cup of garri, depending on the size of your pan and the quantity of groundnuts. The nuts should sit inside the garri, not on bare metal.
    3. Stir for a minute or two to warm the garri.

    The garri should feel hot when you hover your hand above it, but it should not be browning yet.


    6. Add the groundnuts

    Gently pour the prepared groundnuts into the pan of hot garri.

    Immediately start stirring and folding so that:

    • Garri covers the groundnuts.
    • The nuts are constantly moving and not sitting on one spot.

    Think of it as shallow‑frying in dry garri instead of oil.


    7. Stir, rest your hand, then stir again

    This is the part your arm will remember.

    • Keep the heat low to medium‑low.
    • Stir continuously for a few minutes.
    • You can rest your hand for about 5 seconds, but don’t walk away — return to stirring so nothing burns.

    Low, steady heat + frequent stirring = evenly roasted nuts and garri that doesn’t burn before the nuts are ready.

    You’ll start to hear gentle popping sounds and smell that familiar roasted aroma.


    8. Watch the colour

    As the nuts roast:

    • The groundnut skins shift from a raw, pale tone to a light golden‑brown.
    • The garri also changes colour, picking up some of the oil and colour from the nuts.

    A good rule of thumb from the kitchen:

    Your groundnut is ready when the garri is roughly the same colour as the nuts.

    If you like a deeper roast (more brown, more intense flavour), keep going for a few extra minutes, still on low heat, stirring consistently.


    9. Take off the heat and separate

    Once you’re happy with the colour:

    1. Turn off the heat.
    2. Pour the contents of the pan into a dry sieve placed over a bowl or tray.
    3. Shake gently so the garri falls through and the groundnuts stay in the sieve.

    Spread the hot groundnuts on a tray so they can cool quickly and evenly.

    Important: They will feel slightly soft while still hot. Don’t panic — they get crunchier as they cool down.


    10. Let them cool completely

    Allow the roasted groundnuts to cool down completely at room temperature.

    • This can take 20–30 minutes depending on the room temperature and the amount roasted.
    • Avoid covering them while they are still hot — trapped steam can soften them again.

    Once cool, taste a few. If they taste slightly under‑roasted for your liking, you can return them to the pan with a little fresh garri and roast for a few more minutes.


    11. Peel (optional) and clean

    If you like skinless groundnuts:

    1. Rub small handfuls between your palms to loosen the skins.
    2. Gently blow away the chaff outside or over the sink, or use a fan to help separate skins from nuts.

    If you don’t mind the skins, you can skip this step completely and enjoy them as‑is.


    12. Store in an airtight container

    Transfer the fully cooled roasted groundnuts into a clean, dry, airtight container:

    • A glass jar with a tight lid
    • A food‑grade plastic container
    • Or resealable pouches

    Store in a cool, dry place away from direct heat and strong smells.

    For best flavour, aim to finish a batch within 2–3 weeks. If you’re roasting a lot at once, you can keep part of it in the freezer in a well‑sealed container and bring it out in small portions.


    What about the garri — can you reuse it?

    Yes, you can reuse the garri for another roasting session as long as:

    • It hasn’t burned.
    • It’s not full of groundnut skins or debris.
    • It’s been stored in a clean, dry container after cooling completely.

    Simply cool the garri, sieve out loose skins or burnt particles, and keep it airtight until the next time you want to roast.

    To keep things simple and hygienic, it’s best to reuse this garri mainly for roasting, not for drinking or soaking as regular garri.


    Pro tips for consistently crunchy groundnuts

    • Low heat is your best friend. High heat will burn the outer layer before the inside cooks.
    • Don’t overload the pan. Roast in batches if you have a small pan.
    • Listen for the pops. Gentle popping and a strong roasted aroma usually mean you’re close.
    • Remember the cool‑down effect. If they are already very crunchy while hot, they may end up too hard when fully cool.
    • Salt carefully. You can always sprinkle a little fine salt after roasting; it’s harder to fix “too salty”.

    Quick ways to enjoy your roasted groundnuts

    Once you’ve nailed this method, the options are almost endless:

    • Snack on them plain or lightly salted.
    • Pair them with chilled soaked garri, sugar and milk if you like.
    • Sprinkle over salads or grain bowls for extra crunch.
    • Blend into quick homemade peanut butter.
    • Use them as a base for sauces and soups.

    And because you roasted them yourself, you know exactly how they were handled from start to finish.


    FAQs

    1. Do I still need to sort Green Unison groundnuts before roasting?

    Carefully Dried Groundnuts – Rich in Protein and Healthy Fats are already sorted and dried, so there’s no sand to worry about. A quick visual check before soaking is still a good habit.


    2. Should I use white or yellow garri?

    Both work. Use plain garri without sugar, milk, pepper or flavourings. The colour of the garri doesn’t affect the method — only the final shade, and even that is minor.


    3. Can I use this method without sun‑drying?

    Yes, but you still need to get surface moisture down.

    If the sun isn’t strong, spread the soaked nuts on a tray near a fan or in a breezy spot until they stop looking wet. Going straight from water to pan makes them steam instead of roast.


    4. Can I roast groundnuts in a non‑stick pan?

    Yes, as long as you:

    • Keep the heat low to medium‑low.
    • Use only wooden or silicone utensils that are safe for your pan’s coating.
    • Avoid scratching the surface while stirring.

    5. Is this method suitable for people with peanut allergy?

    No. If you or anyone around you has a peanut or nut allergy, this snack is not suitable. Always follow medical advice and keep roasted groundnuts away from anyone who is allergic.


    Ready to try it?

    If you’re excited to test this method, start with groundnuts that are already clean and roast‑ready:

    Prefer to order by chat?

    Once you’ve tried this sand‑free garri method, tag us in your photos and let us know: team light‑golden roast or team deep‑brown roast? 😉

  • Mint Tea for Digestion: How to Brew Peppermint, Spearmint & Menthol Mint the Right Way

    Mint Tea for Digestion: How to Brew Peppermint, Spearmint & Menthol Mint the Right Way

    You know that feeling after a really good meal — when your heart is happy but your stomach feels a bit too full?

    More and more people are turning to simple herbal teas after meals, and mint is constantly showing up in short videos, wellness posts and search results as a gentle way to support digestion. It’s not just hype. Mint leaves naturally contain aromatic compounds (like menthol and carvone) that can relax the smooth muscles of the digestive tract, which may ease gas, bloating and general discomfort after eating.

    In this guide, you’ll learn:

    • Why mint works so well as an after-meal tea
    • The difference between everyday mint, peppermint, spearmint and menthol mint
    • Exactly how to brew each one for digestive comfort
    • When to drink it, and how to make it part of your evening ritual

    Throughout, you’ll see links to our farm-grown dried mint leaves, so you can easily recreate these brews at home.


    Why mint and digestion go so well together

    Mint leaves are rich in essential oils that give them that fresh, cooling aroma. Two of the most important are menthol and carvone.

    Modern nutrition and herbal research suggests that:

    • Menthol can have gentle antispasmodic effects — in plain language, it can help relax the smooth muscles in the digestive tract. This relaxed state may allow food and gas to move more comfortably, easing feelings of tightness or cramping after a meal.
    • Spearmint oils (menthol plus carvone) are also associated with smoother digestion and reduced post-meal discomfort in traditional use and emerging research.

    That’s why peppermint and spearmint teas often show up in lists of drinks and foods that can help with bloating and digestive comfort.

    Mint tea is not a medicine and not a cure for any disease. Think of it as a comforting, caffeine-free drink that can gently support your digestion and help you feel lighter after meals.

    If you have ongoing or severe digestive symptoms, always speak with a health professional first.


    Meet your mint trio: which one fits your cup?

    Green Unison’s dried herb range includes a family of mint options. All are grown and dried locally, but they have different personalities in the cup.

    1. Everyday dried mint leaves – the easy all-rounder

    If you just want a simple “after-meal mint tea”, reach first for Nature Powered Dried Mint Leaves.

    • Flavour: clean, refreshing, not too strong
    • Best for: daily sips, after lunch or dinner, or as a chilled mint drink on hot days
    • Great if: you want one bag that works for tea, infused water, lemonades and light cooking

    Because the flavour is balanced, this is the perfect starting point if you’re new to mint tea for digestion.


    2. Dried peppermint leaves – bold & cooling

    When people talk about mint tea for bloating and digestive comfort, peppermint is usually what they mean. Our Nature Powered Dried Peppermint Leaves are all about that bold, cooling taste.

    • Flavour: strong menthol “cooling” sensation, like a deep breath for your tummy
    • Best for: heavy meals, oily meals, or evenings when your stomach feels especially full
    • Great if: you love a strong minty aroma and a very “fresh” finish

    Peppermint is the go-to choice when you want your tea to feel like a reset after a big plate of rice, stew, swallow, beans, or late-night snacking.


    3. Dried spearmint leaves – sweet & gentle

    Some people find peppermint a bit too intense. That’s where spearmint shines. Our Nature Powered Dried Spearmint Leaves have a naturally sweet, smooth flavour.

    • Flavour: mild, gentle, slightly sweet
    • Best for: lighter meals, evening wind-down, or anyone sensitive to strong mint
    • Great if: you want digestive support in a tea that feels soft and comforting

    Recent articles even describe spearmint tea as a “mini reset” for digestion, thanks to essential oils that help relax the digestive tract and ease that post-meal tightness.


    4. Dried menthol mint – extra cool & focused

    If peppermint is bold, menthol mint is the cool cousin with extra “aaah”.

    Our Nature Powered Dried Menthol Mint is blended for a distinctly cool, minty cup:

    • Flavour: very cooling, crisp and focused
    • Best for: days when you want a seriously minty, refreshing tea
    • Great if: you enjoy strong herbal flavours and love the feeling of deep freshness after a meal

    Because menthol mint is so expressive, a little goes a long way — it’s perfect on its own or mixed with regular dried mint for balance.


    How to brew mint tea for digestive comfort (step-by-step)

    Good mint leaves are the first step. The second step is brewing them properly, so you capture the aromatic oils that make the tea both flavourful and soothing.

    Below is a simple guide you can use with any of our dried mint products.

    Basic ratio

    • 1 teaspoon of dried mint leaves
    • 250 ml of hot water (about one standard mug)

    This is the same ratio we recommend on our product pages for classic mint and peppermint tea.

    Step-by-step brewing method

    1. Heat your water
      Bring fresh water to a gentle boil, then let it sit for 30–60 seconds. You want it hot, not aggressively boiling, so you don’t bruise the delicate leaves.
    2. Measure your mint
      Add about 1 teaspoon of:
    1. Cover while it steeps
      Pour the hot water over the leaves, then cover the cup or teapot. This is crucial. Covering helps trap the aromatic oils (including menthol) instead of letting them escape with the steam.
    2. Steep for the right time
    • Everyday mint or peppermint: 5–7 minutes
    • Spearmint or menthol mint: 6–8 minutes (they’re a bit gentler and benefit from a slightly longer steep)
    1. Strain and sip slowly
      Strain out the leaves. Taste before adding sweetener — many people find mint tea naturally refreshing. If you like, add a little honey or sugar and a slice of lemon.
    2. Optional: turn it into iced mint tea
      Let the tea cool, then pour over ice. Perfect for hot afternoons or after spicy foods.

    When should you drink mint tea?

    You can enjoy mint tea almost any time of day, but for digestion support many people like to drink it:

    • After meals – especially heavy or late meals
    • Between meals – as a light, hydrating drink that doesn’t weigh you down
    • In the evening – as a caffeine-free way to unwind before bed

    Recent wellness pieces from dietitians and gut-health experts often include peppermint tea on lists of drinks that may help with occasional bloating and gas, thanks to its relaxing effect on digestive muscles.

    Again, this isn’t a guarantee or a treatment — it’s simply a small daily habit that many people find comforting.


    Which mint should you choose? (Quick guide)

    If you’re not sure where to start, use this simple guide:

    You can’t really go wrong — choose based on your taste and how strong or gentle you want the cup to feel.


    Simple flavour twists that stay digestion-friendly

    Stay focused on mint as your base and keep additions simple so they don’t overshadow the herb.

    1. Mint + warm ginger slices

    Add 2–3 thin slices of fresh ginger while steeping your mint.

    • Feels warming in the stomach
    • Perfect when you’ve had a very rich or spicy meal

    Just remember that ginger itself can be quite strong, so keep your mint ratio the same and adjust the ginger to taste.


    2. Mint + lemon wedge (hot or iced)

    After steeping your mint, squeeze in a little fresh lemon and add a small wedge.

    • Brightens the flavour
    • Makes an excellent iced “digestive” drink for hot afternoons

    Because citrus can be sharp, start with a small squeeze and build from there.


    3. Mint + lemongrass

    For an aromatic, spa-like cup, combine mint with lemongrass:

    The result is a citrusy-minty tea that feels very refreshing without being heavy.


    How much mint tea is okay?

    For most healthy adults, 1–3 mugs of herbal mint tea spread through the day is a common pattern. Mint tea is naturally caffeine-free, so it won’t keep you awake the way regular tea or coffee might.

    However, a few gentle reminders:

    • If you have acid reflux or very frequent heartburn, mint may not be ideal for you, because menthol can relax the muscle between the stomach and the food pipe in some people.
    • If you’re pregnant, breastfeeding, on medication, or managing a medical condition, talk to your health-care provider before making strong herbal teas a daily habit.
    • Stop or reduce intake if you notice any discomfort that seems to be linked to the tea.

    This blog is for education only. It does not replace medical advice, diagnosis or treatment.


    Bringing it home: brew your own mint-tea ritual

    The beauty of mint tea is how simple it is:

    1. Scoop a spoon of good quality dried mint.
    2. Add hot water.
    3. Cover.
    4. Wait a few minutes.
    5. Sip slowly and give your body a chance to relax.

    To help you build your own after-meal ritual, you can shop our farm-grown mint range here:

    Or explore all our herbal ingredients on the Dried Herbs eShop.


    Ready to order or ask a quick question?

    If you’d like help choosing the right mint for your kitchen, or you’re ready to order, chat with us directly:

    We’ll help you pick a mint blend that fits your taste, your meals and your routine — and get it to your doorstep as quickly as possible.

    Enjoy your next cup, and here’s to calmer, happier digestion. 🌿☕

  • How Dried Peppermint Can Preserve Farm Produce and Extend Shelf Life

    How Dried Peppermint Can Preserve Farm Produce and Extend Shelf Life

    Dried peppermint plants are more than just a natural remedy or tea ingredient—they can also serve as a powerful, eco-friendly way to preserve farm produce and extend its shelf life. Thanks to their antimicrobial and aromatic properties, dried peppermint helps keep produce fresh longer without relying on synthetic chemicals.

    Here’s how dried peppermint can be used for natural food preservation:


    1. Natural Pest Repellent

    • How It Works: Dried peppermint emits a strong aroma that repels insects like fruit flies, moths, and other pests that spoil farm produce.
    • How to Use:
      • Place dried peppermint leaves in breathable sachets (e.g., muslin or cloth bags) and store them alongside fruits, vegetables, or grains in your storage area.
      • Scatter dried peppermint around the storage space to keep pests away.
    • Benefits: Protects produce without using harmful pesticides, keeping it safe and chemical-free.

    2. Antimicrobial Action

    • How It Works: Peppermint contains natural antimicrobial compounds, such as menthol, which slow down the growth of bacteria and fungi that cause spoilage.
    • How to Use:
      • Sprinkle crushed dried peppermint directly over produce like grains or beans stored in sacks to inhibit microbial growth.
      • Store fresh fruits and vegetables in containers lined with dried peppermint leaves.
    • Benefits: Reduces mold and bacteria, helping to extend the shelf life of farm produce naturally.

    3. Aromatic Absorption of Ethylene Gas

    • How It Works: Many fruits, such as bananas and apples, release ethylene gas as they ripen. This gas can speed up the ripening and spoilage of nearby produce. Dried peppermint can help absorb excess gas and regulate the ripening process.
    • How to Use:
      • Place a few dried peppermint sachets in storage containers or fruit baskets to help maintain freshness.
    • Benefits: Keeps produce fresher for longer and slows down ripening.

    4. Preserving Grains and Seeds

    • How It Works: Peppermint’s natural oils repel pests like weevils and reduce the risk of fungal contamination in stored grains and seeds.
    • How to Use:
      • Mix dried peppermint leaves with grains like rice, maize, or wheat before sealing them in storage bags or bins.
      • Place small sachets of dried peppermint in storage containers.
    • Benefits: Prevents pest infestations and keeps grains dry and mold-free.

    5. Infusing Storage Spaces with Freshness

    • How It Works: The natural aroma of dried peppermint not only repels pests but also keeps storage areas smelling fresh, which can be particularly useful in large storage facilities or pantries.
    • How to Use:
      • Hang dried peppermint bundles or sachets in storage rooms.
      • Scatter leaves on shelves or place them in the corners of storage areas.
    • Benefits: Maintains a clean and pest-free environment for produce storage.

    Why Use Dried Peppermint for Food Preservation?

    • Eco-Friendly Solution: Dried peppermint is a natural and sustainable alternative to chemical preservatives and pesticides.
    • Safe and Non-Toxic: Unlike chemical treatments, peppermint doesn’t leave harmful residues on produce.
    • Cost-Effective: A little dried peppermint goes a long way in keeping produce fresh and pest-free.

    Why Choose Green Unison’s Dried Peppermint Plants?

    At Green Unison, our dried peppermint plants are organically grown, ensuring they’re safe for food preservation while supporting sustainable farming practices. By choosing Green Unison, you’re not only protecting your produce but also contributing to a healthier planet.


    Order Your Dried Peppermint Plants Today!

    Preserve your farm produce naturally with Green Unison’s dried peppermint plants. Order now and enjoy fresher, longer-lasting produce while supporting a greener future!

  • Creative Ways to Use Dried Peppermint in Event Decoration

    Creative Ways to Use Dried Peppermint in Event Decoration

    Dried peppermint plants aren’t just for tea or skincare—they can also bring a refreshing, natural charm to your event decorations. Whether you’re hosting a wedding, party, or seasonal celebration, dried peppermint adds a unique touch with its calming aroma and rustic beauty. Here are some creative ways to incorporate dried peppermint into your event decor:


    1. Aromatic Table Centerpieces

    • How to Use: Combine dried peppermint with flowers, candles, and greenery to create stunning centerpieces. Place the peppermint leaves around the base of candles or scatter them on the table for a fragrant, earthy vibe.
    • Best For: Weddings, dinner parties, or holiday gatherings.
    • Why It Works: The natural scent of peppermint adds a refreshing element to your event while enhancing the aesthetic appeal of your tables.

    2. DIY Potpourri Bowls

    • How to Use: Fill decorative bowls or mason jars with dried peppermint, dried citrus peels, lavender, or cinnamon sticks. Place them around the venue to infuse the air with a fresh, invigorating scent.
    • Best For: Intimate events like bridal showers, baby showers, or cozy holiday parties.
    • Why It Works: Potpourri is both functional and decorative, offering a natural way to keep the space smelling fresh.

    3. Dried Peppermint Garland

    • How to Use: String dried peppermint sprigs together with twine, ribbons, or beads to create a fragrant garland. Use it to decorate tables, doorways, or arches.
    • Best For: Rustic, bohemian, or nature-themed events.
    • Why It Works: The rustic charm of dried herbs enhances any nature-inspired decor.

    4. Gift or Favor Accents

    • How to Use: Attach small bundles of dried peppermint leaves to event favors or gift bags. Tie them with a ribbon or twine for a personalized, eco-friendly touch.
    • Best For: Weddings, corporate events, or seasonal parties.
    • Why It Works: Guests will appreciate the refreshing scent and thoughtfulness of this unique accent.

    5. Peppermint Sachets for Guests

    • How to Use: Fill small breathable fabric bags (e.g., muslin or organza) with dried peppermint and place them on guests’ seats or tables.
    • Best For: Outdoor events or weddings as a take-home keepsake.
    • Why It Works: These sachets act as both decor and a natural mosquito repellent, especially for outdoor celebrations.

    6. Peppermint Confetti or Scatter

    • How to Use: Crush dried peppermint leaves into small pieces and use them as biodegradable confetti for wedding send-offs or as table scatter around candles and centerpieces.
    • Best For: Eco-conscious weddings and outdoor celebrations.
    • Why It Works: It’s an environmentally friendly alternative to synthetic confetti, adding natural beauty and fragrance to your event.

    7. Candle Enhancements

    • How to Use: Sprinkle dried peppermint around candles in glass jars or place sprigs inside clear candle holders for a decorative touch.
    • Best For: Evening events, romantic dinners, or holiday parties.
    • Why It Works: The peppermint adds visual appeal while enhancing the ambiance with its scent.

    Why Use Dried Peppermint for Event Decoration?

    • Eco-Friendly: Dried peppermint is a sustainable alternative to synthetic decorations.
    • Aromatic Appeal: Its refreshing scent enhances the atmosphere naturally.
    • Versatility: Peppermint complements rustic, elegant, and seasonal decor themes alike.

    Make Your Event Unforgettable with Green Unison’s Dried Peppermint Plants

    At Green Unison, we take pride in providing high-quality, organically grown dried peppermint plants that are perfect for creative uses like event decoration. When you choose our products, you’re not just making your event special—you’re also supporting sustainable farming and helping protect the planet.


    Order Your Dried Peppermint Plants Today!

    Add a refreshing, eco-friendly touch to your next event with Green Unison’s dried peppermint plants. Order now and let nature elevate your celebration!