Author: Ayodotun Ayodele

  • No Sand, No Stress: Roasting Groundnuts with Garri (Step‑By‑Step DIY Guide)

    No Sand, No Stress: Roasting Groundnuts with Garri (Step‑By‑Step DIY Guide)

    If you grew up snacking on hot roasted groundnuts, you already know how addictive that crunch can be.

    What many people don’t know is that you can get that same street‑style flavour at home without sand, without an oven, and without stress — just a pan and a little garri.

    In this guide, we’ll walk through a simple, local way to roast groundnut with garri, using everyday tools. We’ll also share practical tips on how to keep it crunchy, how to reuse the garri, and how to store the nuts so they stay fresh for longer.

    For a clean and convenient starting point, we’ll assume you’re using Carefully Dried Groundnuts – Rich in Protein and Healthy Fats, which are already pre‑dried and roast‑ready.


    Why roast groundnuts at home?

    Roasting your own groundnuts comes with a few big advantages:

    • You control the salt. Lightly salted? Extra savoury? You choose.
    • You control the freshness. Roast in small batches and enjoy them at their best.
    • You know what went into it. No mystery oil, no extra additives.
    • You can use them many ways. As a snack, for garri, peanut butter, soup base and more.

    And of course, there’s the joy of doing it yourself — especially if you’re a DIY lover.


    Why use garri instead of sand?

    Traditionally, many sellers use fine sand to roast groundnuts because it distributes heat evenly. At home, that’s not always practical.

    Garri is a handy alternative because:

    • It’s easy to get and already in most pantries.
    • It helps distribute heat so the nuts roast more evenly.
    • It acts like a buffer between the nuts and the hot pan, reducing the chance of burning.
    • It’s much easier to clean off the nuts than sand.
    • It can be reused for another roasting session when handled properly.

    The key is low heat and constant stirring — once you master that, this method is very forgiving.
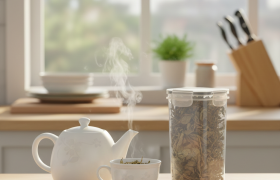

    What you’ll need

    • 2 cups raw groundnuts (peanuts), shelled
    • For quick prep, use Carefully Dried Groundnuts – Rich in Protein and Healthy Fats.
    • ½–1 cup plain garri (white or yellow is fine)
    • 1–2 tablespoons salt (adjust to taste)
    • Hot water (just boiled)
    • Mixing bowl
    • Sieve or colander
    • Flat tray or wide plate
    • Wide, dry frying pan
    • Wooden or heat‑safe spatula
    • Airtight container or clean jar with a tight lid

    Step‑by‑step: how to roast groundnut with garri

    1. Sort (quickly) and measure

    If you’re using market groundnuts, pick out stones, shrivelled nuts or any debris.

    If you’re using Carefully Dried Groundnuts – Rich in Protein and Healthy Fats, they’re already carefully selected, but it’s still good practice to glance through them and remove anything you don’t like.

    Measure out about 2 cups of groundnuts into a bowl.


    2. Salt soak with hot water

    1. Add 1–2 tablespoons of salt over the groundnuts in the bowl.
    2. Pour enough hot water to fully cover the nuts.
    3. Stir so the salt distributes evenly.
    4. Let the groundnuts soak for about 5 minutes.

    This quick soak lets a little salt enter the skin and helps the nuts roast more evenly.

    If you prefer very lightly salted groundnuts, use less salt or rinse an extra time later.


    3. Rinse and drain

    1. Pour the groundnuts into a sieve or colander.
    2. Rinse briefly under clean water to remove excess surface salt.
    3. Shake the sieve gently to remove as much water as possible.

    At this stage, the nuts should be damp but not dripping.


    4. Pre‑dry on a tray (sun or fan)

    Spread the damp groundnuts out in a single layer on a flat tray or wide plate.

    • If there is good sunlight, sun‑dry for about 2 hours.
    • If the weather is dull, place the tray in a well‑ventilated spot and let a fan blow over it.

    You’re not trying to fully dry them like raw nuts again — just enough so they are no longer wet on the surface. Slightly moist inside, dry on the outside, is perfect for even roasting.

    You’ll know they’re ready when:

    • The skins no longer look shiny‑wet.
    • The nuts separate easily when you run your fingers through them.

    5. Preheat the garri

    1. Place a dry frying pan on low heat.
    2. Pour in ½–1 cup of garri, depending on the size of your pan and the quantity of groundnuts. The nuts should sit inside the garri, not on bare metal.
    3. Stir for a minute or two to warm the garri.

    The garri should feel hot when you hover your hand above it, but it should not be browning yet.


    6. Add the groundnuts

    Gently pour the prepared groundnuts into the pan of hot garri.

    Immediately start stirring and folding so that:

    • Garri covers the groundnuts.
    • The nuts are constantly moving and not sitting on one spot.

    Think of it as shallow‑frying in dry garri instead of oil.


    7. Stir, rest your hand, then stir again

    This is the part your arm will remember.

    • Keep the heat low to medium‑low.
    • Stir continuously for a few minutes.
    • You can rest your hand for about 5 seconds, but don’t walk away — return to stirring so nothing burns.

    Low, steady heat + frequent stirring = evenly roasted nuts and garri that doesn’t burn before the nuts are ready.

    You’ll start to hear gentle popping sounds and smell that familiar roasted aroma.


    8. Watch the colour

    As the nuts roast:

    • The groundnut skins shift from a raw, pale tone to a light golden‑brown.
    • The garri also changes colour, picking up some of the oil and colour from the nuts.

    A good rule of thumb from the kitchen:

    Your groundnut is ready when the garri is roughly the same colour as the nuts.

    If you like a deeper roast (more brown, more intense flavour), keep going for a few extra minutes, still on low heat, stirring consistently.


    9. Take off the heat and separate

    Once you’re happy with the colour:

    1. Turn off the heat.
    2. Pour the contents of the pan into a dry sieve placed over a bowl or tray.
    3. Shake gently so the garri falls through and the groundnuts stay in the sieve.

    Spread the hot groundnuts on a tray so they can cool quickly and evenly.

    Important: They will feel slightly soft while still hot. Don’t panic — they get crunchier as they cool down.


    10. Let them cool completely

    Allow the roasted groundnuts to cool down completely at room temperature.

    • This can take 20–30 minutes depending on the room temperature and the amount roasted.
    • Avoid covering them while they are still hot — trapped steam can soften them again.

    Once cool, taste a few. If they taste slightly under‑roasted for your liking, you can return them to the pan with a little fresh garri and roast for a few more minutes.


    11. Peel (optional) and clean

    If you like skinless groundnuts:

    1. Rub small handfuls between your palms to loosen the skins.
    2. Gently blow away the chaff outside or over the sink, or use a fan to help separate skins from nuts.

    If you don’t mind the skins, you can skip this step completely and enjoy them as‑is.


    12. Store in an airtight container

    Transfer the fully cooled roasted groundnuts into a clean, dry, airtight container:

    • A glass jar with a tight lid
    • A food‑grade plastic container
    • Or resealable pouches

    Store in a cool, dry place away from direct heat and strong smells.

    For best flavour, aim to finish a batch within 2–3 weeks. If you’re roasting a lot at once, you can keep part of it in the freezer in a well‑sealed container and bring it out in small portions.


    What about the garri — can you reuse it?

    Yes, you can reuse the garri for another roasting session as long as:

    • It hasn’t burned.
    • It’s not full of groundnut skins or debris.
    • It’s been stored in a clean, dry container after cooling completely.

    Simply cool the garri, sieve out loose skins or burnt particles, and keep it airtight until the next time you want to roast.

    To keep things simple and hygienic, it’s best to reuse this garri mainly for roasting, not for drinking or soaking as regular garri.


    Pro tips for consistently crunchy groundnuts

    • Low heat is your best friend. High heat will burn the outer layer before the inside cooks.
    • Don’t overload the pan. Roast in batches if you have a small pan.
    • Listen for the pops. Gentle popping and a strong roasted aroma usually mean you’re close.
    • Remember the cool‑down effect. If they are already very crunchy while hot, they may end up too hard when fully cool.
    • Salt carefully. You can always sprinkle a little fine salt after roasting; it’s harder to fix “too salty”.

    Quick ways to enjoy your roasted groundnuts

    Once you’ve nailed this method, the options are almost endless:

    • Snack on them plain or lightly salted.
    • Pair them with chilled soaked garri, sugar and milk if you like.
    • Sprinkle over salads or grain bowls for extra crunch.
    • Blend into quick homemade peanut butter.
    • Use them as a base for sauces and soups.

    And because you roasted them yourself, you know exactly how they were handled from start to finish.


    FAQs

    1. Do I still need to sort Green Unison groundnuts before roasting?

    Carefully Dried Groundnuts – Rich in Protein and Healthy Fats are already sorted and dried, so there’s no sand to worry about. A quick visual check before soaking is still a good habit.


    2. Should I use white or yellow garri?

    Both work. Use plain garri without sugar, milk, pepper or flavourings. The colour of the garri doesn’t affect the method — only the final shade, and even that is minor.


    3. Can I use this method without sun‑drying?

    Yes, but you still need to get surface moisture down.

    If the sun isn’t strong, spread the soaked nuts on a tray near a fan or in a breezy spot until they stop looking wet. Going straight from water to pan makes them steam instead of roast.


    4. Can I roast groundnuts in a non‑stick pan?

    Yes, as long as you:

    • Keep the heat low to medium‑low.
    • Use only wooden or silicone utensils that are safe for your pan’s coating.
    • Avoid scratching the surface while stirring.

    5. Is this method suitable for people with peanut allergy?

    No. If you or anyone around you has a peanut or nut allergy, this snack is not suitable. Always follow medical advice and keep roasted groundnuts away from anyone who is allergic.


    Ready to try it?

    If you’re excited to test this method, start with groundnuts that are already clean and roast‑ready:

    Prefer to order by chat?

    Once you’ve tried this sand‑free garri method, tag us in your photos and let us know: team light‑golden roast or team deep‑brown roast? 😉

  • Mint Tea for Digestion: How to Brew Peppermint, Spearmint & Menthol Mint the Right Way

    Mint Tea for Digestion: How to Brew Peppermint, Spearmint & Menthol Mint the Right Way

    You know that feeling after a really good meal — when your heart is happy but your stomach feels a bit too full?

    More and more people are turning to simple herbal teas after meals, and mint is constantly showing up in short videos, wellness posts and search results as a gentle way to support digestion. It’s not just hype. Mint leaves naturally contain aromatic compounds (like menthol and carvone) that can relax the smooth muscles of the digestive tract, which may ease gas, bloating and general discomfort after eating.

    In this guide, you’ll learn:

    • Why mint works so well as an after-meal tea
    • The difference between everyday mint, peppermint, spearmint and menthol mint
    • Exactly how to brew each one for digestive comfort
    • When to drink it, and how to make it part of your evening ritual

    Throughout, you’ll see links to our farm-grown dried mint leaves, so you can easily recreate these brews at home.


    Why mint and digestion go so well together

    Mint leaves are rich in essential oils that give them that fresh, cooling aroma. Two of the most important are menthol and carvone.

    Modern nutrition and herbal research suggests that:

    • Menthol can have gentle antispasmodic effects — in plain language, it can help relax the smooth muscles in the digestive tract. This relaxed state may allow food and gas to move more comfortably, easing feelings of tightness or cramping after a meal.
    • Spearmint oils (menthol plus carvone) are also associated with smoother digestion and reduced post-meal discomfort in traditional use and emerging research.

    That’s why peppermint and spearmint teas often show up in lists of drinks and foods that can help with bloating and digestive comfort.

    Mint tea is not a medicine and not a cure for any disease. Think of it as a comforting, caffeine-free drink that can gently support your digestion and help you feel lighter after meals.

    If you have ongoing or severe digestive symptoms, always speak with a health professional first.


    Meet your mint trio: which one fits your cup?

    Green Unison’s dried herb range includes a family of mint options. All are grown and dried locally, but they have different personalities in the cup.

    1. Everyday dried mint leaves – the easy all-rounder

    If you just want a simple “after-meal mint tea”, reach first for Nature Powered Dried Mint Leaves.

    • Flavour: clean, refreshing, not too strong
    • Best for: daily sips, after lunch or dinner, or as a chilled mint drink on hot days
    • Great if: you want one bag that works for tea, infused water, lemonades and light cooking

    Because the flavour is balanced, this is the perfect starting point if you’re new to mint tea for digestion.


    2. Dried peppermint leaves – bold & cooling

    When people talk about mint tea for bloating and digestive comfort, peppermint is usually what they mean. Our Nature Powered Dried Peppermint Leaves are all about that bold, cooling taste.

    • Flavour: strong menthol “cooling” sensation, like a deep breath for your tummy
    • Best for: heavy meals, oily meals, or evenings when your stomach feels especially full
    • Great if: you love a strong minty aroma and a very “fresh” finish

    Peppermint is the go-to choice when you want your tea to feel like a reset after a big plate of rice, stew, swallow, beans, or late-night snacking.


    3. Dried spearmint leaves – sweet & gentle

    Some people find peppermint a bit too intense. That’s where spearmint shines. Our Nature Powered Dried Spearmint Leaves have a naturally sweet, smooth flavour.

    • Flavour: mild, gentle, slightly sweet
    • Best for: lighter meals, evening wind-down, or anyone sensitive to strong mint
    • Great if: you want digestive support in a tea that feels soft and comforting

    Recent articles even describe spearmint tea as a “mini reset” for digestion, thanks to essential oils that help relax the digestive tract and ease that post-meal tightness.


    4. Dried menthol mint – extra cool & focused

    If peppermint is bold, menthol mint is the cool cousin with extra “aaah”.

    Our Nature Powered Dried Menthol Mint is blended for a distinctly cool, minty cup:

    • Flavour: very cooling, crisp and focused
    • Best for: days when you want a seriously minty, refreshing tea
    • Great if: you enjoy strong herbal flavours and love the feeling of deep freshness after a meal

    Because menthol mint is so expressive, a little goes a long way — it’s perfect on its own or mixed with regular dried mint for balance.


    How to brew mint tea for digestive comfort (step-by-step)

    Good mint leaves are the first step. The second step is brewing them properly, so you capture the aromatic oils that make the tea both flavourful and soothing.

    Below is a simple guide you can use with any of our dried mint products.

    Basic ratio

    • 1 teaspoon of dried mint leaves
    • 250 ml of hot water (about one standard mug)

    This is the same ratio we recommend on our product pages for classic mint and peppermint tea.

    Step-by-step brewing method

    1. Heat your water
      Bring fresh water to a gentle boil, then let it sit for 30–60 seconds. You want it hot, not aggressively boiling, so you don’t bruise the delicate leaves.
    2. Measure your mint
      Add about 1 teaspoon of:
    1. Cover while it steeps
      Pour the hot water over the leaves, then cover the cup or teapot. This is crucial. Covering helps trap the aromatic oils (including menthol) instead of letting them escape with the steam.
    2. Steep for the right time
    • Everyday mint or peppermint: 5–7 minutes
    • Spearmint or menthol mint: 6–8 minutes (they’re a bit gentler and benefit from a slightly longer steep)
    1. Strain and sip slowly
      Strain out the leaves. Taste before adding sweetener — many people find mint tea naturally refreshing. If you like, add a little honey or sugar and a slice of lemon.
    2. Optional: turn it into iced mint tea
      Let the tea cool, then pour over ice. Perfect for hot afternoons or after spicy foods.

    When should you drink mint tea?

    You can enjoy mint tea almost any time of day, but for digestion support many people like to drink it:

    • After meals – especially heavy or late meals
    • Between meals – as a light, hydrating drink that doesn’t weigh you down
    • In the evening – as a caffeine-free way to unwind before bed

    Recent wellness pieces from dietitians and gut-health experts often include peppermint tea on lists of drinks that may help with occasional bloating and gas, thanks to its relaxing effect on digestive muscles.

    Again, this isn’t a guarantee or a treatment — it’s simply a small daily habit that many people find comforting.


    Which mint should you choose? (Quick guide)

    If you’re not sure where to start, use this simple guide:

    You can’t really go wrong — choose based on your taste and how strong or gentle you want the cup to feel.


    Simple flavour twists that stay digestion-friendly

    Stay focused on mint as your base and keep additions simple so they don’t overshadow the herb.

    1. Mint + warm ginger slices

    Add 2–3 thin slices of fresh ginger while steeping your mint.

    • Feels warming in the stomach
    • Perfect when you’ve had a very rich or spicy meal

    Just remember that ginger itself can be quite strong, so keep your mint ratio the same and adjust the ginger to taste.


    2. Mint + lemon wedge (hot or iced)

    After steeping your mint, squeeze in a little fresh lemon and add a small wedge.

    • Brightens the flavour
    • Makes an excellent iced “digestive” drink for hot afternoons

    Because citrus can be sharp, start with a small squeeze and build from there.


    3. Mint + lemongrass

    For an aromatic, spa-like cup, combine mint with lemongrass:

    The result is a citrusy-minty tea that feels very refreshing without being heavy.


    How much mint tea is okay?

    For most healthy adults, 1–3 mugs of herbal mint tea spread through the day is a common pattern. Mint tea is naturally caffeine-free, so it won’t keep you awake the way regular tea or coffee might.

    However, a few gentle reminders:

    • If you have acid reflux or very frequent heartburn, mint may not be ideal for you, because menthol can relax the muscle between the stomach and the food pipe in some people.
    • If you’re pregnant, breastfeeding, on medication, or managing a medical condition, talk to your health-care provider before making strong herbal teas a daily habit.
    • Stop or reduce intake if you notice any discomfort that seems to be linked to the tea.

    This blog is for education only. It does not replace medical advice, diagnosis or treatment.


    Bringing it home: brew your own mint-tea ritual

    The beauty of mint tea is how simple it is:

    1. Scoop a spoon of good quality dried mint.
    2. Add hot water.
    3. Cover.
    4. Wait a few minutes.
    5. Sip slowly and give your body a chance to relax.

    To help you build your own after-meal ritual, you can shop our farm-grown mint range here:

    Or explore all our herbal ingredients on the Dried Herbs eShop.


    Ready to order or ask a quick question?

    If you’d like help choosing the right mint for your kitchen, or you’re ready to order, chat with us directly:

    We’ll help you pick a mint blend that fits your taste, your meals and your routine — and get it to your doorstep as quickly as possible.

    Enjoy your next cup, and here’s to calmer, happier digestion. 🌿☕

  • How Dried Peppermint Can Preserve Farm Produce and Extend Shelf Life

    How Dried Peppermint Can Preserve Farm Produce and Extend Shelf Life

    Dried peppermint plants are more than just a natural remedy or tea ingredient—they can also serve as a powerful, eco-friendly way to preserve farm produce and extend its shelf life. Thanks to their antimicrobial and aromatic properties, dried peppermint helps keep produce fresh longer without relying on synthetic chemicals.

    Here’s how dried peppermint can be used for natural food preservation:


    1. Natural Pest Repellent

    • How It Works: Dried peppermint emits a strong aroma that repels insects like fruit flies, moths, and other pests that spoil farm produce.
    • How to Use:
      • Place dried peppermint leaves in breathable sachets (e.g., muslin or cloth bags) and store them alongside fruits, vegetables, or grains in your storage area.
      • Scatter dried peppermint around the storage space to keep pests away.
    • Benefits: Protects produce without using harmful pesticides, keeping it safe and chemical-free.

    2. Antimicrobial Action

    • How It Works: Peppermint contains natural antimicrobial compounds, such as menthol, which slow down the growth of bacteria and fungi that cause spoilage.
    • How to Use:
      • Sprinkle crushed dried peppermint directly over produce like grains or beans stored in sacks to inhibit microbial growth.
      • Store fresh fruits and vegetables in containers lined with dried peppermint leaves.
    • Benefits: Reduces mold and bacteria, helping to extend the shelf life of farm produce naturally.

    3. Aromatic Absorption of Ethylene Gas

    • How It Works: Many fruits, such as bananas and apples, release ethylene gas as they ripen. This gas can speed up the ripening and spoilage of nearby produce. Dried peppermint can help absorb excess gas and regulate the ripening process.
    • How to Use:
      • Place a few dried peppermint sachets in storage containers or fruit baskets to help maintain freshness.
    • Benefits: Keeps produce fresher for longer and slows down ripening.

    4. Preserving Grains and Seeds

    • How It Works: Peppermint’s natural oils repel pests like weevils and reduce the risk of fungal contamination in stored grains and seeds.
    • How to Use:
      • Mix dried peppermint leaves with grains like rice, maize, or wheat before sealing them in storage bags or bins.
      • Place small sachets of dried peppermint in storage containers.
    • Benefits: Prevents pest infestations and keeps grains dry and mold-free.

    5. Infusing Storage Spaces with Freshness

    • How It Works: The natural aroma of dried peppermint not only repels pests but also keeps storage areas smelling fresh, which can be particularly useful in large storage facilities or pantries.
    • How to Use:
      • Hang dried peppermint bundles or sachets in storage rooms.
      • Scatter leaves on shelves or place them in the corners of storage areas.
    • Benefits: Maintains a clean and pest-free environment for produce storage.

    Why Use Dried Peppermint for Food Preservation?

    • Eco-Friendly Solution: Dried peppermint is a natural and sustainable alternative to chemical preservatives and pesticides.
    • Safe and Non-Toxic: Unlike chemical treatments, peppermint doesn’t leave harmful residues on produce.
    • Cost-Effective: A little dried peppermint goes a long way in keeping produce fresh and pest-free.

    Why Choose Green Unison’s Dried Peppermint Plants?

    At Green Unison, our dried peppermint plants are organically grown, ensuring they’re safe for food preservation while supporting sustainable farming practices. By choosing Green Unison, you’re not only protecting your produce but also contributing to a healthier planet.


    Order Your Dried Peppermint Plants Today!

    Preserve your farm produce naturally with Green Unison’s dried peppermint plants. Order now and enjoy fresher, longer-lasting produce while supporting a greener future!

  • Creative Ways to Use Dried Peppermint in Event Decoration

    Creative Ways to Use Dried Peppermint in Event Decoration

    Dried peppermint plants aren’t just for tea or skincare—they can also bring a refreshing, natural charm to your event decorations. Whether you’re hosting a wedding, party, or seasonal celebration, dried peppermint adds a unique touch with its calming aroma and rustic beauty. Here are some creative ways to incorporate dried peppermint into your event decor:


    1. Aromatic Table Centerpieces

    • How to Use: Combine dried peppermint with flowers, candles, and greenery to create stunning centerpieces. Place the peppermint leaves around the base of candles or scatter them on the table for a fragrant, earthy vibe.
    • Best For: Weddings, dinner parties, or holiday gatherings.
    • Why It Works: The natural scent of peppermint adds a refreshing element to your event while enhancing the aesthetic appeal of your tables.

    2. DIY Potpourri Bowls

    • How to Use: Fill decorative bowls or mason jars with dried peppermint, dried citrus peels, lavender, or cinnamon sticks. Place them around the venue to infuse the air with a fresh, invigorating scent.
    • Best For: Intimate events like bridal showers, baby showers, or cozy holiday parties.
    • Why It Works: Potpourri is both functional and decorative, offering a natural way to keep the space smelling fresh.

    3. Dried Peppermint Garland

    • How to Use: String dried peppermint sprigs together with twine, ribbons, or beads to create a fragrant garland. Use it to decorate tables, doorways, or arches.
    • Best For: Rustic, bohemian, or nature-themed events.
    • Why It Works: The rustic charm of dried herbs enhances any nature-inspired decor.

    4. Gift or Favor Accents

    • How to Use: Attach small bundles of dried peppermint leaves to event favors or gift bags. Tie them with a ribbon or twine for a personalized, eco-friendly touch.
    • Best For: Weddings, corporate events, or seasonal parties.
    • Why It Works: Guests will appreciate the refreshing scent and thoughtfulness of this unique accent.

    5. Peppermint Sachets for Guests

    • How to Use: Fill small breathable fabric bags (e.g., muslin or organza) with dried peppermint and place them on guests’ seats or tables.
    • Best For: Outdoor events or weddings as a take-home keepsake.
    • Why It Works: These sachets act as both decor and a natural mosquito repellent, especially for outdoor celebrations.

    6. Peppermint Confetti or Scatter

    • How to Use: Crush dried peppermint leaves into small pieces and use them as biodegradable confetti for wedding send-offs or as table scatter around candles and centerpieces.
    • Best For: Eco-conscious weddings and outdoor celebrations.
    • Why It Works: It’s an environmentally friendly alternative to synthetic confetti, adding natural beauty and fragrance to your event.

    7. Candle Enhancements

    • How to Use: Sprinkle dried peppermint around candles in glass jars or place sprigs inside clear candle holders for a decorative touch.
    • Best For: Evening events, romantic dinners, or holiday parties.
    • Why It Works: The peppermint adds visual appeal while enhancing the ambiance with its scent.

    Why Use Dried Peppermint for Event Decoration?

    • Eco-Friendly: Dried peppermint is a sustainable alternative to synthetic decorations.
    • Aromatic Appeal: Its refreshing scent enhances the atmosphere naturally.
    • Versatility: Peppermint complements rustic, elegant, and seasonal decor themes alike.

    Make Your Event Unforgettable with Green Unison’s Dried Peppermint Plants

    At Green Unison, we take pride in providing high-quality, organically grown dried peppermint plants that are perfect for creative uses like event decoration. When you choose our products, you’re not just making your event special—you’re also supporting sustainable farming and helping protect the planet.


    Order Your Dried Peppermint Plants Today!

    Add a refreshing, eco-friendly touch to your next event with Green Unison’s dried peppermint plants. Order now and let nature elevate your celebration!

  • How Marigold Plants Purify the Air Indoors

    How Marigold Plants Purify the Air Indoors

    Marigold plants are not just beautiful—they’re also natural air purifiers. When placed indoors, marigolds work to improve air quality by filtering out toxins and releasing oxygen, creating a healthier and fresher environment. Here’s how marigold plants contribute to cleaner indoor air:


    1. Absorbs Harmful Pollutants

    Marigold plants can help remove harmful volatile organic compounds (VOCs) from the air. VOCs are commonly found in household items such as cleaning products, paints, and furniture. Marigolds absorb these pollutants through their leaves and convert them into harmless compounds.


    2. Releases Fresh Oxygen

    Like all green plants, marigolds photosynthesize, taking in carbon dioxide and releasing oxygen. This process enhances the air quality in your home, especially when marigolds are placed in well-lit areas where they can thrive.


    3. Reduces Indoor Dust

    The dense leaves of marigold plants can trap airborne dust particles, preventing them from circulating in your home. This is particularly beneficial for people with allergies or respiratory sensitivities.


    4. Neutralizes Bad Odors

    Marigolds release a subtle earthy scent that can help neutralize unpleasant odors in the air. Their natural fragrance is gentle yet refreshing, making them an excellent addition to kitchens, living rooms, or bathrooms.


    5. Deters Airborne Pathogens

    The antimicrobial properties of marigolds make them effective at reducing the presence of bacteria and fungi in the air. This can create a cleaner, healthier indoor environment.


    Tips for Using Marigold Plants Indoors

    • Place in Bright, Sunny Areas: Marigolds need sunlight to thrive, so position them near windows or in rooms with plenty of natural light.
    • Keep the Soil Moist: Water regularly, but avoid overwatering to prevent root rot.
    • Pair with Other Air-Purifying Plants: Combine marigolds with other indoor plants like spider plants, aloe Vera or peace lilies for a well-rounded air-purifying effect.

    Why Choose Green Unison’s Marigold Plants?

    Green Unison’s marigold plants are organically grown, ensuring they’re free from harmful pesticides or chemicals. By choosing our marigolds, you’re not only improving the air quality in your home but also supporting eco-friendly farming practices that benefit the planet.


    Order Your Marigold Plants Today!

    Bring the beauty and air-purifying power of marigold plants into your home. With Green Unison’s marigolds, you’ll enjoy cleaner air, a fresher space, and the peace of mind that comes from supporting sustainable practices.

    Order now and experience the natural air-purifying benefits of marigolds!

  • Bring Your Garden to Life: How Marigold Plants Attract Pollinators Naturally

    Bring Your Garden to Life: How Marigold Plants Attract Pollinators Naturally

    At Green Unison, we believe that every garden has the potential to support nature while adding beauty and vitality to your outdoor space. One of the simplest and most impactful ways to do this is by planting marigolds. Known for their vibrant colors and pest-repelling properties, marigold plants also play a vital role in attracting pollinators like bees and butterflies to your garden.

    If you’re ready to create a thriving, eco-friendly garden, here’s how marigold plants can make all the difference.


    Why Pollinators Are Essential

    Pollinators such as bees, butterflies, and hoverflies are the backbone of a healthy garden and ecosystem. They help fertilize flowers by transferring pollen, ensuring that fruits, vegetables, and other plants grow and thrive. However, pollinator populations are declining due to habitat loss and the overuse of harmful chemicals.

    By planting marigolds, you’re taking an active step to support these vital creatures and make your garden part of the solution.


    How Marigold Plants Attract Pollinators

    1. Vibrant Colors That Catch Attention

    Marigolds are famous for their bold, warm hues of yellow, orange, and red. These colors act as a natural beacon, drawing pollinators like bees and butterflies into your garden. Pollinators are naturally attracted to bright flowers, making marigolds a must-have for any garden that prioritizes pollination.

    2. Sweet and Subtle Fragrance

    Marigolds emit a light, earthy scent that is irresistible to pollinators. The aroma acts as a guide, helping bees and butterflies find their way to the blooms, where they can feast on nectar and pollen.

    3. Easy Access to Nectar

    The open structure of marigold flowers makes it easy for pollinators to access nectar and pollen. This accessibility is especially important for bees, which need a steady food source to thrive.

    4. Long Blooming Season

    Marigolds bloom consistently from spring to fall, providing pollinators with a reliable source of food throughout the growing season. When other flowers stop blooming, marigolds keep producing, helping to sustain pollinator populations.

    5. Double Benefits: Attract Pollinators and Repel Pests

    Marigolds are unique because they do more than just attract pollinators. Their natural pest-repelling properties help keep aphids, nematodes, and other harmful insects away from your garden, creating a safe and thriving environment for beneficial creatures.


    The Pollinators Marigolds Attract

    • Bees: Essential for pollination, bees love marigolds for their abundant nectar and pollen.
    • Butterflies: These colorful visitors are drawn to marigolds’ vibrant hues and sweet scent.
    • Hoverflies: In addition to pollinating flowers, hoverflies help control pests, making them a gardener’s ally.
    • Beetles: Certain beetles are also attracted to marigolds, helping with pollination.

    Why Choose Green Unison’s Marigold Plants?

    At Green Unison, our marigold plants are grown with care, using sustainable and organic farming methods. When you choose Green Unison, you’re not just adding beautiful blooms to your garden—you’re actively supporting a healthier planet.

    Here’s how you’re making a difference:

    • Supporting Pollinator Health: By planting marigolds, you’re creating a haven for pollinators that are essential to our ecosystems.
    • Sustainable Practices: Our plants are grown organically, ensuring that no harmful chemicals disrupt the natural balance.
    • Partners in Progress: Every purchase helps us further our mission to reconnect people with nature and promote environmentally friendly solutions.

    Your Garden, Your Impact

    Planting marigolds is more than a gardening choice—it’s a step toward a greener, healthier planet. When you create a garden that attracts pollinators, you’re contributing to the survival of vital species while enhancing your outdoor space with beauty and life.


    Order Your Marigold Plants Today!

    Ready to transform your garden into a pollinator paradise? With Green Unison’s organically grown marigold plants, you’ll enjoy vibrant blooms, healthier plants, and the satisfaction of knowing you’re making a difference.

    Order now and join us in creating a greener future, one marigold at a time!

  • Why Toothpaste with Peppermint is Essential for Your Oral Health

    Why Toothpaste with Peppermint is Essential for Your Oral Health

    At Green Unison, we’re passionate about showing you how natural ingredients, like our organically grown dried peppermint plants, can transform your everyday routines. Peppermint isn’t just a refreshing flavor—it’s a powerhouse of benefits for your oral health. Today, we’re sharing why using toothpaste with peppermint can elevate your dental hygiene and how Green Unison’s dried peppermint plants can support this journey.


    The Oral Health Benefits of Peppermint in Toothpaste

    Peppermint is a key ingredient in many toothpastes, not just because of its refreshing taste but also because it delivers real benefits to your teeth and gums:

    1. Keeps Your Breath Fresh
      The natural menthol in peppermint eliminates bad breath-causing bacteria and leaves your mouth feeling minty fresh. Unlike artificial flavors, peppermint provides long-lasting freshness.
    2. Fights Oral Bacteria
      Peppermint’s natural antibacterial properties help reduce harmful bacteria in the mouth, preventing plaque buildup, cavities, and gum disease.
    3. Soothes Sensitive Gums
      Peppermint has anti-inflammatory properties that can calm irritation and reduce swelling, making it ideal for sensitive gums.
    4. Encourages Saliva Flow
      Dry mouth can lead to bad breath and tooth decay. Peppermint naturally stimulates saliva production, keeping your mouth hydrated and healthy.
    5. Provides a Cooling Sensation
      The cooling effect of menthol gives you that “just-cleaned” feeling after brushing and enhances your overall dental care experience.

    How Green Unison’s Dried Peppermint Plants Fit Into Your Oral Health Routine

    While toothpaste with peppermint is a fantastic choice, you can also incorporate Green Unison’s dried peppermint plants into your oral care routine in creative ways:

    • Peppermint Mouth Rinse: Boil a handful of dried peppermint plants, let the infusion cool, and use it as a natural mouthwash to freshen your breath and fight bacteria.
    • Peppermint Tooth Powder: Mix ground dried peppermint with baking soda for a natural, chemical-free tooth-cleaning powder.
    • DIY Peppermint Chewing Sticks: Soak toothpicks in a peppermint infusion for a refreshing and antibacterial boost.

    Why Choose Green Unison’s Dried Peppermint Plants?

    Our dried peppermint plants are organically grown, ensuring they’re free from harmful chemicals. When you choose Green Unison, you’re not only improving your oral health—you’re making a positive impact on the environment.

    Here’s how your purchase supports a healthier planet:

    • Sustainable Farming Practices: Every plant we grow is cultivated with care to preserve the earth’s natural resources.
    • Reducing Chemical Waste: By choosing natural products, you help reduce the environmental impact of synthetic chemicals.
    • Partnering in Progress: With every purchase, you join our mission to reconnect people with nature and create a greener future.

    Make the Switch Today

    Ready to take your oral health to the next level with peppermint? Whether it’s in your toothpaste or a homemade mouthwash, the power of peppermint is undeniable.

    Order your dried peppermint plants from Green Unison today and join us in creating a healthier, greener planet—one fresh, minty smile at a time.

    Take the first step toward better oral health and a better world. Order now!

  • How Peppermint Helps Improve Oral Health

    How Peppermint Helps Improve Oral Health

    Peppermint is more than just a refreshing herb—it’s a powerful ally for maintaining excellent oral health. Packed with antimicrobial properties, natural oils, and a cooling sensation, peppermint has been used for centuries to keep the mouth clean, fresh, and healthy. Here’s how peppermint can help improve your oral health:


    1. Fights Bad Breath

    The strong, refreshing aroma of peppermint helps mask bad breath instantly, but it doesn’t stop there. Peppermint’s natural antimicrobial properties kill the bacteria that cause unpleasant odors, offering a long-lasting solution to bad breath.


    1. Combats Oral Bacteria

    Peppermint contains menthol, which has antimicrobial properties that help:

    Reduce harmful bacteria in the mouth.

    Prevent plaque buildup that can lead to tooth decay and gum disease.

    By keeping bacteria at bay, peppermint contributes to a healthier oral environment.


    1. Soothes Gum Inflammation

    Peppermint’s anti-inflammatory properties can help reduce swelling and irritation in the gums. Whether caused by gingivitis or general sensitivity, peppermint’s cooling effect provides relief while promoting healing.


    1. Prevents Dry Mouth

    Dry mouth can lead to discomfort, bad breath, and an increased risk of cavities. Peppermint stimulates saliva production, keeping your mouth naturally moist and reducing the risks associated with dryness.


    1. Natural Teeth Whitening

    The gentle abrasiveness of dried peppermint leaves, when used as a powder, can help remove stains on teeth. While not a replacement for professional whitening treatments, it’s a natural way to keep your smile brighter.


    How to Use Peppermint for Oral Health

    1. Peppermint Mouth Rinse

    Boil a handful of dried peppermint plants in water to create an infusion.

    Let it cool and use it as a natural mouthwash to freshen breath and fight bacteria.

    1. Peppermint Tooth Powder

    Grind dried peppermint leaves into a fine powder.

    Mix it with baking soda for a natural tooth-cleaning powder. Use it occasionally to polish your teeth and freshen your breath.

    1. Peppermint Chewing Sticks

    Add a pinch of dried peppermint to water and soak toothpicks in the solution overnight. Chew on them for a refreshing, antibacterial effect.

    1. Peppermint Tea

    Sip on peppermint tea made from dried peppermint plants. Its antibacterial properties work from the inside out, promoting overall oral health while keeping your breath fresh.


    Why Choose Green Unison’s Dried Peppermint Plants?

    At Green Unison, our dried peppermint plants are organically grown, ensuring you’re using only the purest and highest-quality ingredients for your oral care routine. By choosing us, you’re also supporting sustainable farming practices that benefit the planet.


    Order Your Dried Peppermint Plants Today!

    Make peppermint a part of your oral health journey with Green Unison’s dried peppermint plants. Experience the natural benefits of peppermint while contributing to a healthier, greener world.

    Order now and let nature take care of your smile!

  • How to Add Extra Flavor to Efo Riro with Dried Peppermint

    How to Add Extra Flavor to Efo Riro with Dried Peppermint

    Efo Riro, a rich and flavorful Nigerian spinach stew, is already a beloved dish—but adding a touch of dried peppermint can take its taste to the next level. The refreshing, minty notes of dried peppermint complement the earthy, savory flavors of the dish, creating a unique twist on this classic recipe.

    Here’s how you can incorporate dried peppermint into your Efo Riro for extra flavor:


    When and How to Add Dried Peppermint

    1. Prepare Your Ingredients
    • Start by washing and chopping your vegetables (spinach or any preferred leafy greens).
    • Assemble your ingredients, including tomatoes, peppers, onions, spices, and your choice of protein.
    1. Incorporate the Dried Peppermint
    • During Cooking:
      • Crush a small amount (1–2 teaspoons) of dried peppermint and add it during the final stages of cooking. Stir it into the pot after adding your leafy greens. This ensures the minty flavor is noticeable but doesn’t overpower the dish.
    • As a Garnish:
      • Sprinkle a pinch of crushed dried peppermint over the dish just before serving for a fresh, aromatic finish.
    1. Balance the Flavors
    • Dried peppermint has a strong flavor, so use it sparingly. Start with a small amount, taste, and adjust as needed to suit your preference.
    • To balance the minty notes, you can add a bit of extra crayfish or groundnut oil for richness.

    Benefits of Adding Dried Peppermint to Efo Riro

    • Enhances the Aroma: The minty fragrance adds an inviting twist to the dish.
    • Elevates the Flavor: Peppermint’s refreshing taste balances the rich, spicy flavors of Efo Riro.
    • Aids Digestion: The natural properties of peppermint can help with digestion, making the meal even more satisfying.

    Why Use Green Unison’s Dried Peppermint Plants?

    Our dried peppermint plants are organically grown, ensuring you’re adding only the best to your meals. By choosing Green Unison, you’re supporting sustainable farming practices and making a positive impact on the planet.


    Order Your Dried Peppermint Plants Today!

    Transform your Efo Riro with the refreshing twist of dried peppermint while supporting a greener world. Order from Green Unison today and bring the taste and wisdom of nature into your kitchen.

  • How to Tone Your Skin Naturally with Dried Peppermint Plants

    How to Tone Your Skin Naturally with Dried Peppermint Plants

    Toning is an essential step in any skincare routine, helping to tighten pores, refresh your skin, and balance its pH levels. With dried peppermint plants, you can create a natural, effective toner that’s free of harsh chemicals and rich in skin-loving properties. Here’s how you can tone your skin with dried peppermint plants:


    Why Use Dried Peppermint Plants as a Toner?

    Dried peppermint plants are packed with antioxidants, menthol, and natural oils that:

    • Tighten pores and refresh the skin.
    • Soothe inflammation and redness.
    • Provide a cooling effect for tired or irritated skin.
    • Help balance oily skin and fight acne-causing bacteria.

    How to Make Your Peppermint Skin Toner

    What You’ll Need:

    • 1–2 tablespoons of dried peppermint plants.
    • 1 cup of distilled water or boiled tap water.
    • A spray bottle or cotton pads for application.

    Steps:

    1. Boil and Infuse:
      • Bring 1 cup of water to a boil.
      • Add the dried peppermint plants and let them steep for 15–20 minutes.
    2. Strain and Cool:
      • Strain the liquid to remove the plants.
      • Allow the infusion to cool completely.
    3. Store:
      • Pour the peppermint toner into a clean spray bottle or jar.
    4. Apply to Skin:
      • After cleansing your face, apply the toner by spritzing it onto your skin or using a cotton pad to gently dab it.
      • Let it dry naturally before applying moisturizer.

    How Often to Use Peppermint Toner

    • Use this toner twice daily—once in the morning and once at night—for best results.
    • Keep it refrigerated to extend its shelf life and enhance its cooling effect.

    Additional Tips for Your Peppermint Toner

    • For Dry Skin: Add a few drops of glycerin or aloe vera juice to the toner for extra hydration.
    • For Acne-Prone Skin: Mix in a teaspoon of apple cider vinegar for added antibacterial benefits.
    • For Extra Relaxation: Combine dried lavender or chamomile flowers with your peppermint plants for a calming aroma.

    Why Choose Green Unison’s Dried Peppermint Plants?

    Our dried peppermint plants are organically grown, ensuring they’re free of harmful pesticides and chemicals. When you choose Green Unison, you’re not just caring for your skin—you’re partnering with us to support sustainable farming and protect our planet.


    Order Your Dried Peppermint Plants Today!

    Take the first step toward glowing, toned skin with Green Unison’s naturally dried peppermint plants. Elevate your skincare routine and make a positive impact on the environment. Order now and experience the difference!