Moisture = clumps, stale flavour, and eventually mould risk
Beans powder is milled very fine, so it can re‑absorb moisture from the air. That’s why clumps tend to show up when the kitchen is humid, when you scoop over a steaming pot, or when the pouch is left half‑sealed.
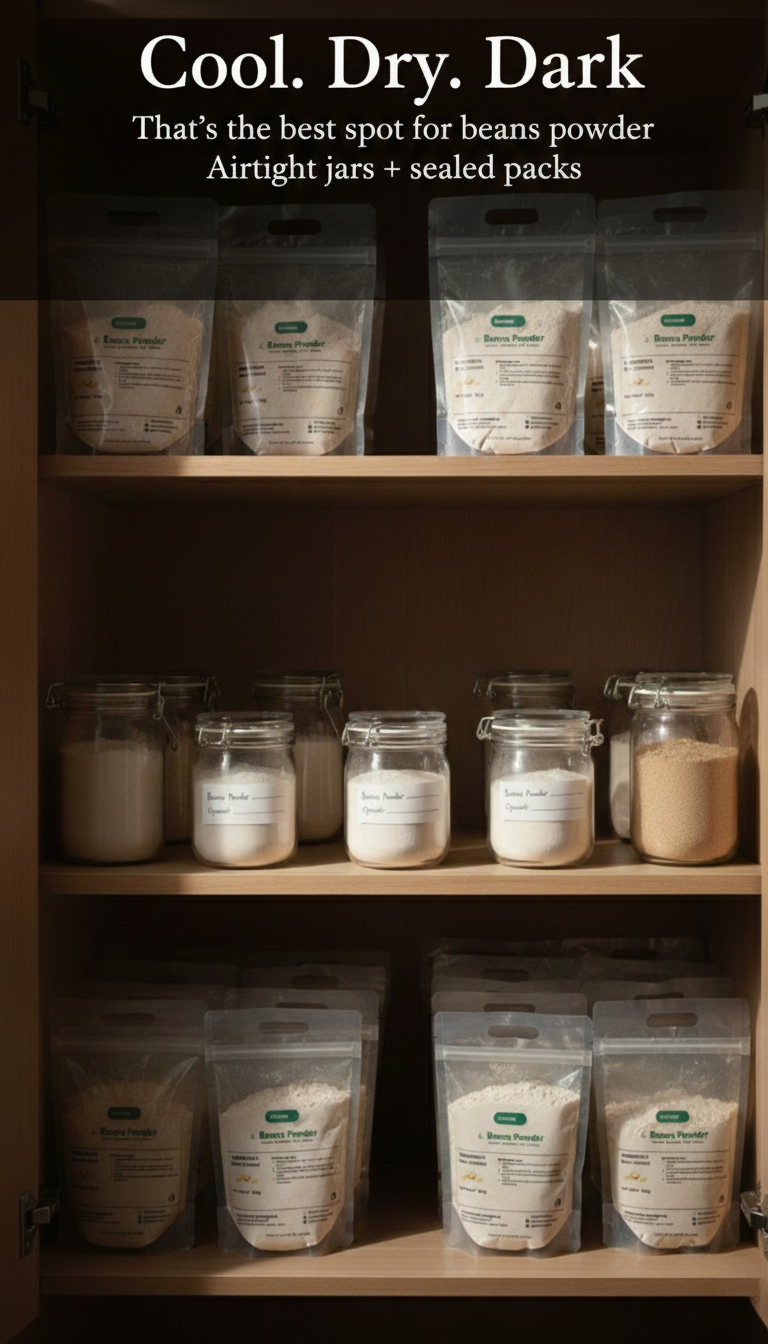
Fix: store in a clean, dry, insect‑proof container and keep it in a cool, dry, dark spot.
Upgrade: portion a small amount into a “daily‑use” jar and keep the bulk sealed — fewer openings = longer freshness.
Pests often start before your food reaches the kitchen
Pantry pests can be present as eggs in grains/beans before milling. Airtight storage prevents spread, but the simplest prevention is a short freezer reset.
Fix: freeze the sealed pack for 4 days, then move to your airtight container.
After that: keep your container sealed and wipe up flour spills (spills attract pests).
Odour absorption: why your beans powder can start smelling “off”
Flours absorb strong smells easily. Store beans powder away from spices, detergents, onions, fish, and strong‑smelling cupboards.
Best container setup for beans powder
Use any of these options, as long as they’re clean, dry, food‑safe, and truly airtight:
Option A (simple): keep beans powder in its resealable pouch, then place that pouch inside a tight‑lid container.
Option B (best day‑to‑day): decant into an airtight jar/tub and label it (product + date opened).
Option C (bulk): portion into 2–3 smaller airtight jars so you only open one at a time.
Pro tip: Always let containers dry completely after washing. “A little damp” is enough to start clumping.
Fridge or freezer: should you chill beans powder?
If your kitchen is humid, chilling helps — but do it the right way to avoid condensation.
Fridge: Keep beans powder sealed airtight. When you need it, take it out and let it sit sealed for 15–20 minutes before opening (this reduces condensation on the flour).
Freezer: Great for the 4‑day “pest reset” and for long‑term storage if you buy in bulk. Keep it airtight, and thaw sealed before opening.
Can I store beans powder in the fridge? Yes — especially in humid kitchens. Keep it airtight and let it come down to room temperature while still sealed before opening to reduce condensation.
Can I freeze beans powder? Yes. A short freezer “reset” (4 days) helps prevent pest issues. Keep it airtight and thaw sealed before opening.
Why does beans powder form lumps even when sealed? Most times it’s moisture exposure during use: opening near steam, using a damp spoon, or leaving the pouch unsealed for “just a minute”.
Is it safe to scoop off mould and use the rest? No — discard mouldy flour. It’s not worth the risk.
How do I avoid lumps when mixing for akara or moi moi? Start with cool/warm water (as directed in the prep guide), whisk gradually, then let the batter rest briefly before cooking.
Allergy note? Beans powder is made from beans (a legume). Avoid if you have legume allergies.
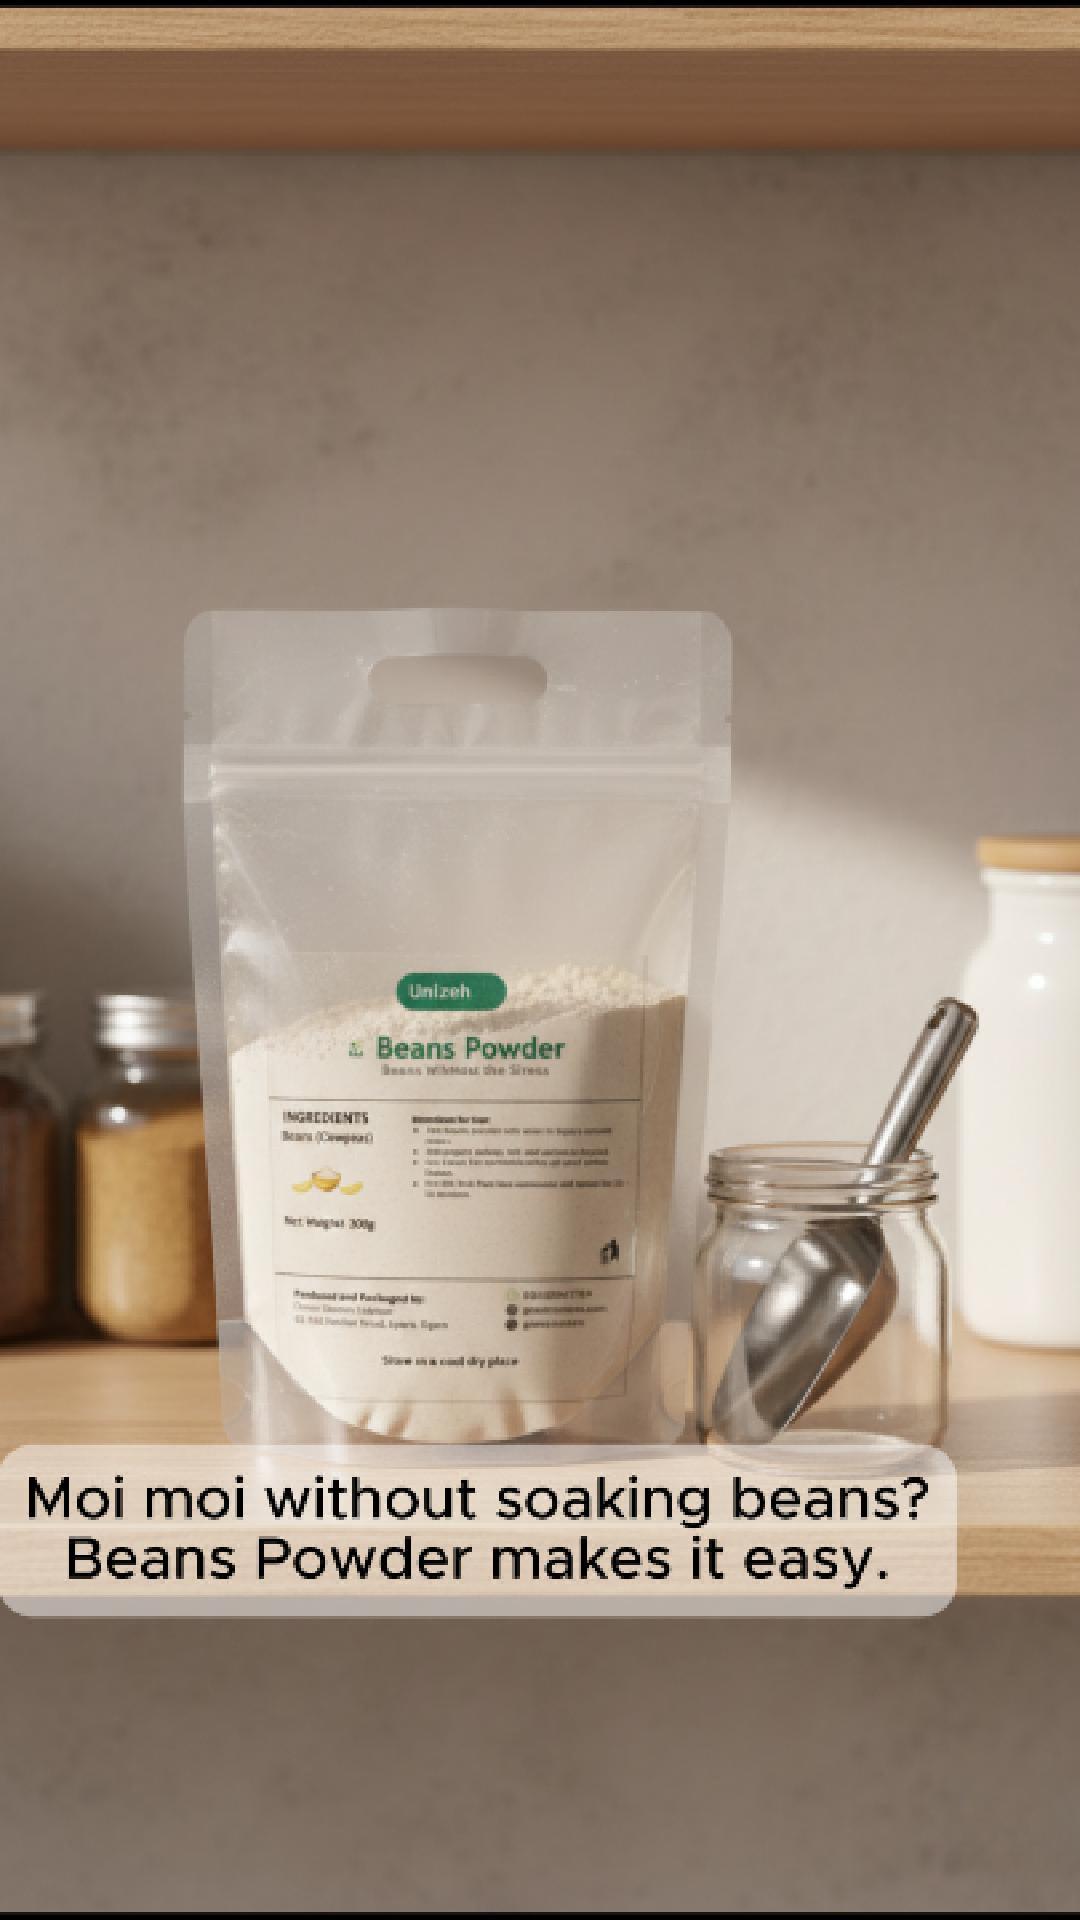
Moi moi – that beloved steamed bean pudding – is a Nigerian classic known for its rich taste and high protein content. Traditionally, making moi moi involves soaking, peeling, and blending beans, which can be time-consuming. But what if you could skip those tedious steps? Beans powder (also known as bean flour) is the convenient alternative that lets you make moi moi without the overnight soaking or heavy blending. In this guide, we’ll walk you through how to use beans powder to prepare soft, delicious moi moi the easy way, while retaining all the goodness and flavour of the original recipe. It’s warm, informative, and perfect for both beginners and busy home cooks looking to save time. Let’s get started!
Why Beans Powder for Moi Moi?
Using beans powder in place of whole beans is a game-changer for making moi moi. Here’s why more people are embracing this no-soak method:
Time-Saving: No need to soak beans overnight or spend ages peeling off skins. Beans powder is ready to mix, cutting prep time dramatically. This means you can satisfy that moi moi craving faster.
Convenience: With bean flour, you avoid the messy blending step. Just add water to the powder and it transforms into a smooth batter. Perfect for busy cooks or anyone without a strong blender.
Consistency: High-quality beans powder (like the finely milled, dehulled one from Green Unison) gives a smooth, lump-free batter. The result? Moi moi with a nice, even texture – no random bean chunks!
Nutrition Intact: Beans powder is simply processed beans – you still get the protein, fiber, and nutrients of beans. It’s a healthy choice that doesn’t compromise on the wholesomeness of the dish.
Year-Round Availability: Dried beans powder stores well, so you can make moi moi anytime without worrying if you have raw beans at home. It’s pantry-friendly with a long shelf life.
By using beans powder, you’re preserving the authentic taste of moi moi while simplifying the process. Now, let’s see what you need and how to do it step by step.
What You’ll Need
Before we dive into cooking, gather the following ingredients and tools:
Beans Powder (Bean Flour): about 2 cups. (This is simply dried beans milled into flour. If you don’t have any, you can order our smooth Beans Powder for the best results.)
Warm Water: about 3 cups, to mix with the powder (roughly 1.5 cups of water for every 1 cup of beans powder).
Onion: 1 medium, blended or finely chopped. Onion adds great flavor to moi moi.
Fresh Pepper: to taste (e.g. 1–2 scotch bonnets or chilli peppers, blended). Adjust to your heat preference.
Ground Crayfish (optional): 1–2 tablespoons for extra depth of flavor, if you like that classic taste.
Seasoning: Salt (about 1 teaspoon or to taste) and seasoning cubes or powder as desired.
Vegetable Oil: 2–3 tablespoons (for richness and to prevent sticking). Palm oil can also be used for a traditional flavour, or mix both oils.
Extras (optional): You can add sliced boiled eggs, deboned fish, or corned beef when assembling the moi moi for a richer meal – just like in the traditional version. (Totally optional, but a common way to enjoy moi moi!)
Containers for steaming: Moi moi plates, aluminum foil bowls, ramekins, banana leaves (for that authentic taste), or even heat-safe nylon bags. Anything that can hold the batter while steaming.
Steamer or Pot: A large pot with a tight lid for steaming. You’ll also need some water in the pot and maybe a base (like a rack or foil at the bottom) to keep the moi moi containers out of direct water.
Step-by-Step: How to Prepare Moi Moi with Beans Powder
Now, let’s go through the process of mixing and cooking. Making moi moi with bean flour is quick and straightforward. Follow these simple steps:
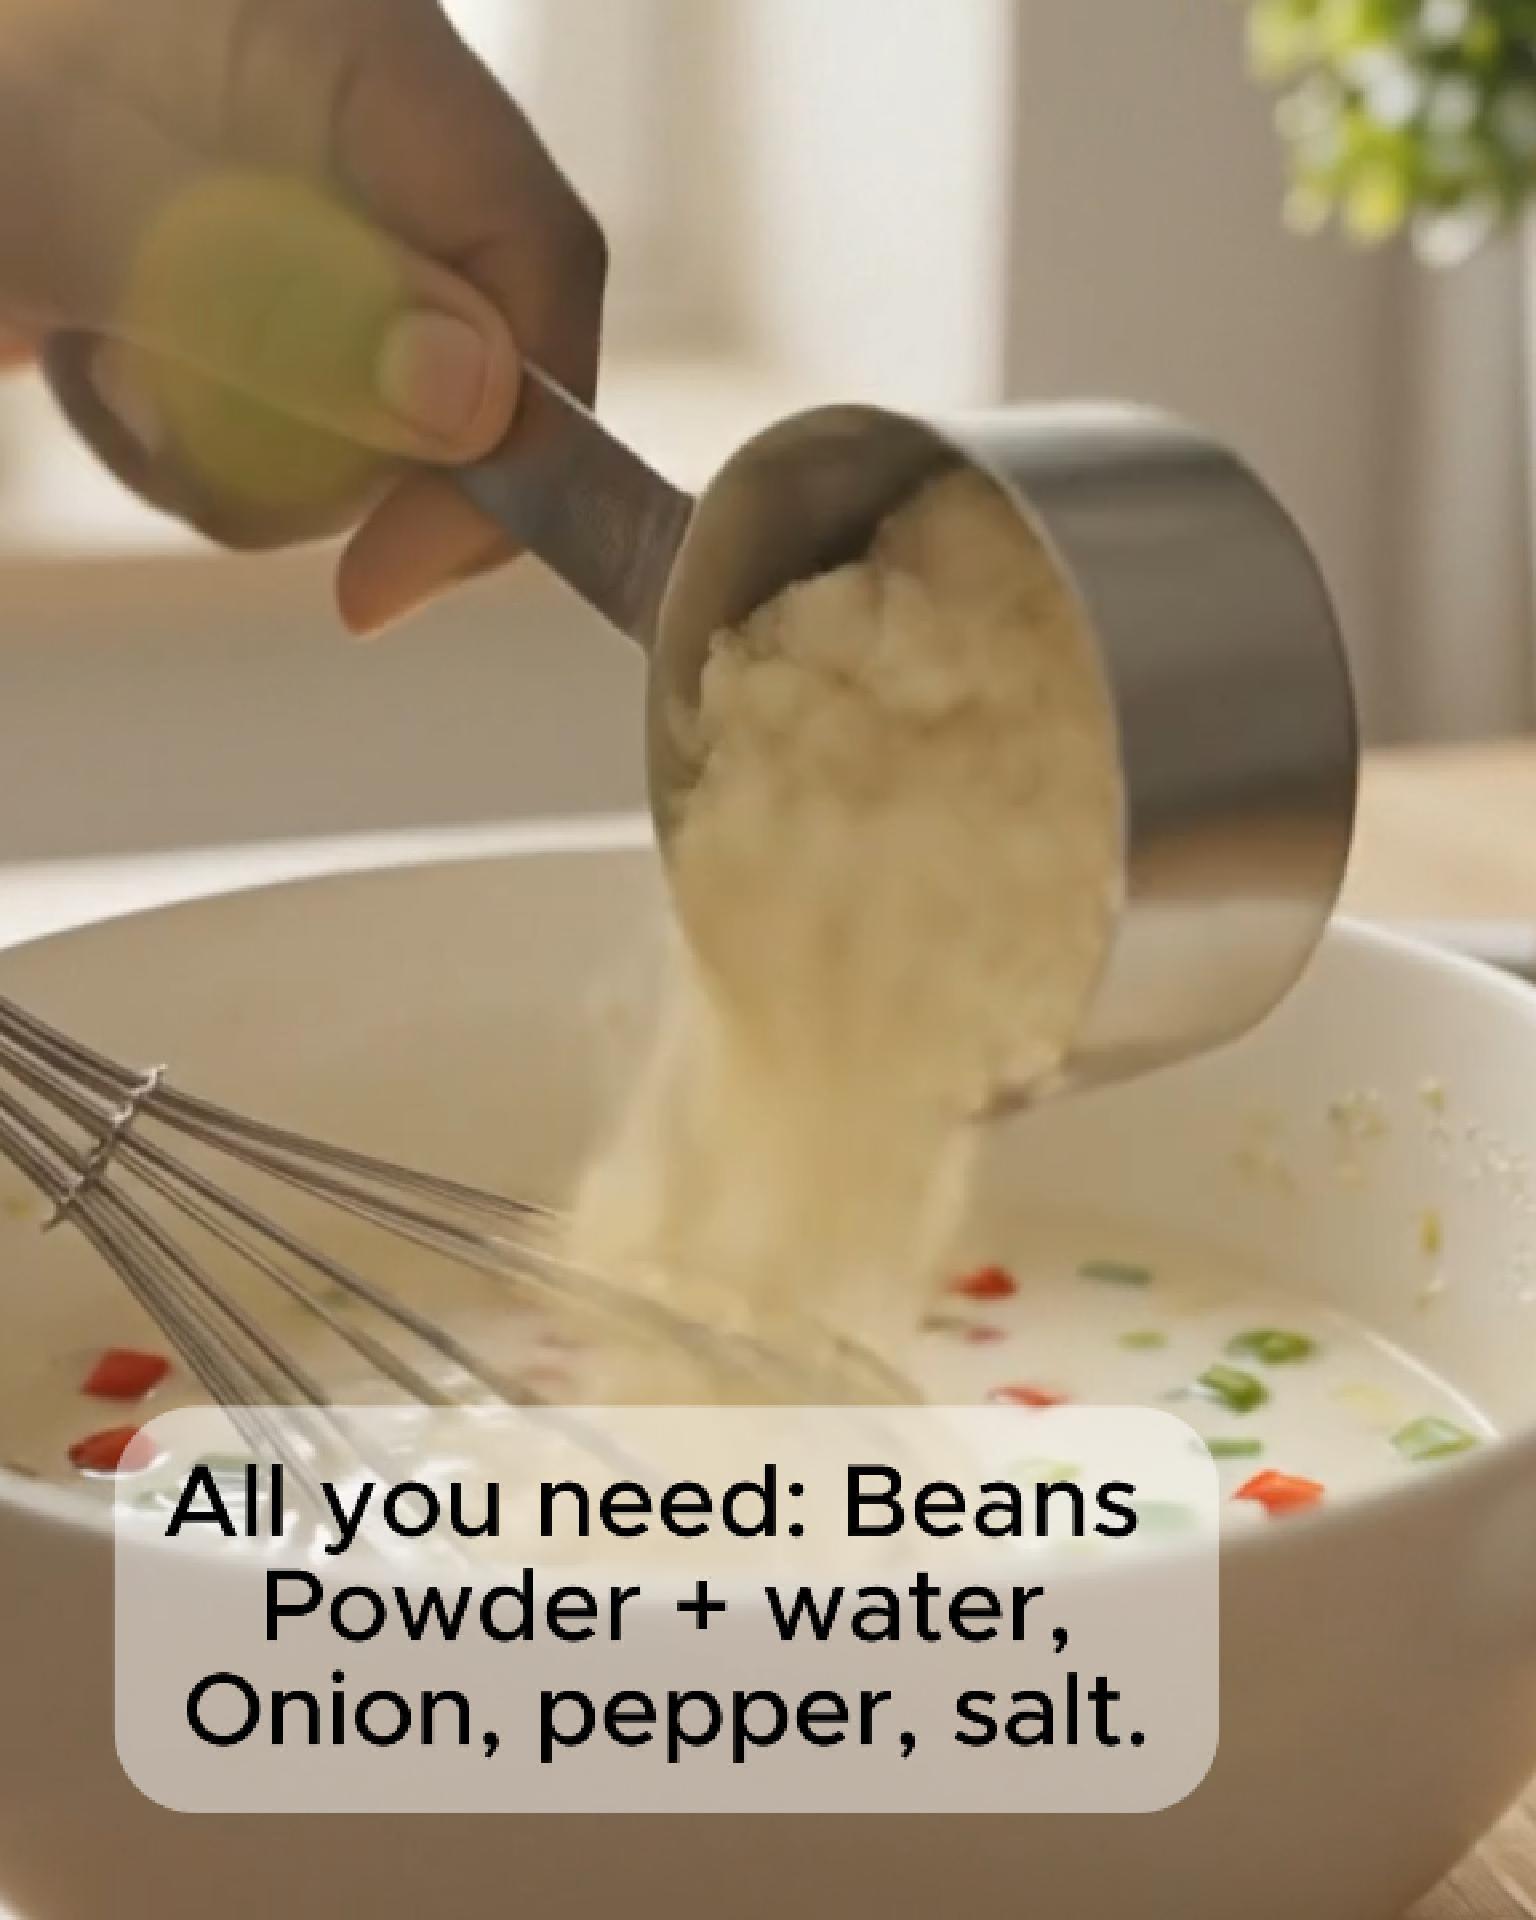
Mix the Beans Powder with Water: In a bowl, combine your beans powder with warm water. Use the ratio of roughly 1 cup beans powder to 1.5 cups water. Pour the water gradually as you stir. Whisk thoroughly to dissolve the powder and form a smooth batter. (Tip: Start with half the water and mix into a paste, then add the rest. This helps prevent lumps.) You’re aiming for a consistency like pancake batter – not too thick or too runny. If it’s too thick, add a little more water; if too thin, sprinkle a bit more powder. There’s no soaking needed, but allow the batter to sit for about 5 minutes after mixing. This helps the flour hydrate properly and any tiny lumps will dissipate.
Add Blended Onion and Pepper: Blend your onion and fresh pepper together into a smooth paste (you can add a little water to help it blend). Stir this mixture into the beans batter. The onion and pepper not only give moi moi its savory, delicious taste and appetizing aroma, but also a bit of color (especially if using red pepper). If you’re using ground crayfish, add it now as well. Mix everything well so the flavours are evenly distributed.
Season the Batter: Add salt to taste (about 1 teaspoon for this quantity, but you can adjust) and your seasoning cube/powder if using. Also pour in the vegetable oil (2–3 tablespoons) and stir thoroughly. The oil enriches the moi moi and makes it moist. Your batter should be smooth and moderately thick at this point, with all ingredients well combined. Quick check: scoop a spoonful – it should pour relatively easily but still coat the spoon. If it feels too thick (like paste), you can stir in a bit more water. Remember, a well-mixed batter is key to moi moi that sets nicely and has a uniform texture.
Prepare Steaming Containers: Get your moi moi containers ready. If you’re using plastic or aluminum molds, lightly grease them with a little oil to prevent sticking. If using banana leaves, soften them by briefly heating or blanching so they don’t tear, then fold into a cone or pocket shape. Give your steaming pot some love too: add water to the pot (about 1–2 inches depth) and put a base/trivet at the bottom. Start heating the water on medium heat so it’s simmering by the time you’re ready to cook.
Portion and Add Extras: Stir the batter one more time (ingredients may settle a bit). Now ladle the batter into your chosen containers or the folded leaves. Fill each container about 3/4 full to allow room for the moi moi to expand a little as it cooks. If you want to add extras like a slice of boiled egg or bits of fish, now’s the time: place them into each portion of batter, gently submerging so they’re covered. Everyone loves finding a “surprise” egg or fish in their moi moi! 🥚🐟😋
Steam the Moi Moi: Place the filled containers into the pot of simmering water, on the rack or foil base (they should not be completely submerged in water; the steam does the cooking). Arrange them so they are upright and not too tightly packed (steam should circulate). Cover the pot with its lid. If the lid isn’t tight, you can cover the pot with foil first then the lid, to trap steam. Steam for approximately 45–60 minutes. The cooking time can vary based on the size of your moi moi portions and the intensity of your stove. Avoid peeking too often to keep the steam trapped, but do check the water level halfway through – add hot water if needed to prevent burning the pot.
Check for Doneness: After about 45 minutes, you can test one. Insert a toothpick or knife into the center of a moi moi – if it comes out mostly clean (no wet batter), it’s done. The moi moi should have changed from a pourable batter to a firm, solid pudding that holds its shape. The top will look set and might have slightly pulled from the container sides. If it’s not yet firm, steam an additional 5-10 minutes and check again. Overcooking can make it a bit dry, so once it’s set, take them off the heat.
Cool and Serve: Using tongs or a cloth (careful – it’s hot!), remove the containers from the pot. Let the moi moi cool for a few minutes so they firm up further and are easier to handle. Moi moi can be enjoyed warm or at room temperature. Gently unmold from containers or unfold the leaves, and serve your delicious moi moi on a plate. It should be moist, orange-brown in color, and fragrant with the onions and pepper you added. Yum!
Tips for the Best Moi Moi Results
Mixing is Key: To avoid lumps in your batter, remember to whisk gradually when combining beans powder and water. Starting with cool or lukewarm water, as opposed to very hot, can help you achieve a smoother mix. A whisk or even a hand mixer can make this super easy. No one likes biting into dry flour pockets, so mix well!
Consistency Matters: If your first attempt comes out a bit too soft or too firm, adjust the water ratio slightly next time. A thicker batter (less water) yields a firmer moi moi, while a looser batter (more water) yields a softer result. Aim for that happy medium – typically the 1:1.5 powder-to-water ratio is on point.
Boost the Flavor: Moi moi made with bean flour has the same authentic taste as the traditional method. Make it even better by ensuring you season well. Don’t skip the onions, peppers, and salt. A teaspoon of vegetable bouillon or stock powder can elevate the taste too. And if you enjoy the aroma of banana leaves, by all means use them as wrappers – they infuse a subtle earthy flavor you can’t get from plastic or metal containers.
Avoid Water Logging: Be careful not to get water into your moi moi while it’s steaming (that can make it mushy). That’s why we keep the containers above the water level. If you’re using leaves or flimsy covers, you can wrap the top of each moi moi with foil or banana leaf to prevent dripping condensate. Also, keep that steam steady – a gentle simmer is better than a rolling boil (which could splash water into the food).
Cooking in Batches: If you have more batter than space in your pot, you can cook in batches. Don’t try to overfill the pot. The batter can actually sit out for a bit waiting its turn – it won’t spoil at room temperature for the duration of one batch (just give it a stir before ladling again).
Serving Ideas: Moi moi is very versatile. It’s filling enough to eat on its own as a light meal or snack. Often, it’s served alongside pap (ogi/akamu), custard, or garri for breakfast. It’s also a great side with Jollof rice or fried rice at parties, or with a salad for a fit-fam combo. However you enjoy it, know that you’ve made a wholesome dish in a fraction of the usual time!
In Conclusion…
Making moi moi has never been this quick and stress-free. By using beans powder, you’ve skipped the hardest parts of the traditional method while still enjoying a nutritious, home-cooked delicacy. The texture is soft and moist, the flavor is spot on, and you didn’t have to haul out a heavy grinder or spend hours in the kitchen. Modern hacks meet traditional taste – what’s not to love?
If you’re excited to try this out, we’ve got you covered. Green Unison’s Nature-Powered Beans Powder is perfect for this recipe – finely milled from dehulled beans, with no additives, giving you a pure and smooth batter every time. You can get it easily from our shop and have it delivered to your doorstep.
Ready to cook smarter, not harder? 🛒 Order our Beans Powder here for a convenient moi moi experience. We deliver fast, so you can start enjoying hassle-free cooking. Have questions or need to chat before buying? 💬 Chat with us on WhatsApp – we’re here to help!
We hope this guide answers all your questions about using beans powder for moi moi. Feel free to share your own moi moi-making experiences or any tips you discovered along the way. Have fun cooking, and enjoy every delicious bite of your easy homemade moi moi!
Related Post: Curious about other quick bean recipes? Check out our article on No-Soak Akara in Minutes (another Nigerian breakfast favorite made easy with beans powder). Happy cooking!
Akara, those delicious fried bean cakes, are a breakfast favourite – crispy on the outside, soft and fluffy on the inside. But making akara from scratch the traditional way can be time-consuming (think soaking, peeling, and grinding beans ). What if you could skip all that hassle and still enjoy perfect akara in minutes? That’s where beans powder comes in! In this post, we’ll show you how to use our ready-made beans powder (500g pack) to prepare akara quickly, with no soaking, no peeling, and no stress. You’ll get preparation tips, a simple recipe, and answers to common questions so you can achieve tasty, golden akara anytime.
Why Use Beans Powder for Akara? (No More Soaking Beans!)
Using beans powder (also known as bean flour) is a game-changer for akara lovers. Here’s why it’s worth a try:
Time-Saving Convenience: With beans powder, you eliminate the tedious steps of soaking raw beans overnight and hand-peeling the skins. The beans in our powder are already dehulled (peeled) and finely milled, so you can go straight to mixing batter. This is perfect for busy mornings when you want a quick homemade breakfast.
Smooth, Lump-Free Batter: Our beans powder is finely ground and smooth, which means it blends easily with water. You can whisk up a lump-free batter in minutes. No gritty bits or clogged blender – just a consistent mixture that’s ready to fry. (Tip: Start with cool water for mixing to avoid lumps, as we’ll detail below.)
Great Texture & Taste: Worried that shortcut akara won’t taste as good? Don’t be! Beans powder is simply natural peeled beans, so the taste is authentic. In fact, because the bean skins are removed, your akara can turn out lighter in colour and texture. You’ll still get that rich, protein-packed bean flavour and satisfying crispness. Season and spice the batter to your liking, just as you would with traditional beans.
On-Demand Freshness: Beans powder has a long shelf life (up to 6 months after opening if stored well), so you can make akara anytime without planning ahead. Keep a 500g pouch in your pantry – it’s like having ready-to-mix akara batter on standby. No more deciding one day in advance and no leftover wet batter to worry about.
How to Prepare Akara with Beans Powder (Quick Recipe)
Making akara with Green Unison’s Beans Powder is super straightforward. Here’s a simple step-by-step recipe to get you started:
Ingredients:(Serves about 4)
1 cup Beans Powder (approximately 125g) – this is enough for a family breakfast.
Water – about 1 to 1¼ cups (use just enough to reach a thick batter consistency).
Onion: 1 small bulb, blended or finely chopped.
Peppers: Fresh chilli or scotch bonnet to taste (blended with the onion) or 1–2 tsp of dried ground pepper.
Salt: to taste (about ½ tsp, or as you prefer).
Spices/Seasoning: (optional) e.g. a pinch of ground ginger or stock seasoning cube, to taste.
Vegetable Oil for deep frying.
Directions:
Mix the Batter: In a bowl, whisk the beans powder with cool water gradually. Start with 1 cup of water and add a little more if needed until you get a smooth, thick batter. Aim for a texture like traditional akara batter – not runny, but able to drop off a spoon.Pro tip: add the water slowly and keep whisking to avoid any lumps. Because the powder is finely milled, it should come together easily.
Season the Batter: Add your blended onion and pepper mixture into the batter. Also stir in salt and any other spices or seasoning you like. Mix everything thoroughly. The batter should be well-combined and speckled with the onions and peppers (and it already smells appetising!).
Rest & Aerate: Let the batter rest for about 2–3 minutes. This short rest helps the dry beans powder fully rehydrate and gives the mixture a chance to thicken slightly. Meanwhile, heat up oil in a frying pan or pot. For extra fluffy akara, you can whisk the batter vigorously for 30-60 seconds right before frying. This incorporates air, making the akara puff up nicely when cooking.
Fry the Akara: Once the oil is hot (test by dropping a tiny bit of batter – it should sizzle), scoop the batter into the oil. You can use a spoon or a small ladle. Fry in batches, careful not to overcrowd the pan. Fry on medium heat until each akara ball is golden-brown on the outside. This usually takes a few minutes per side; flip halfway through for even cooking.
Drain & Serve: Use a slotted spoon to remove the fried akara and drain on paper towels to soak up excess oil. Your akara should be crispy outside and soft inside. Serve warm and enjoy!
Serving suggestions: Akara is delicious on its own or with condiments. Many love it with pap (ogi) for a complete breakfast, or alongside bread (akara burger, anyone? ). You can also pair with a spicy pepper sauce or stew for extra flavour. Beans powder isn’t just for breakfast either – akara makes a great protein-rich snack any time of day.
Tips for Perfect Akara Using Beans Powder
Even though using beans powder simplifies the process, a few extra tips will ensure your akara turns out just right:
Consistency is Key: If your first batch of batter seems too thick or too thin, adjust the water accordingly. A thicker batter yields more compact akara, while a slightly looser batter can give lighter, puffier results – but too runny will make it absorb oil. So find that happy medium. It’s easier to add water than to take out, so start thick and dilute gradually.
Avoid Lumps: Always start mixing the powder with cool water, not hot. Cold or room-temperature water allows the powder to absorb evenly without clumping. Whisk steadily as you pour in water. If you do spot small lumps, just keep whisking or use the back of a spoon to press them out. Because our beans powder is finely milled, lumpiness is rarely an issue.
Whisk for Air: As mentioned, a good whisk or blend right before frying incorporates air into the batter, which helps make your akara fluffier. You can use a hand whisk, or even blend the batter in a blender for a few seconds to aerate – just don’t over-blend to the point of being too smooth or runny.
Oil Temperature: Make sure the frying oil is adequately hot but not smoking. If oil is too cool, the akara can soak up oil and turn out greasy or fall apart. If it’s too hot, the outside will brown too fast while the inside remains undercooked. Medium heat works best. You can test with a small drop of batter as noted in the recipe.
Season Well: Beans itself is mild, so the flavour of your akara depends on your seasonings. Don’t skimp on onions, salt, and pepper. You can also add a little crayfish powder or ginger/garlic for a twist. Since our beans powder has no added spices or salt (100% pure beans), you have full control over the taste. Season to your preference, just as you would when blending whole beans.
Add Baking Powder? Some people add a pinch of baking powder or potash (akanwu) to akara batter to increase fluffiness. With a well-aerated beans powder batter, this isn’t really necessary – you’ll get a nice rise from whisking alone. But if you traditionally use a leavening, you can experiment with a tiny pinch of baking powder. It can help if your batter is dense, but don’t overdo it to avoid any aftertaste.
Use Fresh Oil: This goes for any frying, but worth noting – using clean, fresh oil (or well-filtered oil) ensures your akara tastes fresh and not like yesterday’s fish. The neutral flavour of beans powder will soak up oil flavours, so fry in oil that’s not rancid or overly reused.
By following these tips, you’ll get crispy, tasty akara that no one will guess came from a powder mix!
Frequently Asked Questions
Q: Does akara made from beans powder taste different from the traditional method? A: Not really – it tastes like authentic akara because it’s made from the same ingredient (beans). Our beans powder is simply peeled, dried, and ground beans with nothing added. In fact, some people find it even better because removing the bean skins can eliminate any slight bitterness and give a smoother texture. As long as you season your batter well, your family might not notice any difference except that you spent far less time preparing it!
Q: Can I use this same beans powder for moi moi? A: Yes, absolutely. The beans powder is versatile for other bean recipes like moi moi (steamed bean pudding). In our prep guides, we recommend about 1 cup of beans powder to 1.5 cups of water for moi moi batter. The concept is similar – mix with warm water, season, then steam instead of frying. So you get smooth moi moi without the laborious bean peeling too. (You can also add extras like boiled egg or fish to your moi moi before steaming, just as you normally would.) Our focus today is akara, but feel free to experiment with other dishes. One product, many possibilities!
Q: How do I store the beans powder? Will it keep well after opening? A: Store it in an airtight container or keep it in its resealable pouch tightly sealed. Place in a cool, dry area away from moisture. It will stay good for up to 6 months once opened. If you live in a very humid environment, you can refrigerate the powder to prolong freshness (just make sure it’s sealed to avoid any moisture). Unlike fresh batter or wet beans, the dry powder won’t spoil quickly – no weevils or mould as long as it’s kept dry. (For more on storing flours and powders, check out our Flour & Pap Powder Care Guide for tips on beating moisture and pests.)
Q: Where can I get Green Unison’s Beans Powder? A: You can purchase it directly from our online shop – the 500g pack is a popular choice for households. We offer nationwide delivery in Nigeria, so whether you’re in Lagos, Abuja, or anywhere else, we’ll get it to you quickly. It’s also available in other sizes (from 200g up to 5kg) if you need more or less. Additionally, you can order through our WhatsApp catalog for convenience. Just click to browse all products here: WhatsApp Catalog → or message us directly on WhatsApp to chat about your order.
Ready to Try Akara the Easy Way?
Imagine enjoying a stack of hot, yummy akara tomorrow morning without any kitchen chaos today. With beans powder, it’s totally possible – and affordable too, considering one 500g pack can make multiple family breakfasts. It’s a breakfast hack for anyone who loves traditional foods made simpler.
Give it a go and let us know how it turns out! We’re always excited to see our customers making the most of these natural, time-saving products. If you have questions or want to share your akara success story, drop a comment or reach out to us.
Craving a taste? 🍽️ Don’t wait. Order your Beans Powder now on our website or send us a WhatsApp message to get started. Your mornings are about to get a lot easier, one delicious bean cake at a time!