Author: Ayodotun Ayodele

  • Eko vs Ogi: One Pap Powder, Two Textures (and How to Nail Both Every Time)

    Eko vs Ogi: One Pap Powder, Two Textures (and How to Nail Both Every Time)

    Pap is a versatile staple enjoyed in many homes – it can be smooth and creamy or cool and firm. In fact, the classic breakfast ogi (also called akamu or pap) and the sliceable eko (firm pap pudding) both come from the same pap base. With one quality pap powder, you can easily make either texture in minutes. This guide explains the difference between eko and ogi, the science behind their textures, and how you can nail both consistencies every time. (No more guesswork – even if you’re new to pap-making!)

    What Exactly Are Ogi and Eko?

    Ogi (Pap/Akamu) is a smooth, custard-like porridge made from fermented grains (usually corn). It’s a traditional cereal pudding that’s popular across Nigeria. Ogi is typically enjoyed warm for breakfast or as a light meal – often sweetened to taste or taken with a splash of milk. Many families pair ogi with side treats like akara (bean fritters) or moin moin (steamed bean pudding) for a hearty start. Because it’s fermented, ogi has a mild tangy aroma and taste. (Fun fact: the fermentation is done by friendly bacteria and yeast, which gives pap its unique slightly sour flavour and makes it easily digestible.)

    Eko (Agidi), on the other hand, is basically pap in jelly form. It’s the firm, set version of pap – usually made by cooking pap extra thick and letting it cool until solid. The result is a white, pudding-like block that can be sliced and chewed. Eko (called agidi by the Igbo) has a neutral taste like ogi, but its firmer texture means it’s often eaten differently. Some people enjoy eko on its own as a light meal or snack, while others serve it with flavorful accompaniments (for example, eko can be paired with soups, stews, or a spicy sauce). Essentially, if ogi is like a thick drinkable porridge, eko is pap you can hold once it’s cooled and set.

    In summary: ogi/akamu is the creamy pap you eat with a spoon, while eko/agidi is the solid pap you can cut with a knife. The amazing part is both come from the same pap powder or paste – the difference is how you prepare it. Below, we’ll show you how one instant pap powder can yield two textures with ease.

    One Pap Powder, Two Textures – How Is It Possible?

    The secret comes down to proportion and technique. With traditional wet pap (the kind sold fresh in markets), cooks have long known that a slightly thinner mix gives a pourable ogi, while a thicker mix can set into firm eko. It’s all about how much water you use and how long you cook it.

    From a food science perspective, it’s about starch gelatinisation and gelation. When you heat a starch like corn in water, its granules swell and burst – the mixture thickens (that’s gelatinisation). As it cools, the starch molecules (especially amylose) start bonding into a mesh-like network, trapping water. With more starch (higher concentration), this network becomes denser and sets into a firm gel. That’s why eko, which is made with more pap powder and less water, solidifies into a sliceable gel, whereas ogi, made with more water, stays semi-liquid and spoonable. In short, the higher the starch-to-water ratio, the firmer the pap will be once cooled.

    (If you were to reheat a solid eko with enough water, it would loosen back into a pap consistency – it’s the same ingredients, just a different structure!)

    Another key factor is fermentation. Traditional pap is made by fermenting corn for days; this process develops that classic slightly sour taste and improves the pap’s texture and digestibility. Green Unison’s Instant Pap Powder retains this authentic process – our maize is soaked and fermented under controlled conditions, then dried and milled into a fine powder. The result: you get all the rich flavour and nutrition of real ogi/akamu without the laborious prep. No additives or preservatives – just pap powder that cooks fast into creamy ogi or sets into firm eko.

    With that in mind, let’s dive into the practical steps for making both ogi and eko using one pap powder. Grab your favourite pap powder (we’ll of course be using our Green Unison brand) and let’s get cooking!

    How to Prepare Ogi (Akamu) – The Creamy Pap

    Making ogi with our instant pap powder is quick and foolproof. Here’s how to get that smooth, creamy porridge consistency every time:

    1. Measure the Pap Powder: Start with about 3–4 tablespoons of pap powder per serving (this yields roughly one medium bowl of ogi).
    2. Make a Slurry: In a pot or bowl, mix the powder with a little cool water – just enough to form a smooth, runny paste (slurry). This step is crucial: using cold water first helps the powder dissolve without forming lumps. Stir until there are no dry clumps.
    3. Add to Boiling Water: Bring about 2 cups of water to a rolling boil in a pot. Once boiling, slowly pour the pap slurry into the water while stirring continuously. Stirring as you pour is the key to avoid lumps – you’ll see the mixture turn translucent and begin to thicken as it combines.
    4. Cook to Thicken: Reduce the heat to low and keep stirring for a few minutes. The pap will thicken into a custard-like consistency. Cook for about 5 minutes until it’s smooth and creamy, with no raw starchy taste.
    5. Serve Warm & Enjoy: Your ogi is ready when it’s a lush, smooth porridge. Serve it hot or warm. You can enjoy it plain, or add a splash of milk (or plant-based milk) and a bit of sugar or honey to sweeten. For extra yum, pair it with akara or moi-moi on the side – a classic combo for a filling breakfast!

    Ogi Tip: If your pap turns out too thick for your liking, simply stir in a little hot water to loosen it. If it’s too thin, you can mix a bit more pap powder in cold water and carefully stir it in while heating until it thickens. Once you get your preferred thickness, make a mental note of the powder-to-water ratio for next time. With our finely milled pap powder, you should get a smooth result with no lumps – just be sure to stir well and use boiling water.

    How to Prepare Eko (Firm Pap) – The Set Pap Pudding

    Now for eko, the firmer pap that sets into a mold. The preparation is similar at the start, but we’ll use less water and a thicker slurry, plus some patience to let it set:

    1. Measure a Larger Quantity: For eko, you’ll typically use more pap powder since it’s a solid serving. Let’s say about 1 cup of pap powder to make a small bowl or mold that serves two people.
    2. Mix a Thick Paste: In a bowl, combine the pap powder with some cool water, but this time add just enough water to form a thick paste. The mixture should be heavier – think the consistency of pancake batter or even thicker. Make sure it’s smooth (no dry lumps).
    3. Add to Boiling Water: Boil about 2½ cups of water in a pot (for 1 cup powder). Once boiling, stir in the pap paste gradually. Go slowly and stir vigorously as you add it, so the thick pap disperses without clumping. The mixture will begin to thicken very quickly.
    4. Cook Until Very Thick: Keep the heat on medium and stir constantly. The pap will turn into a thick, doughy porridge. Continue cooking and stirring for a few minutes – it will become glossy and pull away slightly from the pot as it thickens. Make sure there’s no raw taste (about 5–6 minutes of cooking is usually enough).
    5. **Pour and *Set:* Immediately pour the thick pap into a clean container or mold. (You can use any bowl, a loaf pan, or ramekins – lightly rinsed with water beforehand to make unmolding easier, if you plan to invert it out.) Smooth the top with a spoon. Leave it to cool and set for at least 1–3 hours at room temperature. For faster results, you can refrigerate it once it’s cooled a bit – the cold will help it firm up quicker.
    6. Serve as Desired: Once solid, eko can be cut into slices or blocks. Serve chilled or at room temperature. It’s often eaten on its own as a light meal, or you can enjoy it with a savory dish. Some popular pairings include eko with hot pepper soup, with akara/moi-moi (like ogi), or with a drizzle of stew or sauce on top.

    When made right, eko should hold its shape but still have a tender, gel-like bite. If your eko feels too soft or won’t hold form, it may have had a bit too much water – next time use slightly more powder (or a little less water). If it’s too hard or rubbery, use a bit more water next time for a gentler gel. After a try or two, you’ll find the perfect balance that suits your texture preference.

    Storage tip: Eko is best enjoyed within a day or two. Keep any leftovers refrigerated, wrapped or in an airtight container so it doesn’t dry out. Chilled eko can be quite firm; you can warm it slightly to soften the texture if preferred (or just enjoy it cold).

    Top Tips for Perfect Pap (Ogi or Eko)

    No matter which style you’re making, these tips will help you get a smooth, delicious result every time:

    • Always start with a cold-water mix: Whether for ogi or eko, don’t skip making that initial cold slurry/paste. Stirring pap powder directly into hot water will almost guarantee lumps. The cold pre-mix allows the powder to disperse evenly.
    • Stir, stir, stir: Continuous stirring while cooking is your best friend. It prevents the pap from settling and forming clumps at the bottom. Use a wooden spoon or whisk and really get into the corners of the pot as you stir.
    • Use the right ratio: For ogi, a ratio of roughly 1 part pap powder to 8–10 parts water (by volume) gives a good consistency (e.g. 3–4 tablespoons powder to 2 cups water). For eko, it’s more like 1 part powder to 2.5 parts water (e.g. 1 cup powder to ~2.5 cups water). These aren’t hard rules – you can adjust if you like it thinner or firmer – but they’re a reliable starting point.
    • Cook thoroughly: Once the mixture thickens, reduce heat to avoid burning, but do let it cook a few minutes. Proper cooking eliminates any raw starchy taste and brings out the subtle fermented flavour of the pap. You’ll notice ogi gets a smoother, more velvety texture after a bit of gentle simmering. Eko needs to be well-heated so it sets evenly (undercooked eko might separate or weep water upon cooling).
    • Let eko set undisturbed: Patience is key for eko. Resist the temptation to poke or stir it while it’s setting. Just pour it and let it rest in a cool spot. Moving it around or disturbing it can prevent the gel from forming nicely. You’ll know it’s ready when the container feels cool and the pap is firm to the touch.
    • Serving suggestions: For ogi/akamu, common add-ins are evaporated milk, sugar or honey, and sometimes a pinch of spices like ginger. It can also be blended with groundnut paste for a protein boost (see our post on a groundnut pap energy breakfast for ideas). For eko, since it’s plain, feel free to spice up the experience – a dash of salt or a spoon of stew on the side can complement its mild taste.
    • Storage and freshness: If you’re using our Pap Powder, store it in a cool, dry place in an airtight container. It has a shelf life of several months, but keeping it dry is crucial (so it doesn’t ferment further or attract pests). Check out our Flour & Pap Storage Guide for tips on keeping your pap powder fresh, weevil-free, and flavourful long-term.

    Why Pap Powder Makes It Easier

    Both newbies and seasoned pap-makers can appreciate the convenience of a good pap powder. Traditionally, preparing ogi from scratch meant soaking corn for 2-3 days, grinding and sieving it, and fermenting the extract – a labor of love that many of us simply don’t have time for. Green Unison’s Instant Pap Powder takes the hassle out while keeping the authentic taste. It’s made from 100% fermented cornno preservatives – and finely milled for a lump-free mix. Essentially, we’ve done the heavy prep ahead so you can just mix, cook, and enjoy in minutes.

    Plus, using a dry pap powder gives you flexibility. You can make just the amount you need, with no waste. It’s also hygienic and shelf-stable – no worries about the pap going sour or bad quickly (a common issue with wet akamu). Whether you’re a busy parent needing a quick breakfast for the kids, or a food enthusiast experimenting with Nigerian recipes, having pap powder in your kitchen means instant ogi or eko on demand.

    And don’t forget, pap isn’t only for breakfast. Ogi can be a soothing evening meal (many people enjoy it as a light dinner or to wind down at night), and eko can be a fun alternative to swallow or other staples at lunch. With one product, you have options.

    Ready to Make Yours?

    Now that you know how to achieve both textures from one humble powder, it’s time to put it into practice! Whether you’re Team Ogi (loves it warm and creamy) or Team Eko (all about that chilled firmness), you can have it all. Grab a bag of quality pap powder and give these techniques a try.

    👉 Get Green Unison Pap Powder: You can order our premium, nature-powered pap powder from our online shop – available in different sizes to suit your needs. It’s the same pap powder that’s featured in this guide, lovingly made from local maize and processed for maximum nutrition and convenience.

    👉 Quick WhatsApp Order: Prefer to chat? No problem! Browse our Pap Powder on WhatsApp via our catalog, or chat with us directly on WhatsApp to place your order or ask any questions. Just send a message saying you’re interested in pap powder, and we’ll guide you from there.

    Enjoy your pap, whichever way you like it! With the right powder and these tips, you’ll be making perfect ogi or eko whenever the craving strikes. Happy cooking and happy eating!

  • Micro-Batches: The Science of Aging Flour — Taste Tests Over 30, 60, 90 Days

    Micro-Batches: The Science of Aging Flour — Taste Tests Over 30, 60, 90 Days

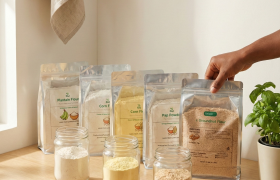
    Flour is a kitchen staple – but have you ever wondered how its flavor and texture change over time? We did, and we put it to the test with our micro-batch flours. In this post, we share results from tasting our freshly milled Smooth Plantain Flour, White/Yellow Corn Flour, Instant Pap Powder (ogi), and Groundnut (Peanut) Flour at 30, 60, and 90 days after production. How long does each stay fresh, when do they start to decline, and what can you do to preserve that just-milled goodness? Let’s dive into the science of aging flour – and why micro-batches may be your new best friend for peak flavor and nutrition.

    Why Freshness Matters (The Micro-Batch Difference)

    There’s a reason your nose perks up at the smell of freshly milled flour – it’s packed with vibrant flavors and nutrients that can dull over time. It’s like comparing freshly ground coffee beans to month-old grounds: fresh is always better. The micro-batch approach means we mill in small quantities and ship quickly, so you get flour at its freshest. This is vital for health-conscious shoppers (to maximise nutrients and avoid stale oils) and budget-wise families (to ensure that every scoop you bought gets used, not binned). Even home cooks will notice the difference: freshly milled flours yield richer aromas and better texture in your swallows, bakes, and breakfasts.

    What actually happens as flour sits? Over time, flours – especially whole-grain or nut-based ones – gradually oxidise. The natural oils in the flour (for example, the germ oil in whole corn or the healthy fats in groundnut) slowly break down, which can lead to off-odors and flavors. An older batch of flour might develop a slight mustiness; as one expert puts it, old whole-grain flour can taste bitter or even metallic if the oils have gone rancid. Additionally, prolonged storage in less-than-ideal conditions can invite moisture or unwelcome pests, which nobody wants in their pantry. All of these factors underscore why freshness isn’t just a buzzword – it directly affects the quality of your food.

    Micro-batches, however, help sidestep many of these issues. By producing flours in small lots, we avoid long warehouse storage. Every package of Green Unison flour is packed at peak freshness and in airtight, food-grade pouches. This means when you open a new bag, you’re likely smelling the same wholesome aroma as on milling day. We also seal each pouch with an extra inner layer – you break the first seal to confirm safety and freshness on arrival, then reseal it to keep the flour fresh after opening. It’s our way of ensuring you enjoy that “just milled” experience, even if you don’t finish the pack immediately.

    Now, onto the fun part: taste-testing our flours as they age. We stored each flour under normal pantry conditions (cool, dry, and sealed between uses) and noted the changes (if any) at 30-day intervals. Here’s what we found:

    30 Days Post-Milling: Still Farm-Fresh

    At the one-month mark, all our flours were virtually as good as new. Thirty days is well within the typical shelf window for any flour, so this wasn’t a surprise – but it was reassuring to confirm.

    • Plantain Flour (Elubo Ogede) – After 30 days, the plantain flour’s color and aroma remained rich. The flour had the same fine, lump-free texture it had on day 1. When made into amala ogede (plantain swallow), it was smooth and had that subtle plantain sweetness we love. No “off” smells; just the usual earthy aroma. This flour is naturally low in fat, so it’s quite stable. A bowl of plantain porridge made with 1-month-old flour tasted identical to one made with a fresh batch. In short, if stored properly, 1-month-old plantain flour cooks and tastes fresh.
    • Corn Flour (White/Yellow) – Our whole-grain corn flour also showed no significant change at 30 days. The fine powder was dry and free-flowing. We made tuwo masara (corn swallow) to test it, and it set perfectly with a smooth, non-lumpy consistency (our finely milled texture helps with that any day). Flavor-wise, both white and yellow corn flour gave the same hearty, slightly nutty corn taste as they did initially. We noticed no stale or bitter notes at this stage. This aligns with expectations – maize flour is relatively low in oil content, so one month is nothing. (If you’re curious about making the perfect corn swallow, we have a detailed guide on how to prepare corn flour for swallow (tuwo masara) – technique matters, but using fresh flour gives you a head start on flavor!).
    • Pap Powder (Ogi) – Our instant pap (fermented corn) powder at 30 days was in great shape. Pap is often made from corn, fermented and dried, so it has some tanginess by nature. After a month, the tangy aroma was the same, with no sour or foul smell beyond the normal ogi scent. The powder had remained dry (thanks to the low-heat dehydration and airtight pouch). We made a warm pap porridge and found no difference in taste or thickness compared to a freshly opened pack. It still gave that comforting, creamy ogi flavor and set into a nice smooth pap in minutes. No signs of clumping or moisture – a good indicator that the packaging was doing its job.
    • Groundnut Flour (Peanut) – At 30 days, the groundnut flour smelled wonderfully nutty, as it did on day 1. This flour has more natural oil than the others, being essentially finely milled peanuts. Sometimes, peanut-based products can start to smell slightly “peanut butter-ish” or rancid if the oils oxidise, but we detected none of that so early on. The flour tasted rich and peanutty when we stirred it into a smoothie and when used to thicken a soup. Its proteins and fats were still in prime condition. We did start storing the opened groundnut flour in the fridge right after this test, as an extra precaution – our product instructions actually recommend refrigerating after opening to maintain best freshness. While a month at room temperature was fine, cooler storage can extend that fresh taste even further for this type.

    Bottom Line at 30 Days: All four flours were fresh in appearance, smell, and taste. Proper packaging and storage were key – we kept them sealed, in a dry cupboard away from sunlight. No mold, no bugs, no odd odors. This shows that buying flours in micro-batches and using them within a few weeks ensures you’re always cooking with vibrant, flavorful flour. In fact, many of our customers finish a 1 kg bag in well under 30 days, especially with how versatile these flours are in everyday cooking. If you’re using them for multiple meals (for example, our social media recently showed 3 quick ways to use corn, plantain, and groundnut flour in one day – morning bowl, afternoon swallow, evening pap), your flour might not even see day 30! But if it does, rest assured it’s still top-notch at this point.

    60 Days Post-Milling: Holding Strong, Minor Changes

    Two months in, we examined (and tasted) the flours again. At 60 days, all flours were still in good shape, with just the subtlest shifts noticed in the more sensitive ones:

    • Plantain Flour (Elubo) – By the 60-day mark, the plantain flour remained dry and fine. There were no visible changes (no discoloration or clumping). The aroma when opening the pouch was still mild and neutral (plantain flour isn’t very aromatic to begin with, unlike something like whole wheat). We made another batch of amala and some plantain flour pancakes. The amala texture was as smooth as ever, and if anything, we might say the flavor was slightly milder than a truly fresh batch – but in a blind taste test, an average person probably wouldn’t tell the difference. Importantly, there was no hint of staleness. We did notice the color of the flour remained a nice beige; if it were going bad, you might see it turning dull or grey. At 60 days, it was still appetising. So plantain flour at two months old, stored properly, gets a thumbs up from our home cooks.
    • Corn Flour – At this point, the corn flour (both white and yellow) was also doing well. The powder was free of lumps and weevils (thankfully!). When we mixed it into tuwo, it bound nicely. The flavor was still hearty, though we thought the corn aroma when you first add water was a touch less pronounced than a fresh batch. This could be us being very finely attuned; the difference was minimal. Corn flour does contain the whole grain (ours isn’t degermed), so by 2 months a bit of the corn’s natural oil in the germ could start to lose potency. But there was no “off” smell – no sourness or playdough odor (which rancid flour can have. We also used the corn flour in a baking test – making a rustic cornbread by replacing some wheat flour with our yellow corn flour. The result was excellent; the bread had a lovely aroma and crumb. If the flour had gone stale, the bread would taste dull or slightly bitter. We experienced none of that. So, 60-day corn flour still passes the baking test for flavor and performance.
    • Pap Powder (Ogi) – After 60 days, our pap powder remained reliably good. No clumps (sign of moisture) and no mold. We took a closer sniff and got the same gentle fermented fragrance as always. When prepared, the pap thickened normally and tasted authentic. One thing we kept an eye on was any increase in sourness – over-fermented or spoiling pap might turn too sour or smell alcoholic. At 2 months, that did not happen; the taste was consistent with a fresh batch of pap. We did store this powder very tightly sealed because pap (ogi) can easily absorb moisture from air (and moisture is its enemy if you want it shelf-stable). The resealable pouch did its job well. For context, traditionally wet ogi is often used within a week or two or kept frozen – but our dry pap powder is made to last much longer since it’s fully dried. Two months was no challenge for it. It’s still fast, easy pap on demand, with freshness intact.
    • Groundnut Flour – Here we began to see the first subtle signs of aging. By 60 days, when we opened the pouch (which we had been keeping in the refrigerator after the first month), the groundnut flour’s aroma was still nutty and pleasant. If it hadn’t been, we’d know – peanut flour that’s starting to go rancid would smell a bit like old peanuts or oil paint. Our noses picked up nothing bad. We did a taste test by licking a pinch of the raw flour (just a tiny bit) – it tasted fine: rich and peanutty, no bitter or waxy aftertaste. We then used it in two ways: as a soup thickener and in a banana-groundnut pancake batter. In both cases, the flavor came through as it should. However, compared to a freshly opened pack, the intensity of the peanut aroma might have been slightly reduced. Fresh peanut flour has a strong nutty punch; at 2 months, it was a tad mellower. This is natural, as some of the aromatic compounds dissipate over time. Importantly, no bitterness was detected (which would indicate oncoming rancidity). We’ll note that we kept this flour cool; at room temperature, high-fat flours like groundnut or almond can start declining faster. If you’re buying groundnut flour and plan to store it for several months, we advise transferring it to an airtight container and possibly refrigerating or freezing it to preserve those oils. At 60 days though, ours was still going strong in terms of safety and taste.

    Bottom Line at 60 Days: Two months in, quality remained high across all flours, with only very minor flavor softening in the case of corn and groundnut flours. Everything we cooked tasted great – a sign that the flours were still fresh enough not to negatively impact recipes. If you served dishes made with these 60-day-old flours to your family, they’d likely never know the difference. This is good news for those who buy in bulk or stock up – as long as you store things correctly, you have a comfortable window to use your flours. We do recommend, especially for health-conscious folks, to use whole-grain or nut flours sooner than later for maximum nutritional benefit (some delicate nutrients can degrade over time). But from a purely culinary perspective, 60-day-old micro-batch flour is practically as delightful as day 1.

    One thing to emphasize: storage, storage, storage! By the 2-month mark, if flour is not stored well, you could start seeing problems. For example, a poorly sealed bag can let in humid air (leading to moldy clumps) or pantry pests like weevils. We kept our test flours in their original Green Unison pouches, squeezing out excess air and sealing tightly after each use, and placed them in a cool cupboard. If you were to leave a bag open or in a damp area, your results will vary. At this point, a quick visual check (no bugs, no discoloration) and a sniff test (no sour or musty odor) before use is wise. Ours passed both tests with flying colours at 60 days.

    90 Days Post-Milling: When to Be More Watchful

    Three months after milling, we reached a critical checkpoint. Flour can have a long shelf life, but 90 days is around the quarter-way point of the typical storage lifespan for many flours. According to food safety research, flour generally starts to deteriorate around 3–8 months in storage(so 90 days is right at the lower end of that range). Here’s what we observed at the 90-day mark:

    • Plantain Flour – Our plantain flour at 90 days was still usable and safe, but we noted a slight staleness beginning to creep in. Visually, it looked the same – dry, light brown powder with no pests or mold. The difference was subtle and mostly in aroma. Upon opening the pack, the smell was neutral (which is okay) but had lost that faint sweet hint of unripe plantain that a freshly opened pack has. In a warm bowl of amala, we honestly couldn’t tell much difference in taste; it still made a perfectly satisfying swallow with good texture. Perhaps the flavour was a touch flat compared to a new batch, but nothing off-putting. We did a best-by check: our plantain flour is labeled for ~12 months unopened, 6 months after opening. We were at 3 months open, so within limits. It hadn’t “expired” in any official sense, but we could tell it was no longer at peak. If you have plantain flour nearing 3+ months since opening, we’d suggest using it up in recipes like pancakes, muffins or smoothies where any minor flavor loss is easily masked. Also, always check for little clumps or specks. Our batch had none, but clumps could mean moisture, and specks that move (yikes) mean bugs – in either case, time to toss it. Happily, we saw neither and could continue enjoying it, but we knew we were on the back end of its prime window.
    • Corn Flour – At 90 days, the corn flour also remained largely fine but with some notes to consider. The flour was still dry and free-flowing. One thing we did was a quick sieve test: we sifted a bit through a mesh to see if any weevil carcasses or eggs might be hidden (sometimes you don’t notice pests until you sift). Thankfully, nothing but flour passed through – a relief, meaning our airtight storage kept the flour beetles and moths out. In terms of smell, the flour had a mild cereal scent, perhaps lighter than before. Whole-grain corn flour has some fat from the germ; by 3 months, that fat can start to oxidize. We didn’t smell anything like the “crayon” or “play-dough” odor that truly rancid whole grain flour can emit, so we were clear on that front. Using 3-month-old corn flour in cooking yielded decent results: tuwo came out slightly less flavorful than with a fresh batch (corn’s natural sweetness can dull with time). We also fried some as a coating for fish – it still gave a nice crunch but we noted we had to season a bit more generously to get the same corn flavour pop. This hints that while the flour hadn’t gone bad, its flavour strength was fading. Nutritionally, it’s likely still providing the carbs and fibre, though possibly a tiny loss in certain vitamins by this age. We decided that if not used up by this point, it’s best to finish it soon. The flour’s official shelf life is around 6–8 months in the pantry, but quality-wise, 3 months is a good cut-off to ensure you’re still enjoying it. We’d also move any remainder to the fridge or freezer at this stage to prolong its life (just bring it back to room temp before using, to avoid lumps.
    • Pap Powder (Ogi) – Three months in, our pap powder was the one we were most vigilant about, because any moisture sneaking in could spoil it. We examined the powder closely: still a fine off-white powder, no discoloration (mold on pap would show as dark patches or an orange tint sometimes). The smell test: it had a slightly less sharp sour aroma than a fresh batch, interestingly. Possibly some of the natural sour notes mellowed as the powder aged. There was no foul odor – which is key, because a bad smell would mean throw it out. We made a small bowl of pap to double-check performance: it took a tad longer to thicken than initially (maybe because the powder had absorbed just a bit of ambient humidity over time, needing extra heat to gel). But it did thicken and set into a nice pap/akamu. Taste-wise, it was still enjoyable – a warm, comforting custard. We did notice we wanted to add a bit more milk and sweetener than usual; perhaps the pap’s flavor wasn’t as vibrant, or maybe we were just overanalyzing. The takeaway: 90-day pap powder was okay to consume and tasted fine for most practical purposes. However, at this age, we strongly advise checking it visually each time before use. Any moldy clumps or “off” smells (or the presence of pantry bugs) are a no-go. In our case, the pap powder remained clean. Nonetheless, since pap is something often given to babies or consumed for its probiotic benefits, one might prefer it fresher. We’d say using our pap powder within 3 months of opening is ideal to enjoy its full authentic taste. Technically, it can last longer (unopened pap powder is good for about a year, and 6 months opened, but quality is highest in those first few months.
    • Groundnut Flour – Finally, our groundnut flour at 90 days: this was the critical one due to those natural oils. We had stored it chilled after month 1, which definitely helped. Upon retrieving it for the 3-month test, we let it come to room temperature (to avoid condensation). The look was unchanged – a light brown, powdery flour. No visible oil separation (sometimes you can see tiny oil beads in high-fat flours if they start going bad). We gave it a good sniff: there it was – the first hint of that “old peanut” smell. It was faint, not a full-blown rancid odor, but we could tell the flour was not as fresh. If at 30 days it smelled like freshly roasted peanuts, at 90 days it smelled more like peanut butter that’s been open a while – still nutty, but a bit subdued with a whisper of waxiness. We tasted a pinch and noted a slight bitterness on the back of the tongue that wasn’t there before. This is the tell-tale sign that the oils are on the verge of rancidity. Now, it’s worth noting: rancid flour isn’t immediately harmful in small amounts, but it definitely isn’t pleasant or healthy to consume regularly. We wouldn’t bake a cake with 3-month-old groundnut flour that has started to turn – the whole cake could taste off. In our test, the flour was just at the cusp; we decided it was still usable for non-delicate uses. For example, we stirred some into our morning oats with honey – and it was okay, the honey masked any slight bitterness. But using it in a plain pancake, we noticed the flavor wasn’t as delightful as it should be. Given this result, we concluded that around 3 months is when groundnut flour typically goes downhill in the Nigerian climate if not frozen. It’s in line with general advice that higher-fat flours spoil closer to the 3–4 month mark at room temp. Because we extended its life via refrigeration, we squeezed a bit more time out, but even so, 90 days was pushing it for peak quality. If you ever open your peanut/groundnut flour and it smells sour, musty, or like old crayons, or tastes bitter, it’s time to chuck it (or compost it) – don’t try to save a bad flour. In our case, we pre-emptively decided to transform the remainder into a cooked paste (like a quick groundnut soup) and then froze that, rather than keep the raw flour longer.

    Bottom Line at 90 Days: Three months after production, our flours were largely still safe and mostly palatable, but some were past their prime in flavor. Plantain and pap flours held up the best, continuing to perform well with minimal quality loss. Corn flour was alright but starting to lose its flavourful edge. Groundnut flour was on the verge of decline – edible, yet not as pleasant as we’d like. Essentially, 90 days is a good checkpoint to either use up or renew your stock. If you have flour that’s been sitting for 3+ months, do a thorough check: look, smell, and if those are okay, even taste a tiny bit raw. Fresh flour has very little taste; bad flour tastes bitter or “off”. As one food expert notes, “Old flour can taste bitter or metallic… better to trash that flour than ruin your recipe”. We agree – when in doubt, it’s not worth a ruined pot of soup or batch of swallow (or an upset tummy).

    By this time, you might also encounter pests if your storage wasn’t airtight. Those “tiny visitors” like flour beetles (weevils) or pantry moths can infiltrate even dry-looking flour. They often come in as microscopic eggs from processing or packaging and hatch later. If you ever find small bugs in your flour at any age, it’s best to discard it. The good news: using sealed, thick packaging (like our pouches or your own airtight jars) can prevent infestations by keeping bugs out (and any that were in, trapped). We strongly recommend, especially in our climate, to store flour in airtight containers – not just folded in a paper sack. In our tests, the integrity of our packaging clearly prevented any pest issues even at 90 days. For extra caution, you can freeze new flour for a few days after purchase to kill any possible insect eggs, then store it in a jar. We didn’t need to in our case, but it’s a handy tip for long-term storage.

    Flour Shelf Life by Type (and Maximising Freshness)

    From our micro-batch experiment and general food science, here’s a quick rundown of how long these flours typically stay fresh and what affects that:

    • Plantain Flour: Shelf life is about 12 months unopened, 6 months once opened if stored well. It’s low in fat, so it doesn’t go rancid easily. The main risks are moisture (which can cause mold) and pests. Keep it sealed and dry. In practice, as we saw, quality is top-notch for at least the first 2–3 months, and still usable up to 6 months. Beyond that, you might notice it’s harder to rehydrate smoothly or a stale odour might develop. Always reseal after each use – the pouch is resealable for this reason.
    • Corn Flour (Wholegrain): Also roughly 12 months sealed, ~6 months. Because ours is wholegrain, it contains the germ oils; those oils can shorten the optimal period compared to refined cornmeal. Store corn flour in a cool, dry place, and consider refrigeration after opening if you won’t use it within 3-4 months. It will stay safe for longer, but the flavor may degrade. If it smells musty or no longer has that corn sweetness, it’s past its best. Use clean, dry scoops to avoid introducing moisture or contaminants. Pro tip: Split large packs into smaller airtight jars – each time you open, you expose only a portion of the flour to air. (And if you love corn flour, check out our recipe for fluffy corn-flavoured pancakes – using fresh corn flour makes them extra fragrant!
    • Pap Powder (Ogi/Akamu): Unopened, up to 12 months; after opening, we suggest 3–6 months for best quality (though it may last longer). The key is zero moisture – even a wet spoon can ruin a whole pack of pap. Always use a dry spoon and seal it immediately after scooping. Because pap is fermented, it has some natural preservation (the acidity deters some microbes), but if water gets in, mold can grow. You’ll know if it’s off: moldy pap smells truly foul. Otherwise, it can actually smell sour by nature, so go by any change in smell or appearance. Some folks refrigerate pap powder; it’s not required, but it can’t hurt, especially in humid seasons. If you notice the pap takes much longer to set or doesn’t taste right, it might have aged – time for a fresh pack.
    • Groundnut Flour: Unopened ~12 months, but once opened, use within ~3 months for peak quality, or 6 months max if kept refrigerated. This flour is the most sensitive of the lot. The natural oils in peanuts can oxidize and go rancid relatively quickly at room temperature. You’ll first notice a slight bitter or “crayon-like” smell when it’s starting to spoil. To maximise its life: keep it airtight (absolutely no air exchange if possible), and store it cold. We recommend transferring groundnut flour to a jar and popping it in the fridge or freezer right after opening if you won’t finish it in a month. In the freezer, it can easily last 6+ months without quality loss (just let it thaw to room temp before opening the container, so no condensation forms). As we saw, even refrigerated, by 3 months we were hitting the limit on taste. So smaller quantities bought more frequently (micro-batches!) will give you the best experience. And hey, if you find you have a lot nearing its date, you can turn it into a quick groundnut soup or sauce – cooked groundnut won’t spoil as quickly as the raw flour.

    Factors influencing freshness: Beyond time itself, remember these key factors that determine how long your flour stays fresh and tasty:

    • Packaging – The initial packaging matters a lot. All Green Unison flours come in sealed, multilayer pouches that keep light, air, and moisture out. This gives you a head start on shelf life. Once opened, continue to keep them in a similar protective environment. If the original pouch gets damaged, move the flour to an airtight container immediately. Avoid thin plastic bags – believe it or not, insects can chew through flimsy bags, and bags don’t fully prevent humidity exchange. A screw-top jar or quality plastic container is better if not using the original pouch.
    • Storage Conditions – Heat and humidity are the enemies. Store flours in a cool, dry place (for example, a cupboard away from the stove or sunlight). In Nigeria’s climate, that often means finding the least humid spot in your kitchen. You can even put a food-safe moisture absorber (like a silica gel packet meant for pantry use) near your stored flours if humidity is a big issue. Also, strong light can cause some nutrient breakdown – another reason our pouches are opaque. If your kitchen is very hot, consider refrigeration for all flours, not just groundnut, to extend their life. Just ensure they’re sealed to avoid absorbing fridge odors.
    • Flour Type – As discussed, different flours have different compositions. White/refined flours (not in our case, but e.g. white wheat flour) last longer because the oily germ and bran are removed, leaving mostly starch. Wholegrain flours (like our corn flour and pap) have more nutrients but shorter peak life due to oils. Nut flours (groundnut) have the highest oil content and thus the shortest life before quality dips. Root/tuber flours (like plantain) are mostly starch and fibre, with low fat – they tend to be quite shelf-stable if dry. Knowing this, you can prioritise which to use first. For example, if you buy both plantain and groundnut flour today, plan to finish the groundnut flour sooner or store it extra carefully.
    • Cleanliness – Always use clean utensils to scoop your flour. Introducing crumbs, dampness, or other food particles can invite bacterial or mold growth. It might sound trivial, but a breadcrumb in a jar of flour over weeks can grow mold that then spoils the flour. We often tell customers: treat your flour like a food, not just an ingredient – it can spoil. Good handling practices will keep it fresh longer.
    • Best By vs. Actual Freshness – Our products have best-by dates (usually 6-12 months out) and those are conservative estimates for unopened packs. Flour can technically remain safe beyond those dates if stored perfectly, but the quality and nutritional value diminish. One rule of thumb: flour doesn’t suddenly “die” the day after its best-by date. If it’s been stored properly, you can inspect and use your judgment. We’ve heard from some resourceful cooks who revive slightly older flour in non-critical uses (like frying batter or gravy) as long as it passes the sniff/taste test. However, for something like baking or where flour is a main flavor, fresh is always best. Given that most flours are affordable, it usually isn’t worth holding on to old stock – better to buy in quantities you’ll use in a few months, i.e., micro-batches, which brings us back full circle!

    Keeping Your Flour Fresher for Longer: Tips & Tricks

    To wrap up, here are practical tips to ensure your flours stay as fresh as the day they were milled – helping health-conscious shoppers get the most nutrients, budget-conscious families avoid waste, and home cooks achieve consistently delicious results:

    • Buy in Micro-Batches: Rather than buying a year’s supply of flour that sits around losing potency, buy smaller packs more frequently. Our shop offers sizes like 500g or 1kg – which for most households will be used up in a month or two. This way, you’re always working with fresher flour. It might feel convenient to bulk-buy staples, but with flour, less can be more in terms of quality.
    • Use Original Airtight Packaging or Equivalents: Upon purchase, our flours come vacuum-sealed or tightly packed. After opening, squeeze out excess air and zip the pouch securely. If the pouch has no zip or you prefer jars, transfer the flour to an airtight container that no air or pests can enter. Glass jars with rubber gaskets or good plastic canisters work well. Label them with the opening date so you can keep track of age. Remember that pantry pests can’t penetrate solid sealed containers – and you also prevent your flour from absorbing odours or moisture this way.
    • Cool, Dark, Dry Storage: We’ve said it before, but it bears repeating. Humidity is high in many parts of Nigeria, especially during the rainy season – that’s when you’ll want to be extra vigilant. Store flours off the ground (pantry shelves are great) and away from sources of heat like your cooker or direct sun through a window. If you have AC or a dehumidifier in a store room, that’s an ideal spot. Even a lidded plastic bin or cooler box can create a more controlled environment for your dry goods. For those in very hot regions, consider keeping a small stock of flour in the fridge or freezer and the rest in the pantry, refilling your pantry jar from the frozen stock as needed.
    • Freeze for Long Storage: Freezing flour is a well-kept secret. It can significantly extend shelf life and also kill any potential insect eggs. If you buy multiple packs or grind your own flour, store the excess in the freezer. Flour won’t freeze solid (too dry), but the cold keeps it fresh. When using frozen flour, let the container sit out until it reaches room temp before opening, to avoid condensation wetting the flour. This technique is especially useful for groundnut flour or rare flours you use occasionally.
    • First In, First Out (FIFO): Use older flour before newer ones. If you purchase a fresh batch, don’t mix it on top of an older batch in a jar – finish or remove the old one first. This rotation prevents the scenario of discovering a 1-year-old packet that got buried in the back. It also ensures you’re always cooking with reasonably fresh product. Many families keep two jars: one in use, and one backup sealed for when the first is done – rather than opening both.
    • Trust Your Senses: Ultimately, your nose and eyes are great at judging flour. Give stored flour a sniff each time you use it. It should smell neutral or slightly nutty/sweet depending on the type. Any sour, chemical, or strange strong smell is a red flag. Feel the texture: it should be loose and powdery. If it’s caked or has cobwebby clumps, there’s likely mold or insects. Don’t try to salvage it – bin it. It’s better to lose a bit of flour than risk ruining a whole meal or your health. When in doubt, do a test: cook a small pancake or mix a teaspoon of flour in warm water and taste. If it tastes fine, you’re good to go. If it yields any bitter or “off” flavor, time to replace it.
    • **Keep Flour **Bug-Free: As an extra measure, some people like to add a bay leaf or dried chili to flour containers as a traditional repellent for bugs (there’s mixed evidence on effectiveness, but it might help). More scientifically, as mentioned, freezing newly bought flour for 72 hours can eliminate any insect eggs from the factory or market. We ensure our production is clean and we haven’t seen any infestations on our end, but once it’s in your kitchen, other food items can cross-contaminate. Keeping a tidy pantry and using airtight storage is the best prevention. Should you ever find an infestation in one item, check all other nearby items – those pests spread.

    By following these tips, you can extend the life and quality of your flours, saving money (no more tossing out half-used bags) and ensuring every recipe comes out as delicious as possible. Fresh flour not only tastes better but also can have more nutritional value – for instance, freshly milled whole grains retain more vitamins and antioxidants, which degrade over time. So, your commitment to freshness is also a commitment to better nutrition for your family.

    Conclusion: Savor the Freshness of Small-Batch Flours

    Our 30-60-90 day flour experiment highlights one key message: fresh flour makes a difference you can taste. While properly stored flour can stay usable for many months, the peak flavors and textures shine in those first few weeks after milling. That’s exactly why Green Unison champions micro-batches – by milling in small quantities, we deliver flour that reaches you faster and fresher, so you can enjoy it at its best.

    Whether you’re a health-conscious shopper mindful of nutrient loss, a budget-focused parent who hates wasting food, or a home cook whose pride is serving tasty meals, using fresher flour is a win-win. You get full flavor, maximum nutrition, and minimum spoilage. Our micro-batch ethos isn’t just a gimmick; it’s rooted in science and sustainability. We’d rather mill more often and sell just enough, than mill a ton that sits around. It ensures quality control at every step – from the farm in Ogun State where our grains and plantains grow, to the low-heat drying and fine milling we perform, to the careful packaging that locks in freshness.

    So the next time you open a bag of Green Unison flour, breathe in that subtle fresh aroma and feel confident that you’re starting your recipe with a solid foundation. Whether it’s a nourishing breakfast pap, a family dinner of swallow with soup, or a batch of pancakes for a weekend treat, you’ll notice the vibrant taste that fresh flour brings. No more “funny aftertaste” or dense, odd-smelling bakes that old flour can cause – just wholesome, natural goodness. As we often say, “Nature’s best, enjoyed fresh.”

    Ready to put this into practice? We invite you to try any of our all-natural flours and feel the difference yourself. You can shop these products on our website or even via WhatsApp for convenience. For instance, check out our Flours section online to order Smooth Plantain Flour for a gluten-free amala, or Silky Corn Flour to elevate your baking and swallows. We also have the Instant Pap Powder ready for your next hearty breakfast, and the Groundnut Flour for those protein-rich additions to meals (when it’s fresh, it’s incredibly flavorful!).

    Feel free to reach out to us if you have any questions about storing your flours or want to share your own tips. We love hearing from our Green Unison community – after all, our mission is to make natural, healthy living easy and joyful for you.

    📞 Quick Order or Inquiry

    Interested in trying a micro-batch flour or need a refill? We’ve made it super easy for you:

    • WhatsApp Catalog: Browse and order through our WhatsApp catalog with a simple tap: View Products on WhatsApp. You’ll find all our flours there with current prices. 🛍️
    • Chat with Us: Have a question or ready to place an order directly? Chat with a Green Unison representative on WhatsApp: Chat Now. Just say hi and let us know what you need – we’re here to help (fast response guaranteed!). 💬

    We deliver nationwide, with same-day pickup in Iperu Remo and fast delivery to Lagos & Ibadan, so fresh flour is never far from your kitchen.

    Join the micro-batch revolution and cook with confidence, knowing your ingredients are fresh, natural, and handled with care from farm to packaging. Your taste buds (and your family’s smiles at dinnertime) will thank you!

    Live green, eat fresh, and enjoy every meal. 🌱🥘 Thank you for reading, and happy cooking!

    References: The insights above are backed by food science and our hands-on tests. For further reading on flour shelf life and storage, you may check resources like Healthline’s guide on flour expiration, expert tips from Food Republic on signs of flour spoilage, and our own product pages which detail storage recommendations. Stay informed, stay healthy!

  • 5 Healing Herbs to Spice Up Your Comfort Food

    5 Healing Herbs to Spice Up Your Comfort Food

    When it comes to comfort food, a little sprinkle of herb can do more than add flavor – it can add comforting benefits, too! 🌿 In this guide, we explore five healing herbs you can easily use in your everyday meals. These herbs not only make your kitchen smell divine, but also may help soothe common troubles like indigestion, stress or the sniffles (all without forcing anything – just good food and nature’s touch). Grab a warm seat and let’s cook for comfort!

    1. Peppermint – Soothe Digestion with a Fresh Twist

    Why it comforts: Peppermint is famous for calming an upset stomach. In fact, there’s science behind that after-dinner mint ritual – peppermint can relax stomach muscles and improve bile flow, easing indigestion. The menthol in peppermint also works as a gentle decongestant, which is why a steamy cup of peppermint tea feels so good when you have a cold. It’s a win for tummy comfort and stuffy noses!
    How to use: Brew a cup of peppermint tea using our food-grade Dried Peppermint Leaves as a soothing after-meal drink. You can also chop a few Dried Mint Leaves into a cucumber salad or yogurt raita – the cool flavor refreshes the palate and aids digestion. If you’re feeling adventurous, drop a leaf into your morning smoothie or zobo drink. The key is to start with a small pinch, taste, and add more if needed. Peppermint is potent, so a little goes a long way in cooking. (Ever wonder why peppermint candy is offered after heavy meals? Now you know – it’s not just tradition, it’s tummy care in disguise! 😊)

    2. Sweet Basil – Stress Relief in a Stew Pot

    Why it comforts: Sweet basil (the same “scent leaf” many of us know and love) isn’t only for jollof rice aroma – it’s also packed with antioxidants and anti-inflammatory compounds that support wellness. Some studies even suggest basil’s natural oils (like eugenol) can help reduce stress and anxiety levels. No, it’s not a magic cure for a bad day, but the ritual of cooking with basil – and the soothing scent it releases – can have a calming effect. Think of that whiff of fresh basil in hot soup; it practically feels like self-care.
    How to use: Stir a pinch of Dried Sweet Basil into your tomato stew or pepper soup towards the end of cooking (too much heat can diminish its flavor). The herbal note brightens rich dishes and might just help your nerves unwind after a long day. Pro tip: 1 teaspoon of dried basil ≈ 1 tablespoon fresh:contentReference[oaicite:8]{index=8}, so you don’t need much for that classic aroma. Basil is also great in non-Nigerian comfort foods: sprinkle it on homemade pizza, creamy pasta, or even make a quick basil tea (steep 1–2 teaspoons in hot water for 5 minutes) for a caffeine-free evening drink. The aroma therapy you get while chopping or infusing basil is a bonus dose of comfort!

    3. Lavender – A Little Calm in Your Cookies (or Cup)

    Why it comforts: Lavender is well-known for its relaxing scent – think aromatherapy oils and spa days. But can you cook with it? Absolutely – with a few pointers. Lavender contains gentle compounds that are traditionally used to ease stress and improve sleep (ever tried a lavender pillow spray?). In food, it can impart a soothing floral note that feels as calming as it tastes. However, many people worry: won’t my food taste like soap or grandma’s perfume? The good news: if you use culinary lavender and use just a little, your dishes will be enchanting, not overwhelming. The rule of thumb is “less is more” – dried lavender buds are about 3 times more potent than fresh, so start tiny and adjust:contentReference[oaicite:9]{index=9}. When done right, lavender adds a unique cozy warmth to sweets and drinks.
    How to use: Use edible dried lavender (like our locally grown Dried Lavender) in very small quantities. For instance, add a pinch of crushed lavender to a batch of cookie or shortbread dough – you’ll get a light floral hint that pairs beautifully with vanilla and citrus. 🍪 Or steep 1/2 teaspoon of lavender with your tea leaves to make a fragrant lavender tea (excellent with honey at bedtime). You can even infuse lavender in warm milk for a relaxing nightcap. Remember, because of lavender’s strength, it’s wise to start small and taste as you go. The goal is a hint of lavender; too much and you’ll go from comforting to cough syrup. Used sparingly, though, lavender can turn simple foods – like lemonade, hot cocoa, or even zobo – into a calming ritual. And yes, it’s completely safe to eat in these small amounts. So don’t be scared to try it in the kitchen – just follow your nose and your taste buds (they’ll tell you when it’s enough!).

    4. Lemongrass – Warming Relief for Cold Days

    Why it comforts: Lemongrass (known as “citrus grass” by some) brings a bright lemony flavor and a slew of traditional benefits. It’s popularly used in teas for anxiety relief and better sleep, and it contains compounds that fight inflammation:contentReference[oaicite:12]{index=12}. In folk medicine, lemongrass tea is a go-to for when you’re feeling under the weather – it can help reduce bloating and calm the body, almost like a natural mild sedative. Ever had a soothing cup of fever grass tea in grandma’s kitchen? That’s lemongrass working its magic, easing your tension and aiding digestion at the same time. It’s the definition of a comfort drink.
    How to use: Our Dried Lemongrass Leaves are perfect for brewing tea. Just steep a teaspoon in hot water for 5-10 minutes, strain and sip – you’ll notice how the citrusy aroma instantly “opens” your senses and relaxes you. 💆🏾‍♀️ You can add ginger or mint to the cup for extra flavor and cold-fighting power. Beyond tea, drop a piece of lemongrass in your pepper soup or chicken broth while it simmers – it lends a subtle fragrance that can lift your spirits, especially on a chilly evening. (Remove the lemongrass before serving, like you would a bay leaf.) Because lemongrass has those calming properties, a warm soup infused with it does double duty: it comforts you with heat and helps you unwind. Fun fact: The same natural oils in lemongrass that relax you are also great for skin and can even repel mosquitoes – but we’ll stick to culinary comforts here! Enjoy the gentle zest lemongrass brings, and breathe easy with each sip and spoonful.

    5. Indian Borage – Nature’s “Invisible Mentor” Herb

    Why it comforts: Indian Borage (sometimes called Cuban oregano or locally, a form of “effirin” in Yoruba) is a powerhouse of traditional remedies packed into one fuzzy leaf. This humble herb has a long history in grandma’s arsenal: it’s been used for chronic coughs, sore throats, and even skin soothing. In places like India and across Africa, people chew the leaves or drink the tea to help with persistent cough and bronchitis. The leaves are rich in anti-inflammatory properties, which might explain why they’re used to relieve asthma symptoms and ease chest congestion. Think of Indian borage as that quiet friend in the background, ready to step up when you’re feeling congested or run-down. It’s not as famous as peppermint or ginger, but it’s cherished as an “emergency herb” for good reason.
    How to use: Try adding a couple of Dried Indian Borage leaves to your cooking – its flavor is like a bold mix of mint and oregano, so it pairs well with meat and poultry dishes. For example, drop one leaf into your chicken pepper soup or goat meat stew as it cooks, then remove before serving (the same way you’d use a bay leaf or scent leaf). It gives a robust, herbal depth to the broth. You can also make a simple herbal steam to clear your nose: pour boiling water over a few borage leaves in a bowl, drape a towel over your head and inhale the steam (carefully). The menthol-like vapors can help open up nasal passages – a comforting relief when you’re bunged up with a cold. If you have fresh leaves, you might even chew on one for a cough (it’s strong, but generations swear by it!). And as always, moderation is key: one or two leaves are plenty to “do the job” – remember, with herbs it’s about gentle consistent support, not heavy doses. Indian borage proves that sometimes the lesser-known ingredients in our pantry carry the biggest comfort surprises!

    Bonus Tips for Cooking with Healing Herbs

    • Start Small, Adjust to Taste: When using potent herbs (👋🏽 hello lavender and Indian borage), begin with a tiny amount. You can always add a bit more, but you can’t undo an overpowering flavor. As one cooking guide says, “less is more when it comes to lavender” in recipes – and this wisdom applies to any strong herb. Your taste buds will guide you, so sprinkle, stir, and sample as you cook.
    • Pair with Comfort Classics: Incorporate these herbs into familiar comfort dishes. Making jollof rice? Toss in a bay leaf and a pinch of basil at the end for aroma. Craving hot chocolate? Try steeping it with a dried peppermint leaf for a minty twist. Because the goal is comfort, you don’t need fancy new recipes – just boost the ones you already love.
    • Quality Matters: Use culinary-grade, dried herbs from trusted sources. (Avoid grabbing potpourri lavender from a craft store, for example – it might be treated with chemicals 🫢.) All the herbs mentioned above – peppermint, basil, lavender, lemongrass, borage, etc. – are available in our shop in dried, food-safe form, grown and prepared with care. Quality dried herbs ensure you get the flavor and the benefits without any unwanted additives.
    • No Wild Health Claims: Enjoy the gentle health boosts these herbs offer, but remember they’re not medicines. Think of them as nature’s little helpers. A cup of lemongrass tea might relax you, but it’s not a prescribed sedative – and that’s okay! Embrace the comforting ritual and the possible relief it brings, with no pressure. Always listen to your body (and of course, consult a doctor for serious ailments). Herbs support a healthy lifestyle; they don’t replace professional care. 💚

    Comfort and Care, Served Naturally

    Cooking with healing herbs is like getting a warm hug from nature with your meal. By infusing your favorite comfort foods with peppermint, basil, lavender, lemongrass, or Indian borage, you’re layering in extra love and care. The next time you’re brewing that chicken pepper soup or baking those biscuits, reach for one of these herbs in your pantry. You’ll not only delight your senses but also tap into age-old wellness traditions that have comforted people for generations.

    Ready to give it a try? You can get high-quality, dried herbs delivered to your doorstep – browse our WhatsApp catalog for all the herbs mentioned here. We’ve got everything from mint to lavender in stock, carefully dried to lock in their goodness. If you need a friendly nudge or a custom recommendation, we’re just a chat away – chat with us on WhatsApp and let’s talk about which herb might become your new kitchen hero. We’re happy to help you pick, order, and even share more recipe ideas. 😉

    Cook, taste, and enjoy the comfort that nature offers. Sometimes, a pinch of healing is all you need to turn a good meal into a great one – for your body and soul. Happy cooking and take care! 💚🌱

    Content reviewed for accuracy and sourced from trusted references. All tips are for general wellness and enjoyment – no medical claims here, just delicious, time-honored habits*.

    (Tags: HealingHerbs, ComfortCooking, HerbalRemedies, NaturalFlavors, HealthyLiving)
    (Categories: Herbs & Spices; Wellness Tips; Recipes)

  • Your Flour & Pap Powder Care Guide: How To Beat Weevils, Moisture And Bad Smells

    Your Flour & Pap Powder Care Guide: How To Beat Weevils, Moisture And Bad Smells

    Keep your plantain, corn, pap and groundnut flours fresh, bug-free and smelling clean with simple flour storage habits that work in warm, humid kitchens.

    Have you ever opened your bag of flour to make a quick meal — maybe a bowl of creamy ogi or soft amala ogede — and instead met tiny insects or a strange smell? 😖 It is a common pantry problem in warm, humid climates where unsealed flour easily becomes a weevil playground or starts to clump and smell off.

    The good news: with a few simple habits, you can beat weevils, moisture and bad smells and get the best out of your Smooth Plantain Flour (Elubo Ogede) , Silky White/Yellow Corn Flour , Instant Pap Powder (Ogi/Akamu) and Finely-ground Groundnut Flour .

    This guide breaks everything down in plain language, so every scoop from your pantry still feels fresh and safe.

    What Makes Flour Go Bad?

    Flour looks dry and harmless, but three quiet enemies can spoil it if we are not careful: insects, moisture and air.

    • Pantry weevils (flour bugs) — Tiny brown beetles that love grains and flours. They often arrive as invisible eggs inside the grain or flour. Once they hatch, they turn your bag into a home and food source.
    • Moisture and mould — Flour absorbs moisture from the air. In a humid kitchen, that moisture can turn into soft clumps and eventually mould. Mouldy flour may show fuzzy spots or develop a musty odour.
    • Air and rancidity — When flour, especially one with natural oils such as groundnut flour, sits open for too long, oxygen slowly breaks the oils down. This process (oxidation) leads to a sharp, stale or paint-like smell and an unpleasant taste.

    The key to good flour care is simple: keep bugs out, keep moisture out, and limit air contact. The next sections show exactly how to do that at home.

    Beat the Bugs: How to Keep Weevils Out of Your Flour

    Nobody enjoys discovering “extra protein” in their pap or swallow. Here is how to keep weevils far away from your flour shelf.

    1. Move flour into airtight containers

    After opening any pack of flour, do not just roll the top and hope for the best. Pour it into a clean, airtight container or keep it in the original resealable pouch, squeezing the air out before sealing.

    Good options include:

    • Glass jars with tight lids
    • Food-grade plastic containers with snap lids
    • The original Green Unison resealable pouch zipped properly after each use

    Airtight containers make it harder for insects to crawl in and also stop any eggs that might already be present from spreading around your pantry.

    2. Use the freezer trick for new flour

    One science-backed tip used in many kitchens worldwide is simple: freeze your new flour for a few days after you buy it.

    When you bring home a fresh bag of:

    place the sealed bag in your freezer for around 3–5 days. Deep cold helps to stop any hidden insect eggs from surviving long enough to hatch. After freezing, let the bag come back to room temperature before you open it, so condensation does not form inside.

    3. Keep shelves clean and crumbs away

    Weevils and other pantry pests love leftover grains or crumbs. If there is spilt flour in your cupboard, it acts like a free buffet.

    Make it a habit to:

    • Wipe and sweep shelves regularly
    • Clean up any flour spills immediately
    • Check corners and cracks — vacuum or wipe them, especially if you have had bugs before

    A clean pantry makes it harder for pests to settle in or move from one food item to another.

    4. First in, first out

    Try not to forget half-used bags at the back of the cupboard. The longer flour sits, the more time insects have to appear.

    Use a simple rule: first in, first out. Finish older flours before newer ones and label containers with the date you opened them so you can keep track.

    Keep It Dry: Protect Your Flour from Moisture and Mould

    Moisture is one of the quickest ways to ruin flour. Once water gets in, clumps, mould and sour odours are not far behind.

    1. Choose a cool, dry cupboard

    Keep flour on a shelf that is:

    • Away from the cooker, kettle and steamy pots
    • Away from the sink or any leaks
    • Not directly against a damp wall

    A cool, dry, dark cupboard is best. Warm, humid air speeds up spoilage and encourages mould growth.

    2. Seal properly after every use

    Each time you scoop flour, close it back immediately. If the flour stays open while you cook, steam and moisture can easily get inside the bag or container.

    Simple habits:

    • Use only clean, dry spoons (no wet cups or damp hands)
    • Close the zip on the pouch all the way to the end
    • Check that container lids are really tight

    3. Be careful with the fridge or freezer

    The fridge or freezer can help with freshness, especially for groundnut flour, but only if the flour is stored in an airtight container.

    If a container is not tightly sealed, cold air can cause condensation when you bring it back to room temperature, and that moisture can sit directly on your flour.

    So if you refrigerate any flour:

    • Use a proper airtight jar or bag
    • Let the container come back to room temperature before opening it

    Fresh, Not Funky: Prevent Bad Odours and Rancidity

    A quick sniff is one of the easiest ways to check flour quality. Fresh flour has a mild, neutral or lightly nutty smell. Spoiling flour usually tells on itself.

    1. Understand shelf life

    The exact shelf life depends on how much natural oil is in the flour:

    • Smooth Plantain Flour & Silky White/Yellow Corn Flour are relatively low in oil. Properly stored, they usually keep their best quality for several months after opening.
    • Instant Pap Powder is completely dry but should be kept bone dry so the fermented grains do not pick up extra moisture.
    • Groundnut Flour contains plenty of natural peanut oil. That oil is great for flavour, but it also means the flour can turn rancid faster if left in heat or light.

    Always check the best before date on the pack and aim to finish an opened pack within a few months for the best aroma and taste.

    2. Chill high-oil flours for longer freshness

    For flour with more natural oil, such as Groundnut Flour , the fridge or freezer can slow down rancidity.

    Simple approach:

    • Store groundnut flour in an airtight container in the fridge after opening if you want it to stay fresh beyond 2–3 months.
    • For very long storage, keep it in the freezer, also airtight, and bring out only what you need.

    Remember to let the container reach room temperature before opening to avoid moisture forming inside.

    3. Keep flours away from strong smells

    Flours quietly absorb odours from their environment. If you keep them next to very strong spices, cleaning products or kerosene, they can pick up strange flavours.

    Give your flours their own corner, away from:

    • Very strong spices (like curry mixes, stock cubes and dried fish)
    • Chemicals or detergents
    • Anything with a strong smell

    A dedicated flour section helps every bag stay neutral and versatile.

    4. Always do a quick check before using

    Before you cook, take a moment to:

    • Look: Does the flour look normal? No unusual colours, no visible mould, no insects?
    • Smell: Does it smell fresh and mild? Any sour, bitter, musty or paint-like odour means it is time to throw it away.
    • Feel: Is it loose and powdery? Hard lumps or dampness suggest moisture problems.

    When in doubt, it is safer to discard and start with a fresh pack. No recipe is worth using spoiled flour.

    How to Care for Each Green Unison Flour

    Here is a quick, practical guide for the four flours most people keep in their pantry.

    Smooth Plantain Flour (Elubo Ogede)

    Smooth Plantain Flour is made from gently dried, finely milled unripe plantain slices. It is naturally gluten-free and grain-free, perfect for instant amala ogede, thickening soups, baby foods and even some baking.

    • Store unopened packs in a cool, dry cupboard.
    • After opening, keep in the resealable pouch or an airtight container.
    • Use a clean, dry scoop every time — no wet utensils.
    • Try finishing an opened pack within about 6 months for best quality, following the pack storage advice.

    For cooking inspiration, you can pair this storage guide with your earlier reading on recipes, then come back and store your flour like a pro.

    Silky White/Yellow Corn Flour

    Silky White/Yellow Corn Flour is finely milled for smooth, lump-free tuwo masara and other dishes. Because it comes from whole maize, it contains natural oils and should be treated with care.

    • Store in a cool, dry cupboard away from direct heat.
    • Keep tightly sealed after every use to keep out bugs and moisture.
    • If you buy in bulk and know it will sit for a while, consider refrigerating a portion in an airtight container.
    • Use older stock first so nothing stays forgotten for too long.

    Want to perfect your swallow technique as well as your storage? Read the full step-by-step cooking guide: How to Prepare Corn Flour for Swallow (Tuwo Masara): Smooth, Simple & Wholesome .

    Instant Pap Powder (White/Yellow Ogi/Akamu)

    Instant White/Yellow Pap Powder is traditionally fermented and then fully dried, so you can make ogi or eko in minutes. To keep that tangy, comforting taste, it must stay completely dry.

    • Store sealed in a cool, dry cupboard.
    • Use only dry spoons when scooping.
    • Reseal immediately after each use.
    • If you ever notice an unusually sharp sour odour, visible mould or heavy clumping, it is time to replace it.

    Finely-ground Groundnut Flour

    Finely-ground Groundnut Flour is made from lightly roasted groundnuts, milled to a smooth, aromatic flour. It is rich in natural oils, which makes it flavourful but also more sensitive to heat and air.

    • Store unopened packs in a cool, dry place away from direct sunlight.
    • After opening, keep in an airtight container and refrigerate for best freshness.
    • For very long storage, freeze in small portions and bring out only what you need.
    • Always do a smell test before use. Any sharp, bitter or paint-like odour means the flour has turned and should be thrown away.

    For ideas on how to use groundnut flour once you have stored it properly, you can check: Power Up Your Pap & Smoothies with Natural Groundnut Goodness . If you enjoy working with whole nuts too, there is also a helpful guide: No Sand, No Stress: Roasting Groundnuts with Garri .

    When to Say Goodbye: Clear Signs Your Flour Is Spoiled

    Even with the best storage habits, an old pack might sometimes slip through. Here are clear warning signs that it is time to let that flour go:

    • Visible insects or webs — Any weevils, larvae or web-like threads in the flour mean it should be discarded immediately.
    • Mould or strange colours — Green, blue, grey or fuzzy patches are mould. Do not try to rescue or sieve and use. Simply dispose of it.
    • Strong off odour — Sour, bitter, musty or paint-like smells show spoilage or rancidity.
    • Heavy, damp clumps — A few small clumps that break easily may be from settling, but big hard lumps or a damp feel are a red flag.
    • Bad taste — If a tiny pinch tastes bitter, stale or strange, do not cook with it.

    Throwing out flour can feel painful, but it is much better than ruining your food or serving something that is clearly past its best.

    Practical Bonus Tips for Everyday Flour Care

    • Buy the right quantity — It is tempting to buy a lot at once, but only stock what you can finish in a reasonable time. You can always reorder.
    • Divide big bags — If you buy 5 kg of flour, pour it into smaller containers. Keep one container for daily use and leave the rest sealed.
    • Use a dedicated scoop — Keep a small dry scoop inside or next to your flour containers so you are less likely to dip in a wet cup.
    • Do a monthly pantry check — Once a month, quickly inspect your flours. It takes just a few minutes and saves surprises later.

    With these habits, your flour stops being a source of stress and becomes something you can trust every time you cook.

    Ready to Give Your Flours Better Care?

    With airtight storage, cool shelves, a little freezer trick and regular checks, you can keep your plantain flour, corn flour, pap powder and groundnut flour fresh, smooth and ready for everyday use.

    Once you have sorted your pantry, you can confidently enjoy:

    • Soft, stretchy amala ogede that cooks without lumps
    • Smooth tuwo masara with no surprise visitors
    • Comforting pap that smells clean and tastes right
    • Rich, nutty soups and smoothies powered by fresh groundnut flour

    At Green Unison, we already handle careful drying, milling and packing for you. All you have to do is finish the journey at home with good flour care.

    Shop Fresh Flours and Get Personal Help

    Ready to restock with flours that arrive already carefully dried and packed in resealable pouches? Explore our flours collection here: Green Unison Flours eShop .

    You can also browse all flours directly in our WhatsApp catalogue.

    Prefer to chat with a real human before buying? Send us a message on WhatsApp and we will help you pick the right combination of flours for your home: chat with us on WhatsApp .

    Share this guide with someone who is tired of “moving flour” and mystery smells. Their pantry will thank you. 😊

  • DIY Herbal Tea Blends for Health & Comfort (Using Green Unison Dried Herbs)

    DIY Herbal Tea Blends for Health & Comfort (Using Green Unison Dried Herbs)

    There’s a special kind of peace that comes from wrapping your hands around a warm mug of herbal tea—especially after Lagos traffic, a busy work day, or during dry, dusty harmattan evenings.

    The beautiful thing? You don’t need a fancy tea brand to enjoy that comfort. With a few spoonfuls of dried herbs you already have at home, you can create your own gentle, caffeine-free blends that support your body and calm your mind.

    In this guide, you’ll learn how to use Green Unison’s nature-powered herbs—like Dried Lemongrass Leaves, Dried Lavender, Dried Indian Borage and our different mints—to make soothing herbal tea blends for:

    • Bedtime calm and better rest
    • Harmattan comfort and breath support
    • Hormone-friendly comfort on “PMS days”
    • Clear-headed focus during busy hours

    All with simple recipes you can repeat again and again.

    Note: This article is for gentle, everyday wellness and comfort. It’s not medical advice and not a replacement for seeing a health professional.


    Why Make Your Own Herbal Tea Blends?

    Buying ready-made tea bags is convenient, but creating your own blends has big advantages:

    • You control what’s inside. No hidden flavours, caffeine or preservatives—just clean, dried herbs.
    • You can tailor it to how you feel today. Heavy after eating? Tired? Anxious? You can adjust your blend.
    • It’s cost-effective. A small pouch of herbs from the Dried Herbs shop can last weeks or months.
    • You support local farmers. Green Unison herbs are grown and gently dried in Ogun State with care from farm to pouch.

    A Quick Herbal Tea Brewing Guide

    Before we dive into recipes, here’s a simple base method you can use for almost any blend.

    For 1 mug (about 250 ml):

    1. Measure the herbs
    • Total of about 1–2 teaspoons of dried herbs per 250 ml water.
    • If a blend has many herbs, use smaller amounts of each so the total still fits in that 1–2 tsp range.
    1. Boil and pour
    • Bring fresh water to a boil.
    • Pour over herbs in a mug, tea pot, French press or infuser.
    1. Cover and steep
    • Cover your mug/teapot so the beneficial oils don’t escape with the steam.
    • Steep 5–10 minutes, depending on how strong you like your tea.
    1. Strain and sip
    • Strain out the herbs.
    • Enjoy plain, or sweeten gently with honey if you like.

    You can safely adjust steeping time and herb quantity to match your taste. Start mild; you can always make it stronger next time.


    Blend 1: Bedtime Calm – Lavender, Spearmint & Lemongrass

    When your mind is busy and sleep feels far away, a soft herbal blend can help you slow down and signal to your body that it’s time to rest.

    This blend combines:

    • Dried Lavender – a calming floral herb often used for relaxation rituals and night routines.
    • Dried Spearmint Leaves – gentle, sweet mint that soothes without feeling too intense.
    • Dried Lemongrass Leaves – bright, citrusy and often used after meals to ease heaviness and support digestion, which is perfect before bed.

    What this blend is good for

    • Unwinding after a long day
    • Creating a simple night-time ritual
    • Light post-dinner comfort so you don’t go to bed feeling too heavy

    Ingredients (1 mug)

    How to brew

    1. Add all herbs to your mug, teapot or infuser.
    2. Pour 250 ml freshly boiled water over the blend.
    3. Cover and steep for 7–10 minutes.
    4. Strain and sip slowly. Add a little honey if you like something sweet.

    Best time to drink

    • 30–60 minutes before bed
    • As part of your evening “wind-down” routine—phone away, lights dim, maybe a journal or gentle music.

    Blend 2: Harmattan Comfort – Indian Borage, Peppermint, Lemongrass & Marigold

    Dry air, dusty breeze, scratchy throat and that “I might be coming down with something” feeling—harmattan can be a lot. This blend leans on herbs traditionally used for respiratory comfort and warmth.

    We’ll use:

    • Dried Indian Borage – a bold, mint-thyme herb often used in homes for steam inhalation, teas and soups to support easy breathing.
    • Dried Peppermint Leaves – strong, menthol-cool leaves that open up the chest and feel refreshing in the throat.
    • Dried Lemongrass Leaves – adds warmth and gentle digestive support.
    • Dried Marigold Petals – a beautiful, caffeine-free flower often used in herbal blends for general comfort and a touch of sunshine in your cup.

    What this blend is good for

    • Harmattan evenings
    • Scratchy throat or dry, uncomfortable feeling in the chest
    • Cozy, warming moments after being out in dusty air

    Ingredients (1 mug)

    How to brew

    1. Add all herbs to your mug or teapot.
    2. Pour 250 ml freshly boiled water over them.
    3. Cover and steep for 6–8 minutes.
    4. Strain, then inhale the steam gently before your first sip.

    Best time to drink

    • In the evening after a dusty commute
    • On cool mornings when your chest feels tight or dry

    ⚠️ Gentle reminder: This is a comfort tea, not a cure. If you have difficulty breathing, chest pain, fever or persistent symptoms, please speak to a doctor or qualified health professional quickly.


    Blend 3: Hormone-Friendly Comfort – Spearmint, Lemongrass & Marigold

    Some days feel heavier than others—bloating, moodiness, cramps, low energy. While herbal tea can’t fix everything, a gentle blend can be a kind companion on “PMS days”.

    Here we lean more on spearmint, which many women around the world enjoy as part of their hormone-friendly routines, along with lemongrass and marigold for warmth and comfort.

    We’ll use:

    What this blend is good for

    • Days when you feel bloated or low-energy around your cycle
    • Evening self-care with a hot water bottle and a calm playlist
    • Pairing with a grounding meal like pap, oats or plantain-flour porridge

    Ingredients (1 mug)

    How to brew

    1. Place all herbs in your mug/teapot.
    2. Add 250 ml freshly boiled water.
    3. Cover and steep for 7–10 minutes to build flavour.
    4. Strain and sip slowly. You can add a teaspoon of honey if you enjoy sweetness.

    Best time to drink

    • Late afternoon or evening, especially on days you feel crampy or easily irritated.

    ⚠️ If you’re pregnant, trying to conceive, on medication or managing a diagnosed hormone condition, please check with a health professional before using herbs regularly as part of your routine.


    Blend 4: Clear-Headed Focus – Menthol Mint, Sweet Basil & Lemongrass

    For those days when your brain feels foggy but you don’t want to rely on coffee, a bright herbal blend can help you feel more awake and refreshed—without caffeine.

    This blend features:

    • Dried Menthol Mint – stronger than regular mint, with a cool, sharp lift that wakes the senses.
    • Dried Sweet Basil – familiar kitchen herb with a cozy, savoury aroma that grounds the blend.
    • Dried Lemongrass Leaves – bright and citrusy, tying everything together and making the tea feel “clean”.

    What this blend is good for

    • Mid-morning or mid-afternoon slumps
    • Long work or study sessions
    • Replacing a second cup of coffee with something gentler

    Ingredients (1 mug)

    How to brew

    1. Add all herbs to your mug/teapot.
    2. Pour 250 ml freshly boiled water over them.
    3. Cover and steep for 5–7 minutes (shorter steep keeps it bright and lively).
    4. Strain and enjoy warm. You can also let it cool and sip as a room-temperature focus drink while you work.

    Best time to drink

    • Morning or afternoon, not too close to bedtime, because the cooling menthol can feel quite awakening.

    How to Build Your Own Signature Herbal Tea Blend

    Once you’ve tried the recipes above, you can start creating your own blends using the herbs you have at home. Here’s a simple framework:

    1. Choose your base

    Pick 1–2 herbs that will make up most of the blend:

    Use about 1–1½ teaspoons total of your base per mug.

    2. Add a “support” herb

    This is where you bring in extra character or focus:

    Use about ½–1 teaspoon of your support herb per mug.

    3. Finish with a “top note”

    Finally, add a small amount of something special:

    Usually ¼–½ teaspoon is enough for your top note in a 250 ml mug.


    General Safety Reminders

    Herbs are powerful, even when they feel gentle. Keep these in mind:

    • Start with small amounts and notice how your body responds.
    • If you’re pregnant, breastfeeding, on regular medication or managing a health condition, talk to a qualified health professional before drinking herbal blends daily.
    • Stop using any herb that makes you feel uncomfortable or triggers unusual symptoms.
    • Herbal tea is a supportive habit, not a replacement for medical care, medication or professional advice.

    Ready to Brew Your Next Mug?

    You don’t have to wait for a special occasion to enjoy herbal tea. Whether it’s:

    • A quiet evening cup of lavender, spearmint and lemongrass,
    • A harmattan comfort blend with Indian borage and peppermint, or
    • A clear-headed focus blend while you work,

    you can create something beautiful from simple, dried leaves on your shelf.

    Explore the full range of herbs in the
    👉 Green Unison Dried Herbs shop

    and start building your own cozy, health-supporting tea rituals—one mug at a time.

  • Local Superfoods in Your Pantry: Corn, Plantain & Groundnut Flour Nutrition Unpacked

    Local Superfoods in Your Pantry: Corn, Plantain & Groundnut Flour Nutrition Unpacked

    If your kitchen already has corn flour, plantain flour and groundnut flour, you’re sitting on a mini “superfood corner” without even realising it.

    These three pantry staples are more than swallow and pap ingredients. Used well, they can help you:

    • build more satisfying meals from simple ingredients
    • enjoy familiar local foods with a little more balance
    • reduce how often you rely on heavily processed snacks

    In this post, we’ll unpack – in plain language – what each flour brings to your plate, plus simple, realistic ways to use them every day.

    Kind note: This article is for general food inspiration only and is not medical or nutrition advice. Always speak with a qualified health professional for personalised guidance.


    What makes these flours “local superfoods”?

    “Superfood” is a marketing word, but there is something special about everyday flours made from whole local crops:

    • Corn flour – a source of complex carbohydrates, some fibre and naturally occurring vitamins and minerals that provide gentle, steady energy.
    • Plantain flour – made from unripe plantain, offering complex carbs, fibre and resistant starch, with a mild flavour that fits breakfast, swallow and snacks.
    • Groundnut flour – a concentrated way to add plant protein, healthy fats and flavour to simple meals like pap, soups and smoothies.

    When the flours are carefully dried and finely milled – like the nature-powered flours from Green Unison – you get the benefits of the original crop in an easy, scoopable form.

    You can explore the full range here:

    Now let’s break down each one.


    Corn flour: familiar comfort and steady energy

    Corn flour has always been a comfort staple – from tuwo and pap to simple home baking.

    When it’s milled from whole maize and left unsieved, you keep more of the natural bran and germ, which means:

    • a steadier release of energy compared with many refined flours
    • a bit more fibre to support comfortable digestion
    • naturally occurring B-vitamins and minerals from the grain itself

    Green Unison’s Silky White/Yellow Corn Flour – Effortless Use is finely milled so it mixes quickly and cooks evenly, whether you’re making swallow, pap or a batter.

    Everyday ways to use corn flour

    You don’t need a big recipe book. Small, repeatable moves are enough:

    1. Soft swallow for busy days
      Make a smooth, lump-free bowl of tuwo masara for those evenings when you want something lighter but still satisfying.
    1. Pap for gentle mornings
      Swap part of your usual pap base with corn flour or use Green Unison Instant White/Yellow Pap Powder (Ogi/Akamu) – Easy on the Kitchen for days when you need breakfast quickly.
    2. Light baking and snacks
      Blending a little corn flour into wheat flour can soften the texture of homemade bakes.
      For ideas, see:
      👉 Bake Bakery-Style at Home with Wholegrain Corn Flour (White & Yellow)
      👉 Fluffy Corn-Flavoured Pancakes: A Naturally Sweet Breakfast with Green Unison

    Plantain flour: green plantain in a scoop

    Plantain flour (especially from unripe plantains) is one of those quiet heroes in the cupboard.

    Because it’s made from green plantain, gently dried and milled, it naturally contains:

    • complex carbohydrates that help you feel properly fed
    • fibre and resistant starch, which support a steady, gentle release of energy
    • potassium and other naturally occurring minerals found in plantain

    Green Unison Smooth Plantain Flour (Elubo Ogede) – No Sieving Needed is milled finely enough for swallow and porridge, so it fits into both weekday and weekend routines.

    Everyday ways to use plantain flour

    1. Swallow that feels light but satisfying
      When you want something different from the usual swallows, plantain flour is a great option – soft on the tongue yet filling enough to carry your favourite soups.
    2. 10-minute breakfast porridge
      Turn plantain flour into a creamy bowl instead of always reaching for oats or custard.
      Try this guide:
      👉 10-Minute Smooth Plantain Flour Power Porridge (No Oats Needed)
    3. Snack and dessert twist
      A small amount of plantain flour can be blended into pancake batters, waffle mixes or simple home snacks for a gentle sweetness and extra body.
    4. Soft, guilt-friendly treats
      If you enjoy experimenting, this article shows how plantain flour can transform a favourite street snack:
      👉 Guilt-Free Puff-Puff: The Plantain Flour Revolution

  • Fluffy Corn-Flavoured Pancakes: A Naturally Sweet Breakfast with Green Unison

    Fluffy Corn-Flavoured Pancakes: A Naturally Sweet Breakfast with Green Unison

    Quick, soft and pleasantly sweet — pancakes reimagined with Green Unison corn flour.
    This post shares a simple recipe that produces light, fluffy pancakes with a clean corn flavour, honest tasting notes from our reviewer, and clear links so you can order the exact products shown.

    Simple Corn-Flour Pancake Recipe

    Makes: 8–10 medium pancakes | Prep & cook: ~10 minutes

    Ingredients

    Optional: For an even softer crumb, mix in a small amount of plantain flour. See plantain flour and other items on the Green Unison Shop (plantain flour and all products).

    Method

    1. In a bowl, sieve the wheat flour and add the corn flour. Add sugar, baking powder and a pinch of salt. Whisk to combine and remove any lumps.
    2. In a separate bowl, whisk the egg with the milk and oil.
    3. Pour the wet mix into the dry mix and whisk gently until you have a thick, smooth batter. Rest 5–10 minutes to let the flours hydrate.
    4. Heat a frying pan on medium and grease lightly. Pour the batter (about ¼ cup per pancake). Wait for bubbles to form on the surface and the edges to look set, then flip and cook until golden.
    5. Stack, drizzle with honey and enjoy.

    Tip: If the batter feels too thin, add a dash more corn flour. If too thick, loosen with a splash of milk. Aim for a thick, smooth, consistent batter before cooking.

    Why Green Unison corn flour works so well

    • Natural sweetness: corn adds a pleasant, subtle sweetness so you can reduce added sugar.
    • Fine milling → smooth batter: Green Unison corn flour blends easily, producing a silky, lump-free batter that cooks into a tender pancake.
    • Fluffy texture: with the right leavening (baking powder) and a gentle whisk, pancakes rise light and airy.
    • Versatile: use on its own for gluten-free pancakes or blend with plantain flour for extra softness.

    Honest tasting notes from the reviewer

    “Very fluffy inside.”
    “Just clean and natural flavour.”
    “No lumps no aftertaste.”
    “corn flour blends so with batter.”

    These short comments reflect what we experienced: a golden stack that tastes naturally sweet and finishes cleanly on the palate.

    Ready to order? Clear product links and ordering

    Buy the exact corn flour used in this recipe:

    Other products and complementary flours:

    Order by WhatsApp (quick and personal):

    We’re happy to advise on quantities, mixing ratios (corn vs plantain or wheat) and delivery options — just message us on WhatsApp.

    Final notes and serving ideas

    • Try a 1:1 mix of corn flour and plantain flour for extra softness (shop link above).
    • Add a splash of vanilla or a pinch of cinnamon to the batter for a warm flavour note.
    • Serve with fresh fruit and honey for a naturally sweet breakfast.

  • 10-Minute Smooth Plantain Flour Power Porridge (No Oats Needed)

    Mornings can be wild. Between traffic, school runs, work, and everything in between, a proper breakfast often loses the battle.

    If you’re tired of skipping breakfast – or you’re bored of the same bowl of oats – this creamy Smooth Plantain Flour breakfast porridge is for you. It’s ready in about 10 minutes, uses things you already have at home, and turns one of your favourite pantry staples into a warm, satisfying bowl.

    In this guide you’ll learn:

    • why plantain flour works brilliantly as breakfast, not just swallow
    • the exact step-by-step recipe for a 10-minute power porridge
    • topping ideas to keep things interesting all week
    • how to shop the ingredients quickly if you don’t already have them

    This article is for general food inspiration only and is not nutrition or medical advice.


    Why plantain flour works for breakfast

    Smooth Plantain Flour from Green Unison is made from 100% unripe plantains, gently dried and finely milled, with no additives. It’s naturally gluten-free and grain-free, and provides complex carbohydrates, potassium and resistant starch.

    In everyday language, that means a plantain-based porridge can help you:

    • feel more satisfied than a sugary snack
    • enjoy the familiar comfort of pap or custard
    • still keep things relatively light and simple

    Because the flour is milled very finely to make smooth amala ogede without sieving, it also blends quickly into hot liquid – perfect when you only have a few minutes.


    10-minute Smooth Plantain Flour breakfast porridge

    This recipe makes one generous adult bowl. Double or triple for the family.

    Ingredients

    Base

    • 3–4 tablespoons Smooth Plantain Flour (Elubo Ogede)
      – Order here: https://greenunison.com/product/nature-powered-plantain-flour/
    • 1 cup (240 ml) water
    • ½ cup (120 ml) milk of choice – dairy or plant-based
    • or use all water if you prefer
    • Small pinch of salt (optional)

    To sweeten (pick one)

    • 1–2 teaspoons honey or date syrup
    • or 1 ripe banana, mashed into the bowl

    Toppings (mix and match)

    • Sliced banana or other fresh fruit
    • A small handful of roasted groundnuts or any nuts you like
    • A sprinkle of seeds (e.g. sesame, sunflower, pumpkin)
    • A pinch of cinnamon or grated nutmeg

    Method (ready in about 10 minutes)

    1. Make a smooth plantain paste (2 minutes)
    • Add the plantain flour to a small bowl.
    • Whisk in 3–4 tablespoons of cool water to form a smooth, lump-free slurry.
    1. Heat your liquid (3 minutes)
    • Pour the remaining water and milk into a saucepan.
    • Add the pinch of salt if using.
    • Bring to a gentle simmer over medium heat.
    1. Cook the porridge (3–4 minutes)
    • Once the liquid is steaming, reduce the heat to low.
    • Slowly pour in the plantain slurry while whisking continuously.
    • Keep stirring as it thickens. Within a few minutes you should have a creamy, spoon-coating porridge.
    • If it becomes too thick, add a splash of hot water or milk and whisk until smooth again.
    1. Sweeten and serve (1–2 minutes)
    • Take the pot off the heat. Stir in honey, date syrup or mashed banana to taste.
    • Pour into a bowl and add your favourite toppings: groundnuts for crunch, slices of banana, a sprinkle of seeds, or a dusting of cinnamon.

    That’s it – a warm bowl of plantain power porridge in the time it takes some people to make a cup of tea.


    Easy variations to keep breakfast exciting

    Once you’ve nailed the basic method, you can tweak the bowl to suit your mood and what you have at home.

    1. Nutty energy bowl

    • Stir 1 tablespoon of peanut butter or groundnut paste into the porridge right at the end.
    • Top with chopped roasted groundnuts and banana slices.

    This adds extra creaminess and a satisfying nutty taste, pairing nicely with the mild flavour of unripe plantain flour.


    2. Coconut & cinnamon “weekend treat”

    • Replace half the milk with coconut milk.
    • Add a pinch of cinnamon or nutmeg while the porridge cooks.
    • Finish with toasted coconut flakes and a drizzle of honey.

    You get a fragrant, dessert-like porridge that still leans on familiar pantry staples.


    3. Plantain–corn swirl bowl

    If you love pap and tuwo, this is a fun twist that pulls both worlds together.

    • Cook your plantain porridge as above, but a little looser.
    • In a separate mug, whisk 1 tablespoon of Green Unison Silky Corn Flour into 2–3 tablespoons of water to form a smooth slurry.
    • Stir the corn flour slurry into the hot plantain porridge and simmer for another minute until thick and silky.

    The result is a plantain–corn hybrid porridge with the nostalgia of pap and the extra body of plantain flour. Use Green Unison’s finely milled corn flour for a smooth, lump-free result:
    https://greenunison.com/product/nature-powered-corn-flour/


    How much Smooth Plantain Flour do I need?

    For a creamy single-serve breakfast bowl:

    • 3–4 tablespoons Smooth Plantain Flour is usually enough for one adult, depending on how thick you like it.
    • A 1 kg pouch can give roughly 40 bowls at 25 g (about 3 tablespoons) per serving, so it stretches nicely for regular weekday breakfasts.

    If you’re feeding children or someone with a smaller appetite, simply halve the quantities and loosen the porridge with more water or milk.


    Frequently asked questions

    Is this porridge gluten-free?

    Smooth Plantain Flour from Green Unison is made from 100% unripe plantain with no wheat added, so it is naturally gluten-free.

    If you need to avoid gluten for health reasons, always check the full product label and speak with a qualified health professional for individual advice.


    Can I make it with only water?

    Yes. Using only water gives a lighter, more pap-like porridge. Using some milk makes it richer and creamier. You can also add a splash of evaporated milk or coconut milk on top when serving.


    Can I meal-prep this?

    Plantain porridge is best eaten fresh, but you can:

    • pre-mix dry ingredients (plantain flour plus spices) in jars,
    • or cook a batch and reheat gently with a splash of water or milk, whisking to smoothen again.

    Where to buy Smooth Plantain Flour and Corn Flour

    Ready to try this 10-minute power breakfast?

    • Smooth Plantain Flour (Elubo Ogede) – finely milled, no sieving needed, great for swallow, porridges, smoothies and baby foods:
      https://greenunison.com/product/nature-powered-plantain-flour/
    • Silky White/Yellow Corn Flour – quick-cooking, naturally gluten-free corn flour for tuwo, pap-style bowls and rustic baking:
      https://greenunison.com/product/nature-powered-corn-flour/

    Browse the full flour range in the eShop:
    https://greenunison.com/shop/


    Order in a few taps

    Prefer to order through chat rather than the website?

    • WhatsApp catalogue:
      https://wa.me/c/2348103043789
    • Chat directly to order Smooth Plantain Flour (pre-filled message):
      https://wa.me/2348103043789?text=Hi%20Green%20Unison%2C%20I%27d%20like%20to%20order%20Smooth%20Plantain%20Flour%20for%20breakfast%20porridge.

    Just tap send, confirm your pack size, and the team will guide you through delivery options.

  • 60-Second Calm Skin Routine with Herbal Infused Oils

    60-Second Calm Skin Routine with Herbal Infused Oils

    Some days your face has seen it all — heat, dust, AC, traffic, screen time — and you only have a minute to breathe.

    This calm skin routine is designed for those days: one infused oil + one minute of gentle massage to help your skin feel softer and your mind feel a little more relaxed.

    No complicated steps. No harsh actives. Just simple, nature-powered care you can actually keep up with.


    Why a Short, Gentle Face Massage Helps You Feel Calm

    A few things we know from research and real-life experience:

    • Gentle facial massage can support local blood flow for a short time, which may help your skin look a bit more awake and refreshed after you’re done.
    • Massage is naturally relaxing for many people — the slow pressure and repeated strokes can feel like a mini “reset” after a long day.
    • Simple routines are easier to stick with. Current skincare trends are moving towards “skin minimalism”: fewer, more thoughtful steps, done consistently, instead of a long routine you abandon after a week.

    This routine is not a medical treatment and it doesn’t promise to fix any skin condition. It’s a cosmetic, feel-good ritual to help you enjoy your infused oils in a safe, gentle way.


    Infused Oil vs Essential Oil (and Why It Matters for Your Face)

    If you’ve ever searched for “oils for glowing skin” or “herbal oil for face”, you’ve probably seen two main types: essential oils and infused oils.

    Here’s the simple breakdown:

    • Essential oils
    • Highly concentrated plant aroma.
    • Usually need to be diluted in another oil before touching skin.
    • Can easily be too strong or irritating if used directly.
    • Infused oils
    • Herbs (like mint, marigold or lavender) are gently soaked in a carrier oil.
    • Result is a milder, ready-to-use cosmetic oil designed for direct topical use (with a patch test).
    • Great for everyday massage and moisturising.

    In this routine we’re focusing on herbal infused oils — the kind Green Unison makes — because they’re designed as cosmetic oils for skin and hair, external use only, with a softer feel that suits quick, daily rituals.

    Always read the label, keep them away from eyes and broken skin, and stop using if irritation shows up.


    Step-by-Step: Calm Skin Routine in 60 Seconds

    You can do this in front of a mirror, at your desk (with clean hands), or before bed after cleansing.

    If your face is very sweaty or dusty, wash it gently and pat dry first.

    Step 1: Choose Your Infused Oil (10 seconds)

    Pick one infused oil that matches how you feel right now:

    Or browse the full Infused Oils collection and pick the one that calls your name today.

    New to a particular herb? Do a patch test on the inner arm and wait 24 hours before using it on your face.


    Step 2: Prep Your Hands & Skin (10 seconds)

    1. Wash your hands or clean them with a wipe.
    2. Put 2–4 drops of your chosen infused oil into your palm.
    3. Rub your palms together to spread and warm the oil slightly.

    You’re aiming for a light glide, not a heavy oil layer.


    Step 3: 60-Second Gentle Massage Map

    You can use fingers only — no tools needed. Keep pressure soft to medium, never rough.

    0–15 seconds – Calm the jaw & cheeks

    • Place your fingers along your jawline.
    • Gently glide upwards towards your ears, then up to the cheekbones.
    • Repeat these slow strokes 3–4 times while breathing out deeply.

    15–30 seconds – Smooth the cheeks outward

    • Place both hands on the centre of your face (beside the nose).
    • Glide your fingers outward towards the temples.
    • Think slow, sweeping strokes — like you’re wiping away the day’s stress.

    30–45 seconds – Relax the forehead

    • Start at the centre of your forehead.
    • Glide your fingers outwards towards the temples in horizontal strokes.
    • Keep your shoulders relaxed; don’t clench your jaw.

    45–60 seconds – Finish with a “hug” for your skin

    • Use both hands to gently “press and release” your cheeks:
    • Lightly press palms to cheeks.
    • Hold for 2–3 seconds.
    • Release.
    • Repeat over your forehead and chin.

    If you have time, you can repeat the whole cycle once more. If not, you’ve still done a complete 60-second calm ritual.


    Everyday Skin, Everyday Life: When to Use This Routine

    You can fit this mini-ritual into different moments of your day:

    • Morning: After cleansing, before sunscreen — especially when the air feels dry or dusty.
    • Midday reset: After washing your face or using a gentle mist at work/home.
    • Night: After cleansing, as the last step before lights out.

    Most people will be fine doing this once a day. If your skin is already using other active products (acids, retinoids, etc.), keep this routine very simple and listen to your skin. If anything stings or feels wrong, stop and rinse off with a gentle cleanser.


    Which Green Unison Infused Oil Fits You Best?

    Here’s a quick guide to help you choose, based on mood and feel, not skin “type” labels:

    All infused oils are cosmetic products for external use only. Do not eat them, keep them away from eyes and broken skin, and discontinue use if irritation occurs.


    Safety First: Gentle, Science-Aware Self Care

    A few important reminders:

    • Patch test: Always patch test a new oil on a small area (like inner arm) and wait 24 hours.
    • Avoid sensitive areas: Keep oils away from eyes, lips, and broken or irritated skin.
    • Less is more: A few drops are enough. You don’t need to drench your face.
    • Health conditions: If you have ongoing skin issues or are under medical care, talk to a qualified health professional before adding new products or rituals.

    This routine is about comfort and care, not diagnosing, treating, or curing any condition.


    Shop the Routine & Chat with Us 💬

    Ready to try your own 60-second calm skin ritual?


    Keep Reading: More Herbal Skin Rituals You’ll Love

    If you enjoyed this calm skin routine, you might also like:

    ✨ Save this routine, share it with a friend, and let your one-minute calm ritual become a small, steady gift you give your skin every day.

  • 10-Minute Banana Groundnut Pancakes: Healthy Breakfast You Can Actually Make

    Some mornings, you blink and it’s already almost time to step out.

    You want something warm, filling and a little bit special – not just dry bread and margarine again – but you don’t have 45 minutes to start making a full spread.

    That’s where these 10-minute banana groundnut pancakes come in. 🥞✨

    They use everyday pantry staples, are naturally sweetened with ripe banana, and get a gentle protein boost from groundnut flour – so breakfast actually feels satisfying, not “snack level”.


    Why quick, healthy pancakes are everywhere right now

    Look around online and you’ll notice the same pattern:

    • Short, step-by-step breakfast videos.
    • Recipes with 5–7 ingredients you can recognize.
    • A big shift toward high-protein, high-fibre breakfasts that keep you full longer.

    People are busy, but they still want:

    • Comfort food (hello, pancakes 🥞)
    • Without a heavy sugar crash
    • And without complicated, imported ingredients

    This recipe is built around exactly that: simple, familiar ingredients you probably already have at home, plus a few natural upgrades from the Green Unison eShop.


    What makes these pancakes feel “healthier” than the usual ones?

    This is still breakfast, not medicine – so we’re focusing on balance and better choices, not perfection.

    Here’s what’s different:

    1. Natural sweetness from ripe banana

    Instead of loading the batter with sugar, we let a ripe banana do most of the sweetening.

    You still get a soft, sweet pancake – but the sweetness comes packaged with fibre, potassium, and flavour, not just empty calories.

    You can always drizzle a little honey or date syrup on top if you like things sweeter, but the base recipe is already quite pleasant on its own.


    2. Extra protein and nuttiness from groundnut flour

    We add a few tablespoons of Finely-ground Groundnut Flour to the batter.

    Groundnut (peanut) flour is:

    • Naturally rich in plant protein and healthy fats
    • Finely milled so it mixes smoothly into batters and drinks
    • Traditionally used in soups, smoothies and “energy” snacks

    In this recipe, it does two important jobs:

    1. Adds that toasty, nutty flavour that banana loves.
    2. Gently increases the protein so breakfast feels more substantial.

    Many people find that breakfasts with some protein and fibre help them stay satisfied for longer and reduce mid-morning “what can I snack on now?” moments.


    3. Option to swap in local whole-grain flours

    You can use regular wheat flour if that’s what you have – but to keep things closer to whole foods, you can also swap in some of Green Unison’s flours:

    • Smooth Plantain Flour (Elubo Ogede)
      Naturally gluten-free, made from 100% unripe plantain, and finely milled. It’s usually used for amala ogede, but also works nicely in pancakes as a partial flour replacement.
    • Silky White/Yellow Corn Flour
      Finely milled Nigerian corn flour that mixes lump-free and adds a gentle corn flavour.

    For this recipe, the base is simple:

    • Wheat flour for structure (or a mix of wheat and plantain flour)
    • Groundnut flour for flavour + protein
    • Banana for sweetness
    • Egg for binding

    You can adjust the mix depending on what’s in your kitchen.


    10-Minute Banana Groundnut Pancake Recipe

    Serves: 1–2 (about 6 small pancakes)
    Total time: About 10 minutes (including mixing and cooking)

    Ingredients

    Wet ingredients

    • 1 ripe banana, medium (the more spotted, the sweeter)
    • 1 egg (or flax “egg” – see notes below)
    • 1/4 cup milk (dairy or plant-based)
    • 1 teaspoon vegetable oil or melted butter for the batter (optional, for tenderness)

    Dry ingredients

    For cooking

    • 1–2 teaspoons oil or butter for the pan (choose the one you prefer)

    Optional toppings

    • Fresh fruit (banana slices, pawpaw, berries, etc.)
    • A small drizzle of honey or date syrup
    • A spoon of yogurt
    • A sprinkle of chopped roasted groundnuts

    Step 1 – Mash, whisk, and mix (3 minutes)

    1. In a medium bowl, peel and mash the banana with a fork until smooth with only tiny lumps.
    2. Add the egg and whisk together until the mixture looks uniform.
    3. Pour in the milk and optional oil or melted butter; mix well.

    In a separate small bowl, combine:

    • Wheat flour (or wheat + plantain flour)
    • Groundnut flour
    • Baking powder
    • Salt
    • Cinnamon (if using)

    Gently add the dry mix into the wet mix and fold until just combined.

    The batter should be slightly thick but still pourable.
    If it looks too thick, add a splash more milk. If it looks watery, sprinkle in a little more wheat or plantain flour.


    Step 2 – Heat the pan (1 minute)

    1. Place a non-stick pan or flat frying pan on medium heat.
    2. Allow it to warm up, then add a small teaspoon of oil or butter and swirl to coat the surface lightly.

    You want the pan hot enough that a drop of batter sizzles gently but doesn’t burn immediately.


    Step 3 – Cook the pancakes (5–6 minutes)

    1. Scoop about 2 tablespoons of batter per pancake onto the pan.
    2. Let it cook for 2–3 minutes, until:
    • You see small bubbles on the surface, and
    • The edges look slightly set.
    1. Gently flip with a spatula and cook the other side for another 1–2 minutes until golden brown.

    Because of the banana and groundnut flour, these pancakes brown a bit faster than plain ones, so keep the heat at medium rather than high.

    Repeat until all the batter is used, adding a few drops of oil between batches if needed.


    Step 4 – Serve and enjoy

    Stack the warm pancakes on a plate and add your favourite toppings:

    • Sliced banana or other fruit
    • A light drizzle of honey or date syrup
    • A spoon of yogurt and a sprinkle of chopped roasted groundnuts for crunch

    Serve immediately for the best texture – soft inside, gently crisp at the edges. 🥞💛


    Ingredient swaps and variations (using what’s in your kitchen)

    The aim is to work with what you already have, while giving gentle upgrades.

    1. Make it more filling with plantain flour

    Want a little more fibre and a different flavour?

    Swap half of the wheat flour for
    Smooth Plantain Flour (Elubo Ogede).

    • Start with this ratio:
    • 2 tbsp wheat flour + 2 tbsp plantain flour
    • You may need a tiny splash more milk, because plantain flour can thicken the batter slightly.

    The result: pancakes with a soft, slightly denser bite and a subtle plantain note.


    2. Corn pancake twist

    If you enjoy the taste of cornmeal pancakes or “almost akara vibes” in your breakfasts, you can swap part of the wheat flour for

    Silky White/Yellow Corn Flour.

    Try:

    • 2 tbsp wheat flour
    • 1 tbsp corn flour
    • 1 tbsp plantain flour (optional)
    • 2 tbsp groundnut flour

    This gives a pancake with a comforting corn flavour, still held together by the wheat and egg.


    3. Egg-free / vegan variation

    If you avoid eggs, you can make a quick flax “egg”:

    • Mix 1 tablespoon ground flaxseed with 3 tablespoons water, stir and let it sit for 5 minutes until gel-like.
    • Use this instead of the egg and pair it with plant-based milk.

    The pancakes may be slightly less fluffy, but still soft and tasty. Make them smaller (bite-size) so they flip easily.


    4. For baby / toddler breakfasts

    For toddlers who already eat eggs and peanuts safely:

    • Make the pancakes small – mini circles that are easy to pick up.
    • Go light on salt and skip the honey (especially for children under 1).
    • Serve with soft fruit and yogurt instead of sugary syrups.

    Always consider any allergies and your paediatrician’s advice when introducing new foods.


    Simple breakfast FAQ (based on real kitchen questions)

    “Can I make the batter ahead and fry later?”

    You can mix the dry ingredients ahead and keep them in an airtight jar.

    When you’re ready to cook, just:

    • Mash banana
    • Add egg + milk
    • Stir in a few spoons of your premixed dry blend

    Because baking powder works best freshly mixed, it’s better not to keep the wet batter sitting for long hours.


    “Do I have to use groundnut flour?”

    No – but it really helps with flavour and texture.

    If you leave out Finely-ground Groundnut Flour, you can:

    • Add a tablespoon of oil or a spoon of peanut butter to keep some richness, or
    • Use a bit more wheat flour and accept a milder flavour.

    If you have peanut allergies in the house, skip groundnut flour completely and use only wheat/plantain/corn flour and banana.


    “Is this ‘diet’ food?”

    Not really. These pancakes are:

    • Made from familiar, minimally processed ingredients
    • Naturally sweetened mostly with fruit
    • Gently boosted with plant protein and fibre

    They’re not a “miracle weight loss” recipe – just a smarter everyday breakfast that feels comforting and keeps you going.


    “What can I drink with it?”

    A warm, soothing herbal tea goes beautifully with pancakes.

    If you’d like a refreshing, caffeine-free option, you can try our guide on brewing spearmint tea using dried spearmint leaves here:

    It’s a nice way to bring more herbs into your morning routine.


    How to get the ingredients from Green Unison

    You don’t need to stress about hunting for good flours around town. You can get everything delivered:

    Explore more in the full eShop here:


    Ready to try it? Here’s your next step 💚

    If this recipe sounds like something you’d actually make on a busy morning, here’s how we can help you get started quickly:

    • 📦 View products and prices at a glance:
      Open our WhatsApp catalog to see all flour and pantry options in one place.
    • 💬 Chat with us on WhatsApp for help choosing products:
      Tap below to send us a message and we’ll guide you on what to order for these pancakes and other quick breakfasts: Chat with Green Unison on WhatsApp

    When you try the recipe, feel free to share a photo and tag us – we love seeing real breakfasts made with our farm-powered ingredients.

    Here’s to warm, nourishing pancakes that actually fit into real-life mornings. 🥞💚